



Table of Contents
You Don’t Have to Slow Down Just Because You’re Getting Older
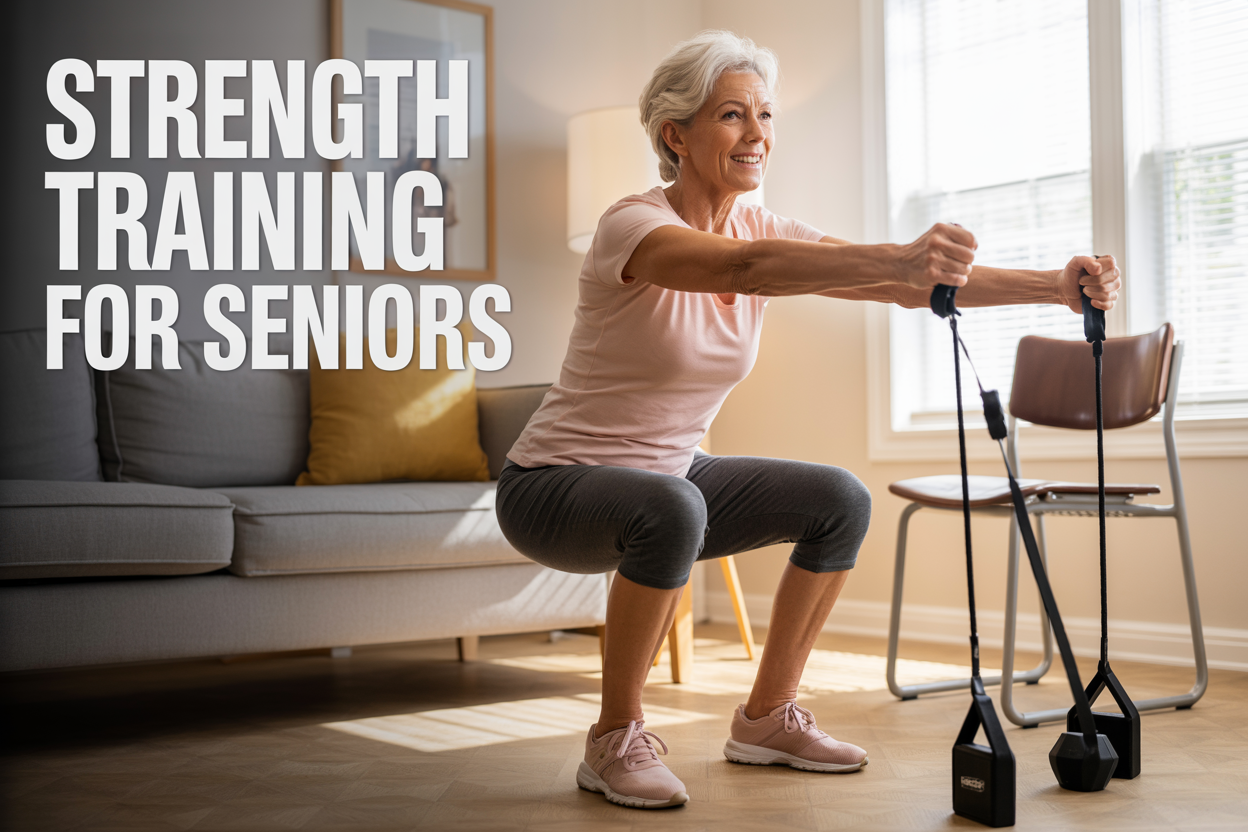
If you’re over 60 and wondering whether strength training is still safe or even worth trying, the short answer is yes — and the benefits might surprise you.
This guide is written for older adults who want to stay strong, move well, and feel confident in their bodies without risking injury. No gym membership needed, no heavy equipment required.
Here’s what you’ll find inside:
- Why strength training for seniors matters more than most people realize — including how it protects your bones, joints, and independence
- How to train safely so you get results without overdoing it
- Seven beginner-friendly strength exercises for older adults, starting with moves like chair squats and resistance band exercises that are gentle on your body but genuinely effective
Whether you’ve never lifted a weight in your life or you’re getting back to fitness after a long break, these moves are designed to meet you where you are. Simple equipment, clear instructions, and real results — that’s what this is about.
Let’s get into it.
Why Strength Training Is Essential for Seniors
Protect Bone Density and Reduce Fracture Risk
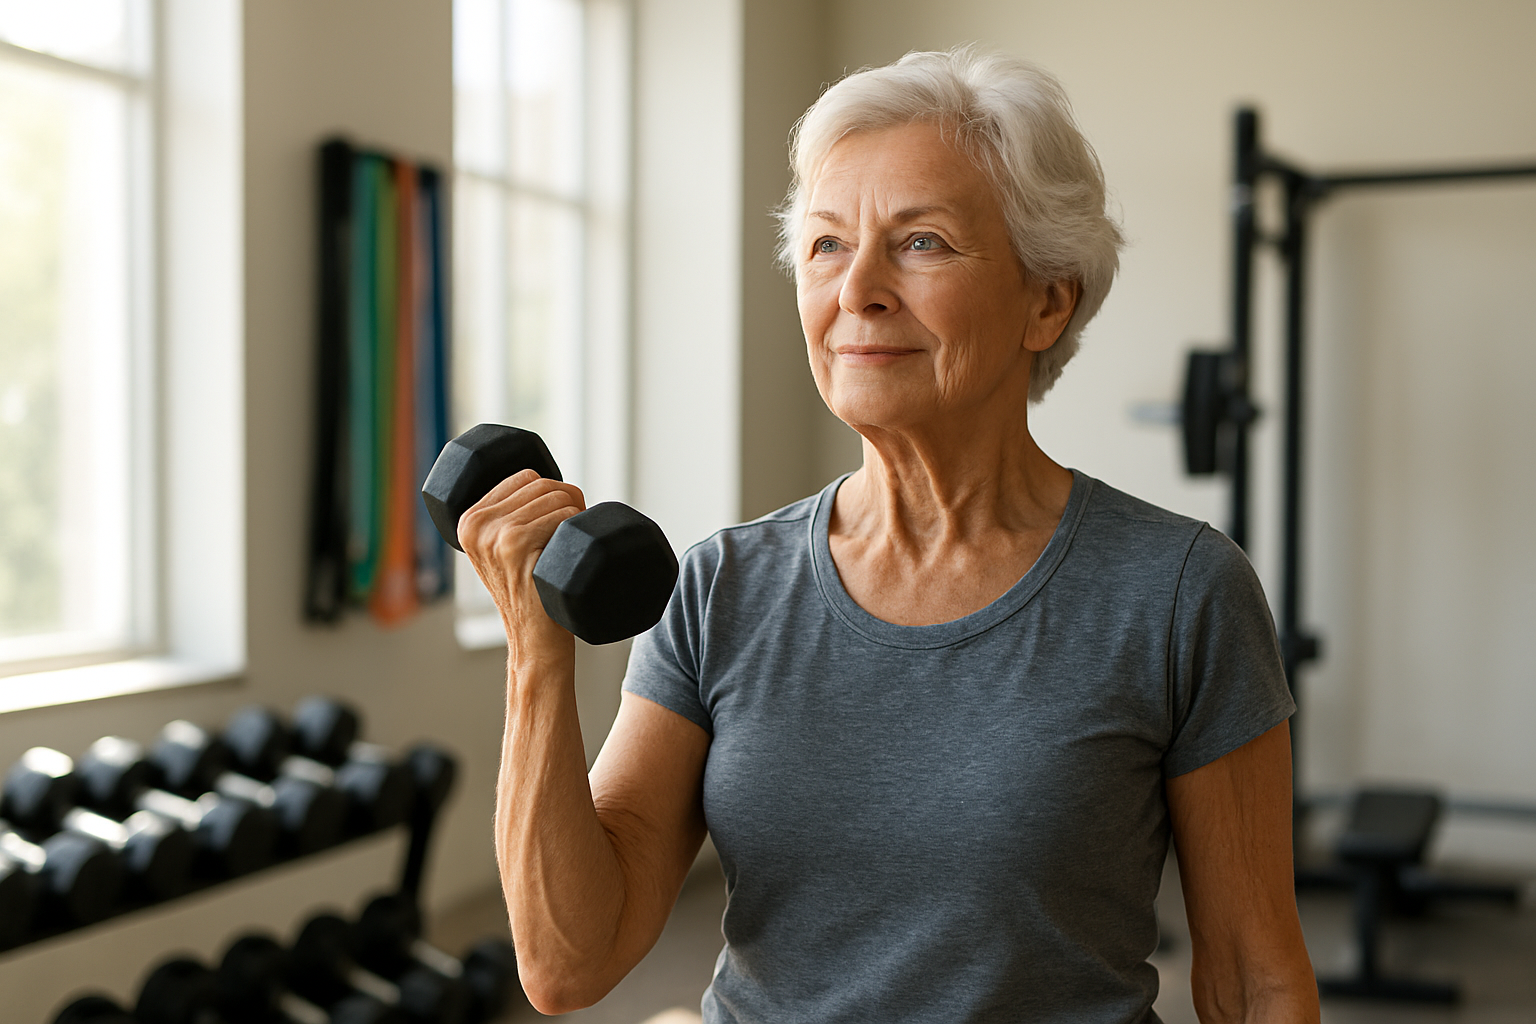
Bones are living tissue, and just like muscles, they respond to the demands you place on them. When you lift weights, use resistance bands, or perform bodyweight exercises, your bones experience a healthy kind of stress that triggers them to become denser and stronger over time.
After age 50, bone density naturally starts to decline — and for women after menopause, this process accelerates significantly. This is where strength training for seniors becomes a genuine game-changer. Research consistently shows that resistance-based exercise can slow bone loss, and in some cases, even help rebuild bone mass in areas like the hips and spine — the two most vulnerable spots for fractures in older adults.
A hip fracture in a senior is not just painful. It can be life-altering. Studies show that up to 30% of older adults who suffer a hip fracture experience serious long-term complications. Reducing that risk through regular strength exercises for older adults is one of the smartest health investments you can make.
Here’s what the research tells us about strength training and bone health:
| Benefit | What Happens in the Body |
|---|---|
| Increased bone mineral density | Mechanical stress from exercise stimulates bone-forming cells called osteoblasts |
| Reduced fracture risk | Denser bones are more resistant to breaks from falls or impact |
| Improved joint support | Stronger muscles cushion and stabilize joints, reducing stress on bones |
| Better posture | Stronger back and core muscles reduce spinal compression |
You don’t need to lift heavy to get these benefits. Even moderate resistance — like light dumbbells or resistance bands — applied consistently over time makes a meaningful difference.
Improve Balance and Prevent Dangerous Falls
Falls are the leading cause of injury among adults over 65. One in four seniors falls each year, and the consequences can range from bruises and sprains to broken bones and head injuries. The good news? A significant portion of falls are preventable, and balance exercises for seniors combined with strength training are among the most effective prevention strategies out there.
Here’s the connection that often gets overlooked: balance isn’t just about your inner ear or your coordination. It’s deeply tied to muscle strength. When your legs, hips, and core are weak, your body struggles to make the tiny, constant adjustments needed to stay upright — especially on uneven ground, stairs, or when changing direction quickly.
Low impact strength training targets the specific muscle groups that keep you stable:
- Glutes and hips – anchor your pelvis and prevent wobbling when you walk or step
- Quadriceps and hamstrings – control how you lower yourself and absorb impact with each step
- Calves and ankles – act as your first line of defense when the ground shifts under you
- Core muscles – keep your center of gravity stable so you don’t tip forward or backward
Even simple moves like chair squats and standing calf raises — which you’ll find later in this post — directly strengthen these critical balance muscles. Over just a few weeks of consistent training, many seniors notice they feel steadier getting up from chairs, climbing stairs, and navigating parking lots or uneven sidewalks.
The confidence boost that comes with better balance is real, too. When you trust your body to catch itself, you move more freely and worry less — and that matters just as much as the physical side of things.
Boost Metabolism and Support Healthy Weight
Muscle is metabolically expensive — meaning your body burns more calories just to maintain it, even when you’re resting. Starting around age 30, most people begin losing muscle mass gradually, a process called sarcopenia. By age 70, some individuals have lost up to 30% of their muscle tissue if they haven’t done anything to counteract it.
Less muscle means a slower metabolism. And a slower metabolism means your body needs fewer calories to function — but if your eating habits haven’t changed, those extra calories get stored as fat. This is a big reason why many older adults find they gain weight without changing their diet.
Senior muscle building workouts flip this script. When you build or even just maintain lean muscle through regular resistance training, you:
- Raise your resting metabolic rate — burning more calories around the clock, not just during exercise
- Improve insulin sensitivity — helping your body manage blood sugar more efficiently, which reduces the risk of type 2 diabetes
- Reduce visceral fat — the dangerous fat that accumulates around internal organs and raises cardiovascular risk
- Support healthy body composition — not just losing weight, but replacing fat with functional muscle tissue
This doesn’t mean you need to bulk up or train like an athlete. Even beginner strength training over 60 — two to three sessions per week using bodyweight or light resistance — produces measurable metabolic improvements within eight to twelve weeks.
One more thing worth knowing: muscle tissue is also protective during illness or recovery. Seniors with higher muscle mass tend to recover faster from surgeries, infections, and hospitalizations. Building that reserve now is a long-term investment in your resilience.
Enhance Independence and Quality of Daily Life
This is the one that hits closest to home for most people. Strength training isn’t just about numbers on a scale or bone density scans — it’s about being able to live your life on your own terms.
Think about the physical demands of everyday activities that most people take for granted:
- Getting up from a low couch or toilet seat without help
- Carrying grocery bags from the car to the kitchen
- Reaching items on a high shelf
- Walking through a large parking lot or airport
- Playing with grandchildren on the floor and then getting back up
- Climbing stairs without gripping the railing for dear life
Every single one of these actions requires functional strength. When that strength fades, these tasks get harder — and eventually, some become impossible without assistance. That loss of independence is one of the biggest fears older adults face, and it’s a deeply valid one.
Safe workouts for older adults that focus on functional movements — the kind that mimic real-life activities — directly preserve and restore this capacity. Chair squats mimic the motion of sitting and standing. Resistance band rows replicate the pulling action of opening doors or lifting bags. Glute bridges train the muscles you use to get up off the floor.
Here’s a practical look at how common daily activities map to specific muscle groups:
| Daily Activity | Primary Muscles Needed |
|---|---|
| Standing up from a chair | Quadriceps, glutes, core |
| Carrying groceries | Forearms, biceps, upper back, shoulders |
| Climbing stairs | Quads, glutes, calves, hip flexors |
| Reaching overhead | Shoulders, triceps, upper back |
| Walking on uneven ground | Ankles, calves, glutes, core |
| Getting up from the floor | Full body — glutes, legs, core, arms |
The payoff of staying strong goes beyond physical ability. Seniors who maintain independence tend to report higher levels of happiness, better mental health, and a stronger sense of purpose. There’s real dignity in being able to do things for yourself — and strength training is one of the most direct paths to holding onto that for as long as possible.
How to Train Safely and Effectively as a Senior
Consult Your Doctor Before Starting Any Program
Before you pick up a single weight or resistance band, a quick visit to your doctor is one of the smartest moves you can make. This isn’t about being overly cautious — it’s about being smart. Your physician can flag any conditions that might affect how you train, like high blood pressure, osteoporosis, arthritis, or joint issues that need special attention.
During that visit, ask about:
- Movement restrictions — Are there any exercises you should avoid completely?
- Heart health clearance — Especially important for anyone who hasn’t been active in a while
- Medication interactions — Some medications affect balance, heart rate, or muscle function
- Baseline fitness assessment — Knowing where you’re starting helps you track real progress
If you’ve had a recent surgery, a fall, or are managing a chronic condition, a referral to a physical therapist before joining a gym or starting a home program is a great idea. A PT can build a personalized plan that works with your body, not against it.
Think of your doctor as your first training partner — one who helps set you up for long-term success rather than short-term frustration.
Choose the Right Equipment for Your Fitness Level
One of the biggest mistakes beginners make — at any age — is jumping straight to heavy equipment. For safe workouts for older adults, starting with the right tools makes all the difference between building strength and nursing an injury.
Here’s a quick breakdown of equipment options based on fitness level:
| Equipment | Best For | Why It Works for Seniors |
|---|---|---|
| Resistance bands (light) | Beginners | Low impact, joint-friendly, easy to control |
| Resistance bands (medium/heavy) | Intermediate | Scalable resistance, versatile for full-body work |
| Dumbbells (2–5 lbs) | Beginners | Easy to grip, controlled movement |
| Dumbbells (8–15 lbs) | Intermediate | Builds more muscle mass over time |
| Bodyweight only | All levels | No equipment needed, always accessible |
| Sturdy chair | All levels | Adds stability for balance-sensitive exercises |
Resistance band exercises for the elderly are particularly popular because bands create resistance throughout the entire range of motion, which means your muscles work harder without putting stress on your joints. They’re also affordable, portable, and come in multiple resistance levels so you can progress gradually.
A few practical tips when choosing equipment:
- Start lighter than you think you need to. You can always add resistance; undoing an injury takes weeks.
- Look for dumbbells with ergonomic, non-slip grips. Grip strength naturally declines with age, so this matters more than most people realize.
- Invest in a good non-slip mat. Falls are a real risk when your footing isn’t secure.
- Use a sturdy chair or wall for support when learning new standing exercises.
You don’t need a gym full of machines to get started with beginner strength training over 60. A set of resistance bands, a pair of light dumbbells, and a solid chair can take you a long way.
Master Proper Form to Avoid Injury
Here’s the honest truth — doing an exercise wrong at a light weight is more dangerous than doing it right at a heavier one. Form is everything in strength training for seniors, and getting it right from day one protects your joints, your spine, and your long-term ability to keep training.
Why Form Matters More as You Age
As we get older, our joints have less cushioning, our tendons aren’t as elastic, and recovery from strain takes longer. A rounded back during a row or misaligned knees during a squat can irritate old injuries or create new ones fast.
Key form principles to keep in mind for every exercise:
- Controlled movement — Never use momentum to “swing” a weight. Slow, deliberate reps build more muscle and reduce injury risk.
- Neutral spine — Keep your back in a natural position. Avoid rounding your lower back or hunching your shoulders.
- Breathe consistently — Exhale during the effort (the hard part), inhale on the return. Holding your breath spikes blood pressure.
- Full range of motion — Move through as much of the natural range as your joints allow comfortably, but never force a movement past the point of pain.
- Feet hip-width apart — This is the stable base for most standing exercises, including balance exercises for seniors.
Practical Ways to Check Your Form
- Use a mirror — Even a bathroom mirror works. Watching yourself move catches errors you’d never feel otherwise.
- Record yourself — A short phone video gives you a view you can’t get in real time.
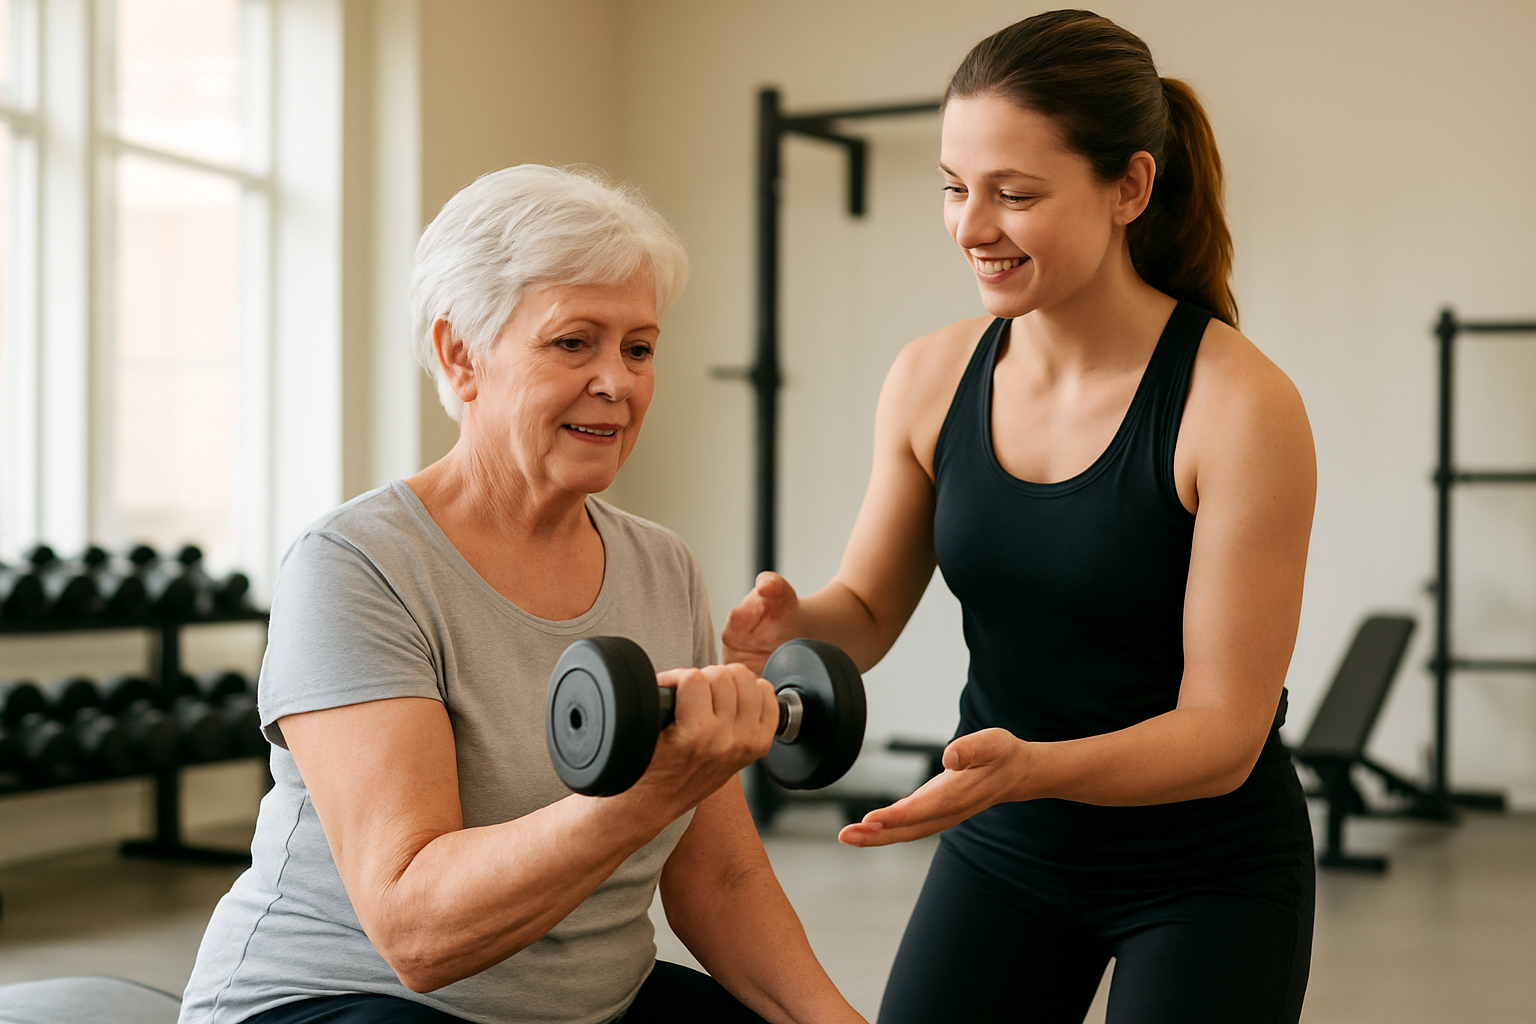
- Work with a certified trainer — Even just two or three sessions with a trainer who has experience in senior fitness exercises can build habits that protect you for years.
- Go slow on new movements — The first few times you try an exercise, cut the weight in half and focus entirely on how it feels. Add resistance only when the movement feels natural and controlled.
Warning Signs to Stop and Rest
Pay attention to these signals during any low impact strength training session:
- Sharp or shooting pain anywhere (not to be confused with normal muscle burn)
- Dizziness or lightheadedness
- Chest tightness or shortness of breath disproportionate to the effort
- Joint pain that lingers after the exercise is done
- Loss of balance or coordination mid-movement
Muscle soreness 24–48 hours after a workout is completely normal and is actually a sign your muscles are adapting and getting stronger. But pain during exercise is your body asking you to stop — always listen to it.
Chair Squats for Building Lower Body Strength
Why This Move Is Perfect for Beginners
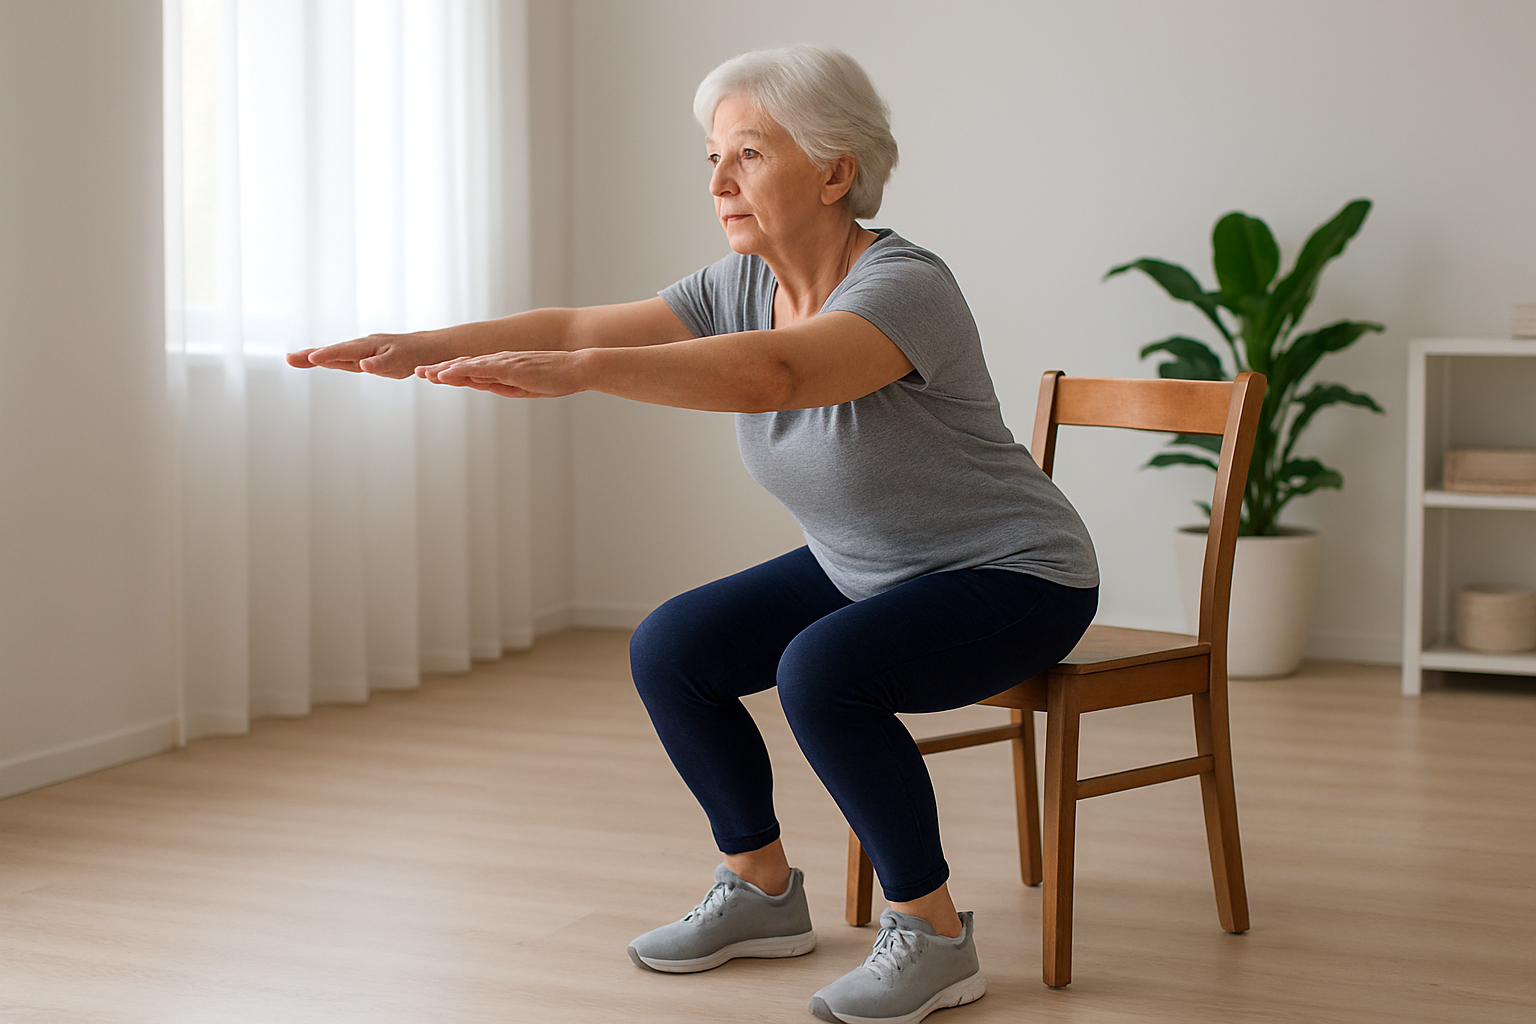
Chair squats are one of the best starting points for anyone diving into beginner strength training over 60. The chair acts as a built-in safety net — it’s right there behind you, ready to catch you if your legs feel shaky or your balance wavers. That alone takes a huge amount of fear out of the equation.
Here’s why seniors love this move:
- Low risk of injury — You’re never more than a few inches from a seated position, which removes the danger of falling
- Builds real-world strength — Getting up from a chair, off the toilet, or out of the car uses the exact same muscles. This exercise trains movements you actually need every single day
- No equipment required — Any sturdy chair does the job. Kitchen chair, dining room chair, even the edge of a couch
- Gentle on the joints — Unlike traditional deep squats, chair squats keep the range of motion manageable, making this a truly low impact strength training option
- Builds confidence fast — Because it mirrors a natural movement, most people get the hang of it quickly, which keeps motivation high
The chair squat targets the quadriceps (front of the thighs), glutes, hamstrings, and even engages the core for stability. These are exactly the muscles that tend to weaken with age and contribute to falls, loss of independence, and difficulty with daily tasks. Strengthening them through chair squats for seniors directly improves functional fitness and quality of life.
Step-by-Step Instructions for Correct Form
Getting the form right matters more than how many reps you do. A few well-executed chair squats will do far more for you than a sloppy dozen.
What you need:
- A sturdy chair with no wheels
- Flat, non-slip footwear (or bare feet on a grippy surface)
- Enough space to stand in front of the chair comfortably
How to do it:
- Set up your position — Stand directly in front of the chair with your back facing the seat. Your feet should be hip-width apart, toes pointing slightly outward (about 10–15 degrees)
- Engage your core — Pull your belly button gently toward your spine. Think of bracing for a soft punch to the stomach — not sucking in, just firming up
- Begin the descent — Push your hips back as if you’re reaching for the chair in slow motion. Keep your chest up and your gaze forward — don’t look at the floor
- Control the movement — Bend your knees as your hips lower. Your knees should track over your toes, not caving inward
- Touch and pause — Lightly tap the seat of the chair with your glutes. You don’t need to fully sit — a gentle touch is enough to confirm you’ve hit the right depth
- Push through your heels — Press into the floor through your heels (not your toes) to stand back up. Squeeze your glutes at the top
- Reset and repeat — Stand tall, take a breath, and go again
Common mistakes to avoid:
| Mistake | Why It’s a Problem | Fix |
|---|---|---|
| Leaning too far forward | Strains the lower back and shifts weight to knees | Keep chest up, hips back |
| Knees caving inward | Stresses the knee joint | Push knees out over little toes |
| Dropping too fast | Removes muscle control, increases fall risk | Take 2–3 seconds going down |
| Holding your breath | Increases blood pressure, causes dizziness | Breathe out on the way up |
| Gripping armrests for leverage | Reduces the load on leg muscles | Arms out in front for balance only |
Aim for 2–3 sets of 8–12 repetitions to start. Rest for 60–90 seconds between sets. If 8 reps feels too hard, start with 5. There’s no rush.
Simple Progressions to Increase the Challenge
Once chair squats start feeling easy — and they will — it’s time to keep the progress going. These progressions make the move harder without adding risk, keeping your senior muscle building workouts moving in the right direction.
Level 1 — Add a Pause at the Bottom
Instead of just tapping the seat and coming back up, hover just above the chair for 2–3 seconds before standing. This kills the momentum and forces your muscles to work harder.
Level 2 — Slow the Descent Down
Take a full 4–5 seconds to lower yourself toward the chair. This is called a tempo squat and it’s surprisingly tough. The slow, controlled movement builds strength and reinforces proper joint mechanics.
Level 3 — Remove the Touch
Stop hovering over the chair without actually touching it. You’ll need full muscular control to hold your position and reverse the movement. This is a big jump in difficulty.
Level 4 — Add a Resistance Band
Place a light resistance band just above your knees. As you squat, the band will try to pull your knees inward — your job is to push them out against that resistance. This lights up the glutes in a way regular squats don’t. Great option for those already doing resistance band exercises for elderly fitness routines.
Level 5 — Try a Single-Leg Variation
Hold one foot slightly off the ground and perform the squat on one leg, using the chair for light balance support. This dramatically increases the strength and balance exercises for seniors component, training each leg independently.
Progression overview:
| Level | Variation | Difficulty |
|---|---|---|
| 1 | Pause at the bottom (2–3 sec) | Beginner+ |
| 2 | Slow 4-second descent | Beginner+ |
| 3 | No touch — hover above seat | Intermediate |
| 4 | Resistance band above knees | Intermediate |
| 5 | Single-leg squat with chair support | Advanced |
A good rule of thumb: when you can do 3 sets of 12 reps with clean form and zero discomfort, it’s time to move to the next level. Progress at your own pace — consistency beats intensity every time when it comes to safe workouts for older adults.
Wall Push-Ups for Upper Body Power Without Strain
Benefits for Chest, Shoulders, and Arms
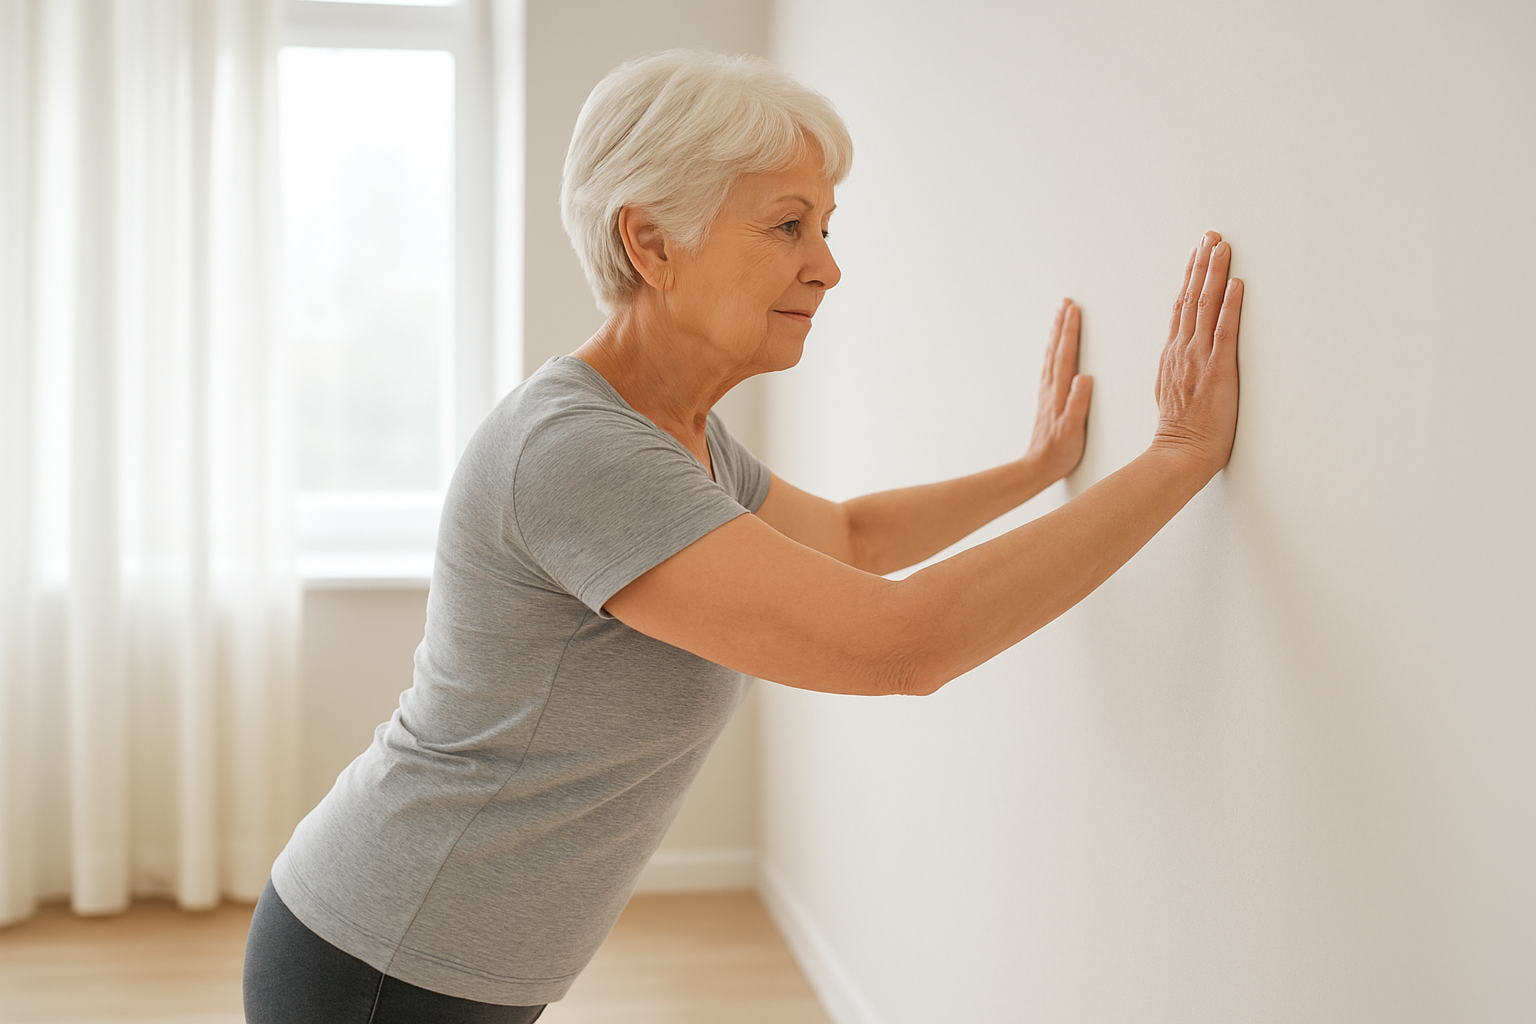
Wall push-ups are one of the most underrated strength exercises for older adults, and they deserve a lot more credit than they get. People often assume they’re “too easy” to be effective, but that’s simply not true. For seniors who are just getting back into movement or dealing with joint sensitivity, wall push-ups offer real muscle engagement without the stress that floor push-ups can put on the wrists, elbows, and shoulders.
Here’s what’s actually happening in your body when you do a wall push-up:
- Chest (pectorals): These muscles are the primary movers. They’re working every time you push yourself away from the wall and control yourself back toward it.
- Shoulders (deltoids): Your shoulder muscles stabilize the entire movement and help guide your arms through the range of motion.
- Triceps: The backs of your arms are firing hard during the pushing phase, which is great for everyday tasks like pushing open heavy doors or getting up from a chair.
- Core muscles: Your abs and lower back have to keep your body in a straight line throughout the movement, so you’re getting a subtle but real core workout at the same time.
For beginner strength training over 60, targeting these muscle groups matters because upper body strength directly affects daily independence. Carrying groceries, reaching overhead, lifting grandchildren — all of these actions depend on the same muscles you’re training with wall push-ups.
There’s also a real posture benefit here. Many older adults develop rounded shoulders from years of desk work, driving, or simply the natural effects of aging. Regularly strengthening the chest and shoulders helps counteract that forward pull and keeps you standing taller.
How to Adjust Difficulty to Match Your Strength
One of the best things about wall push-ups is how flexible they are. You can make them easier or harder based on exactly where you are right now, and you can progress over time as your strength improves — no equipment needed.
Starting Position Matters More Than You Think
The farther you stand from the wall, the harder the exercise becomes. The closer you are, the easier it is. It’s that simple. Use this to your advantage.
| Difficulty Level | Distance from Wall | Who It’s Best For |
|---|---|---|
| Beginner | 6–12 inches away | Just starting out, limited upper body strength |
| Intermediate | 18–24 inches away | Some strength built, ready for more challenge |
| Advanced | Arm’s length or beyond | Strong foundation, working toward incline push-ups |
Step-by-Step Tips for Getting the Most Out of Every Rep
- Keep your body straight from head to heels. Don’t let your hips sag or your back arch — that takes the work away from your muscles and puts unnecessary strain on your spine.
- Move slowly and with control. Lowering yourself toward the wall in about 3 seconds, then pushing back in 2 seconds, makes each rep far more effective than rushing through it.
- Breathe consistently. Exhale as you push away from the wall, inhale as you come back in. Many people accidentally hold their breath during exertion, which can raise blood pressure unnecessarily.
- Keep your elbows at roughly a 45-degree angle from your body rather than flaring straight out to the sides. This is much easier on your shoulder joints and recruits more of the chest effectively.
How to Progress Over Time
Once wall push-ups start to feel manageable — say, you can do 3 sets of 12–15 reps with good form and without fatigue — it’s time to challenge yourself a little more. Here are natural next steps:
- Move your feet farther back from the wall to increase the angle.
- Switch to a countertop or sturdy table for an incline push-up, which is the next progression up from the wall.
- Add a brief pause at the wall (about 1–2 seconds) before pushing back out. This “isometric hold” dramatically increases muscle activation without requiring you to add more reps.
- Increase reps gradually — aim to add 2 reps per session until you reach 15, then focus on moving your feet back rather than just piling on more reps.
This kind of gradual, intentional progression is exactly what low impact strength training should look like for older adults. You’re not rushing, you’re not risking injury — you’re just steadily building real strength in a way that your body can handle and adapt to comfortably.
Resistance Band Rows for a Stronger Back and Posture
Why a Strong Back Matters More as You Age
Your back is doing more work than you probably realize. It holds you upright when you’re sitting at the kitchen table, keeps you steady when you reach for something on a high shelf, and protects your spine every time you bend down to tie your shoes. As the years go by, the muscles supporting your spine naturally start to weaken — and that’s when things like poor posture, chronic lower back pain, and an increased risk of falls start creeping in.
For seniors, a weak back isn’t just uncomfortable — it directly affects your independence. Slouching forward (often called a “dowager’s hump”) becomes more common as the upper back muscles lose their pulling strength. This rounded posture compresses the chest, makes breathing slightly harder, and can even affect your balance and coordination.
Resistance band rows are one of the best strength exercises for older adults specifically because they target the muscles that fight back against this kind of postural collapse — the rhomboids, mid-trapezius, and rear deltoids. These are the muscles that literally pull your shoulders back and keep your spine tall. Training them consistently is one of the smartest investments you can make in your long-term health and mobility.
Beyond posture, a stronger back means:
- Less chronic pain — especially in the lower back, which is one of the top complaints among people over 60
- Better balance — your core and back work together to keep you stable on your feet
- Easier daily movement — tasks like carrying groceries, gardening, and getting up from chairs become noticeably smoother
- Reduced injury risk — strong supporting muscles protect your vertebrae and discs from unnecessary strain
This is exactly why resistance band exercises for elderly individuals have become a go-to recommendation from physical therapists worldwide. Bands offer controlled, joint-friendly resistance that builds real muscle without the compressive load of heavy dumbbells or machines.
How to Set Up Your Band for Maximum Safety
Getting the setup right before you even begin pulling is half the battle. A poorly anchored band or an awkward starting position can turn a great exercise into a frustrating — or even painful — experience.
Choose the Right Band Resistance
Resistance bands come in different tension levels, usually color-coded by brand. As a general guide:
| Band Color (General Guide) | Resistance Level | Best For |
|---|---|---|
| Yellow / Light | Very light | Complete beginners, anyone recovering from injury |
| Red / Medium | Light to moderate | Seniors new to beginner strength training over 60 |
| Green / Medium-Heavy | Moderate | Those with some exercise experience |
| Blue / Heavy | Heavy | More advanced, with solid form already established |
Start lighter than you think you need to. If you can complete 12 to 15 reps with good control and the last few feel only slightly challenging, you’ve found your starting point. You can always increase resistance as you get stronger.
Anchor Your Band Properly
For seated resistance band rows, you have two solid options:
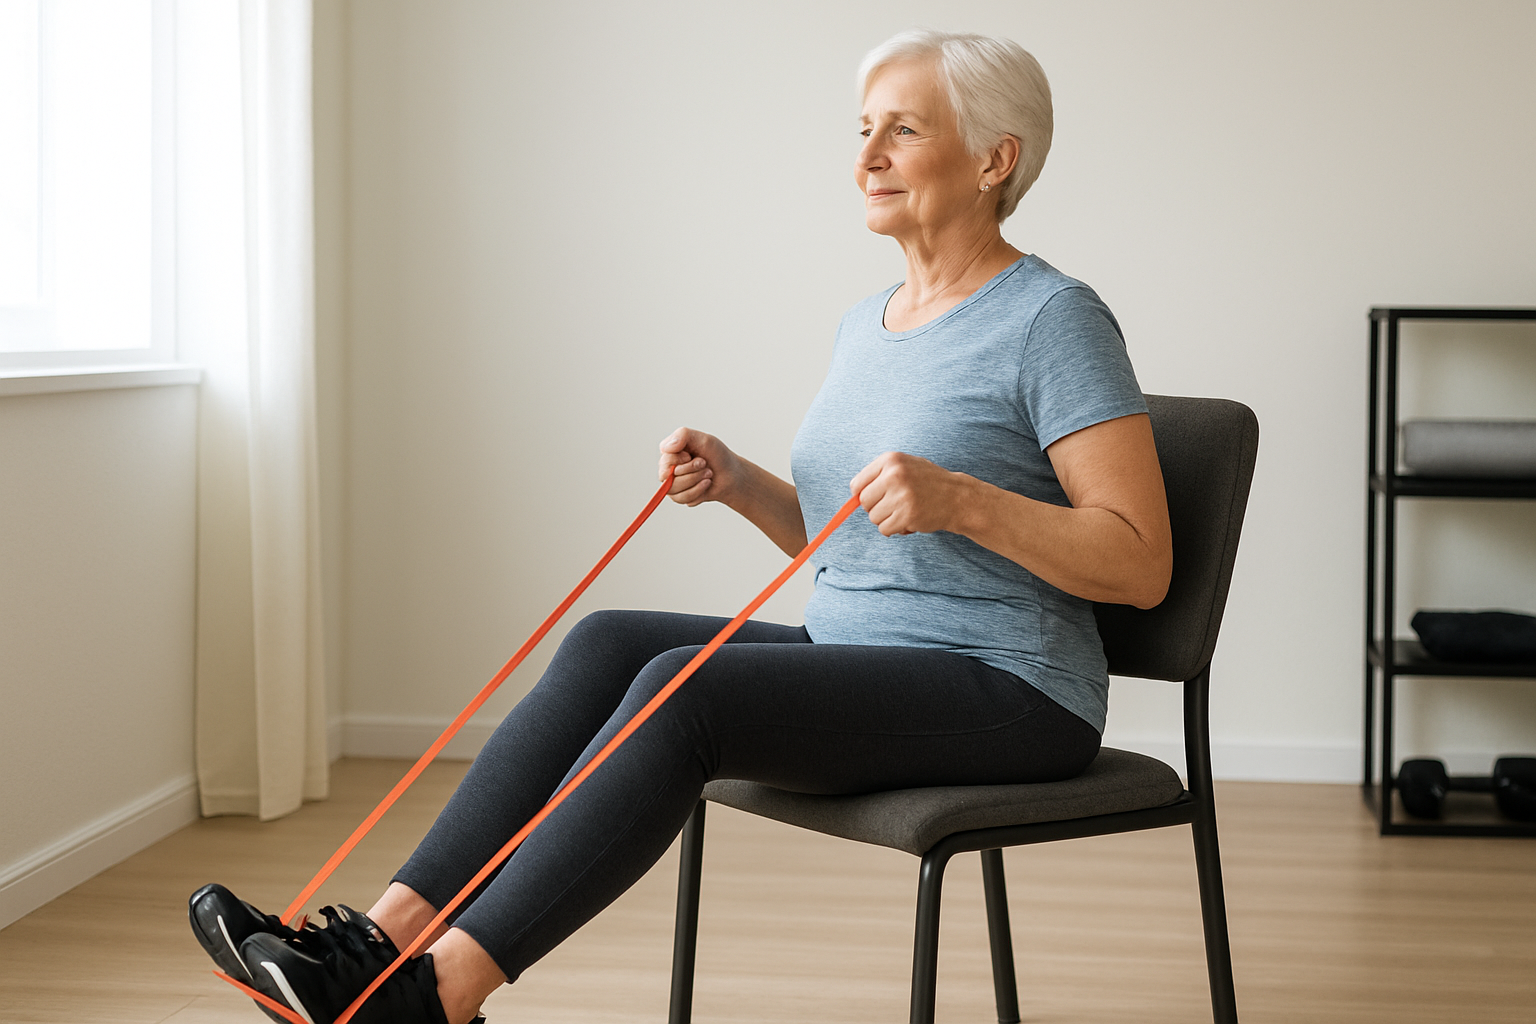
Option 1 — Loop Around Your Feet (Seated on a Chair or Floor)
- Sit upright on the edge of a sturdy chair with your feet flat on the floor
- Loop the middle of the band around both feet, holding one end in each hand
- Keep your feet hip-width apart so the band stays centered and doesn’t slip
Option 2 — Door Anchor Attachment
- Thread a door anchor through the band and attach it to a closed door at about chest height
- Stand or sit facing the door, about two to three feet back
- Grip the handles (or loop the band around your hands) with palms facing each other
Whichever option you choose, always double-check the anchor point before you start pulling. Give it a light tug first. If anything shifts or feels unstable, fix it before you add any real force.
Your Starting Position
- Sit tall with your spine long — imagine a string pulling the top of your head toward the ceiling
- Hold the band with a comfortable grip — not so tight your knuckles go white, but firm enough to keep control
- Arms should be extended in front of you but not locked out at the elbows
- Shoulders relaxed and slightly back, away from your ears
Performing the Row
- Take a slow breath in to prepare
- As you exhale, pull both ends of the band toward your lower ribcage, driving your elbows back behind you
- Squeeze your shoulder blades together at the end of the movement — hold for one second
- Slowly return your arms to the starting position over two to three counts
- That’s one rep — aim for 10 to 15 reps per set, with 2 to 3 sets total
The slower the return, the more work your muscles are doing. Don’t rush it.
Common Mistakes to Avoid for Better Results
Even a simple movement like a resistance band row has a handful of easy-to-make errors. Catching these early means faster progress and a much lower chance of irritating your shoulders or straining your neck.
Shrugging Your Shoulders
This is the most common one. When the band gets heavier or fatigue sets in, many people start pulling with their upper traps — which means the shoulders creep up toward the ears. This puts unnecessary stress on the neck and actually takes the work away from the muscles you’re trying to build.
Fix: Before every rep, consciously drop your shoulders away from your ears. Think about putting them in your back pockets.
Leaning Back Too Far
A slight lean back is fine, but if you’re swinging your whole torso backward to get the band moving, the resistance is probably too heavy — and you’re using momentum instead of muscle.
Fix: Drop down to a lighter band and keep your torso as still as possible throughout the movement. The power should come from your arms and back, not your body rocking back and forth.
Flaring the Elbows Out Wide
Pulling with your elbows pointed out to the sides shifts the emphasis away from your mid-back and puts more pressure on your shoulder joints — which aren’t always happy about that, especially if you have any history of rotator cuff issues.
Fix: Keep your elbows close to your body as you pull, brushing them past your ribs. This small adjustment puts the work exactly where it belongs.
Holding Your Breath
It sounds basic, but a lot of people unconsciously hold their breath during the pulling phase. This can cause a spike in blood pressure and makes the whole movement feel harder than it needs to be.
Fix: Exhale as you pull the band toward you, inhale as you return to the start. Breathing this way also helps you stay focused and gives each rep a natural rhythm.
Gripping Too Tightly
A death grip on the band tires out your forearms fast and can aggravate arthritis in the hands or wrists. You only need enough grip to keep control — not to crush the band into submission.
Fix: Wrap the band around your hands if holding the ends feels uncomfortable, or use a band with soft loop handles that distribute the pressure more evenly.
Skipping the Squeeze at the Top
The moment your shoulder blades come together is where a lot of the postural benefit happens. Rushing past this position without pausing means you’re leaving the best part of the exercise on the table.
Fix: At the end of each pull, pause for one full second with your elbows back and your blades squeezed. You should feel a firm contraction across your upper and mid-back.
Easy Ways to Track Your Progress Over Time
One of the most motivating things you can do in low impact strength training is watch yourself actually get better. Tracking doesn’t have to be complicated — in fact, the simpler your system, the more likely you are to stick with it.
Keep a Basic Exercise Log
A small notebook works perfectly. After each session, jot down:
- Date
- Band color/resistance used
- Number of sets and reps completed
- How it felt (easy, moderate, challenging)
Over time, you’ll start to see a pattern. When “challenging” becomes “moderate,” that’s your signal to try the next resistance level up.
Here’s a simple example of what a few weeks might look like:
| Week | Band Resistance | Sets x Reps | Difficulty |
|---|---|---|---|
| Week 1 | Light (Red) | 2 x 10 | Challenging |
| Week 2 | Light (Red) | 2 x 12 | Moderate |
| Week 3 | Light (Red) | 3 x 12 | Moderate |
| Week 4 | Medium (Green) | 2 x 10 | Challenging |
| Week 6 | Medium (Green) | 3 x 12 | Moderate |
Seeing that table fill up with progress is genuinely satisfying — and it keeps you coming back.
Take Note of Postural Changes
Because this exercise is specifically targeting your posture muscles, pay attention to how you feel standing and sitting throughout the day. After a few weeks of consistent rows, many seniors notice:
- Shoulders naturally sitting further back
- Less tension or aching in the upper back after sitting for long periods
- Standing taller without having to consciously think about it
- Reduced neck stiffness
Ask a family member or friend to take a quick side-profile photo of you standing naturally every four to six weeks. Comparing those photos side by side can reveal postural improvements that a mirror check alone might miss.
Watch for Functional Improvements
The whole point of senior muscle building workouts isn’t to look impressive at the gym — it’s to make real life easier. Check in regularly on things like:
- Carrying groceries — does it feel lighter or less tiring?
- Reaching overhead — any less effort or discomfort?
- Getting dressed — easier to reach behind your back?
- Sitting at a computer or dining table — can you maintain upright posture longer without slumping?
These real-world wins are worth just as much as any number on a log sheet. Write them down when you notice them. They’re proof that what you’re doing is working.
Set Small, Achievable Milestones
Big goals can feel distant and abstract. Small milestones keep things fun. A few examples:
- Complete 3 sets of 12 reps with your current band without needing a rest between sets
- Move up one resistance level within 6 weeks
- Do your resistance band rows 3 times per week for a full month without missing a session
- Notice that a specific daily activity (like reaching for a seatbelt or lifting a pet) has become easier
Celebrate each one. You’ve earned it.
Standing Calf Raises for Better Balance and Stability
How Stronger Calves Protect Your Joints
Your calf muscles do a lot more than just look good in shorts. These two powerful muscles — the gastrocnemius and the soleus — are your body’s first line of defense against falls, ankle rolls, and knee strain. When they’re weak, every step you take puts extra stress on your knees, hips, and lower back, because those joints have to pick up the slack.
Think of your calves as the shock absorbers of your lower body. Strong calves help absorb the impact of each step, reducing the pounding that travels up through your joints. For seniors, this is a big deal. Worn cartilage, arthritis, and reduced bone density are common challenges, and strong surrounding muscles can genuinely take pressure off those vulnerable areas.
Here’s what consistently doing calf raises can do for your body over time:
- Improved ankle stability — Stronger calves keep your ankles from wobbling on uneven surfaces, curbs, or slippery floors
- Better circulation — The calves act as a “second heart,” pumping blood back up your legs, which helps reduce swelling and fatigue
- Enhanced proprioception — This is your body’s ability to sense where it is in space; calf training sharpens that sense, making you quicker to react and recover if you stumble
- Reduced knee stress — When calves are doing their job properly, your knees don’t have to overcompensate during walking or stair climbing
- Greater confidence on your feet — This one isn’t talked about enough; when you feel stable, you move more, and moving more keeps you stronger
This makes standing calf raises one of the most underrated balance exercises for seniors. They’re simple, low impact, and pack a serious punch when it comes to protecting your body from the ground up.
Using a Chair or Wall for Safe Support
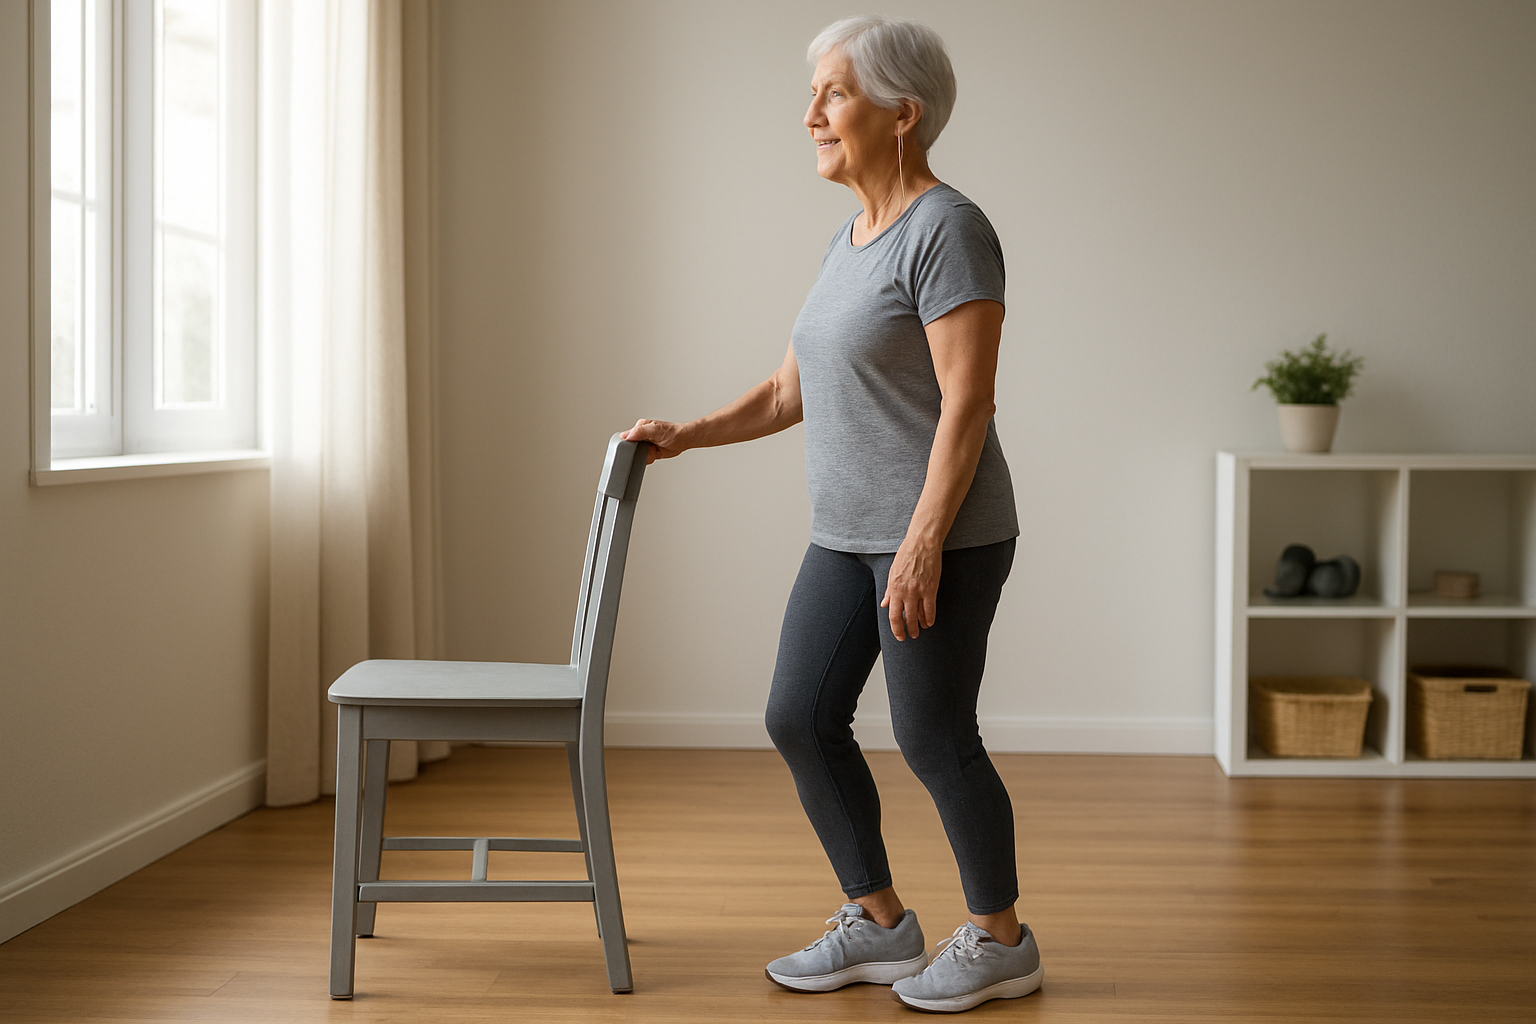
You don’t need a gym machine or a balance board to do calf raises safely. A sturdy chair or a wall gives you all the support you need to do this movement with confidence, especially if you’re just starting out with beginner strength training over 60.
Setting Up the Exercise
What you need:
- A chair with a firm back (not a wheeled office chair) or a clear wall space
- Comfortable, supportive shoes — avoid bare feet on slippery floors
- Flat, non-slip surface
Starting position:
- Stand behind the chair and lightly rest both hands on the back of it, or place your palms flat against the wall at about chest height
- Stand with your feet hip-width apart, toes pointing forward
- Keep your back straight and shoulders relaxed — don’t hunch over the chair
How to Do the Movement
- Slowly rise up on the balls of your feet, lifting your heels off the floor
- Pause at the top for 1 to 2 seconds — squeeze those calf muscles
- Lower your heels back down in a slow, controlled way; don’t just drop them
- Repeat for 10 to 15 reps per set, aiming for 2 to 3 sets
The key word here is slow. Rushing through calf raises turns them into a momentum exercise rather than a strength exercise. Controlling the lowering phase (what trainers call the “eccentric” part) is where a big chunk of the muscle-building and stability benefit actually comes from.
Tips for Getting the Most Out of This Move
| Tip | Why It Matters |
|---|---|
| Hold the chair lightly, not tightly | Gripping too hard shifts the work away from your legs |
| Rise as high as you comfortably can | Greater range of motion = better calf activation |
| Keep both feet flat on the way down | Prevents rolling the ankles inward or outward |
| Breathe steadily throughout | Exhale on the way up, inhale on the way down |
| Progress to single-leg as you get stronger | Challenges balance and doubles the intensity naturally |
Progressing When You’re Ready
Once 15 reps feel too easy with both feet, try these progressions:
- Single-leg calf raises — Hold the chair with one hand and lift one foot slightly off the ground, then perform the raise on the standing leg
- Slower tempo — Take 3 seconds to rise and 3 seconds to lower
- Add a light resistance band — Loop it across your thighs for added challenge without putting stress on your joints
These small progressions keep your body adapting, which is exactly what safe workouts for older adults should do — challenge you just enough to keep getting stronger without overdoing it.
Glute Bridges for Core Strength and Hip Mobility
Key Muscles Activated and Why They Matter
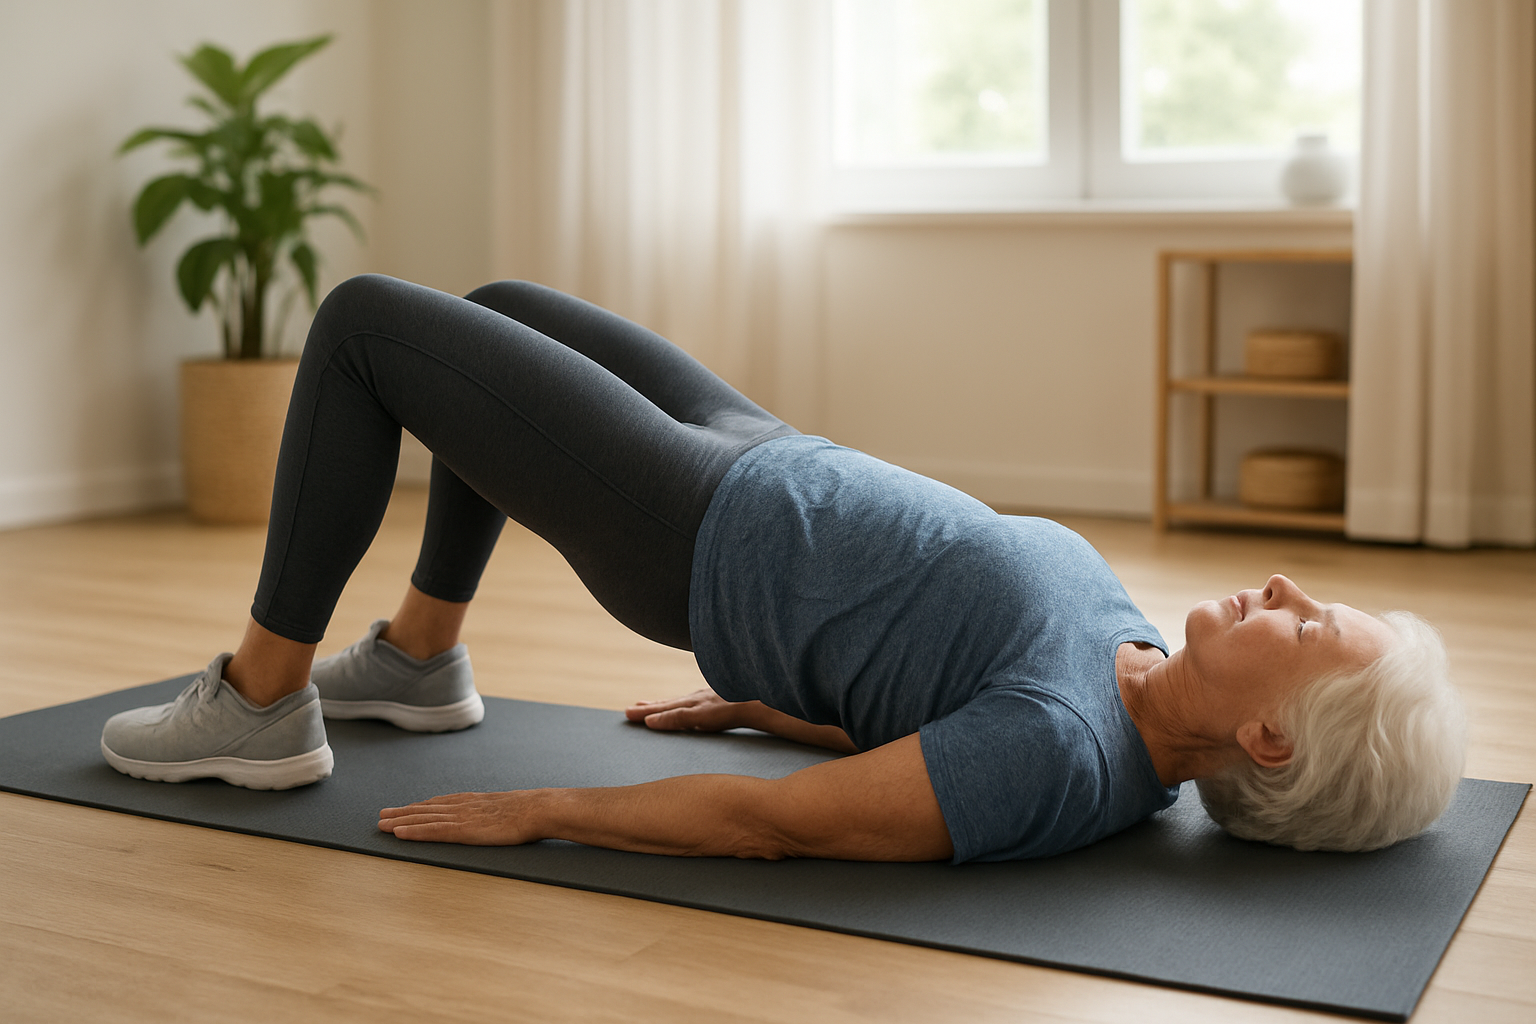
The glute bridge is one of those exercises that looks deceptively simple but quietly works some of the most important muscle groups in your body. When you perform this move, you’re firing up:
- Gluteus maximus – the largest muscle in your body, responsible for hip extension and generating power when you stand, climb stairs, or push off the ground
- Hamstrings – the muscles running along the back of your thighs that support your knees and help stabilize your legs
- Core muscles – including the transverse abdominis and lower back muscles that keep your spine protected and your posture upright
- Hip flexors – stretched during this movement, which helps counteract the tightening that comes from sitting for long periods
For seniors specifically, these muscles are absolutely critical. Weak glutes are directly linked to hip instability, lower back pain, and an increased risk of falls. Your glutes are basically the engine behind nearly every movement you do on two feet. When they’re strong and firing correctly, everyday tasks like getting up from a chair, walking uphill, or bending to pick something up become noticeably easier and safer.
There’s also a postural benefit worth highlighting. Strong glutes pull your pelvis into a better position, which naturally reduces the compression that older adults often feel in their lumbar spine. If you’ve ever dealt with chronic low back aches, building up this area through low impact strength training can make a real difference over time.
Modifications for Seniors With Limited Flexibility
Not everyone is going to nail a full glute bridge on day one, and that’s completely fine. The beauty of this exercise is how adaptable it is. Here are practical ways to adjust the movement to match your current flexibility and strength level:
Reduce Your Range of Motion
You don’t have to lift your hips as high as possible right away. Start by lifting just a few inches off the surface and hold for a second or two. Even a small range of motion activates the glutes and builds the neural connection between your brain and those muscles.
Use a Rolled Towel Under Your Lower Back
If lying flat feels uncomfortable because of back stiffness, place a small rolled towel under your lumbar spine for gentle support. This reduces the arch in your back and makes the position easier to hold without strain.
Try a Supported Version on the Bed
A firm mattress or padded surface gives more cushioning than a yoga mat, which can make the floor more approachable for seniors with hip tenderness or difficulty getting down and back up again. Perform the bridge on a bed to reduce pressure on your tailbone while you build confidence in the movement.
Widen Your Feet for Stability
Placing your feet slightly wider than hip-width apart creates a broader base. This small adjustment reduces wobbling and helps seniors who struggle with balance feel more stable throughout the lift.
Use a Chair for Assistance
If getting down to the floor is the real barrier, a modified version can be done seated at the edge of a chair. Push through your heels, tighten your glutes, and tilt your pelvis forward and upward slightly. It’s not identical to the full floor bridge, but it activates the same muscles and builds the foundation needed to progress.
| Modification | Best For | What It Changes |
|---|---|---|
| Reduced range of motion | Beginners or those with hip stiffness | Lowers intensity while maintaining muscle activation |
| Towel under lower back | Seniors with lumbar discomfort | Reduces spinal compression during the movement |
| Bed surface instead of floor | Those with difficulty on hard floors | Adds cushioning and reduces joint pressure |
| Wider foot placement | Seniors with balance challenges | Creates a more stable base during the lift |
| Seated chair version | Those who can’t get to the floor safely | Mimics glute activation without floor work |
How Consistency Delivers Long-Term Results
Here’s the thing about glute bridges and strength exercises for older adults in general — one session won’t change your life, but a few months of showing up consistently absolutely will.
When you perform glute bridges two to three times per week, your body starts making measurable adaptations:
Weeks 1–3: Your nervous system learns the movement pattern. You might not feel sore or notice dramatic changes, but the connection between your brain and your glute muscles is getting stronger with every rep.
Weeks 4–8: Muscle recruitment improves significantly. You’ll start lifting your hips higher, holding the position longer, and noticing that movements like standing up or climbing stairs feel less labored.
Months 3–6: Real structural changes happen. Muscle fiber density increases, hip joint stability improves, and many seniors report a meaningful reduction in low back discomfort during this phase.
Beyond 6 months: The cumulative effects of senior muscle building workouts like this one show up in daily life. Better posture when walking, greater confidence on stairs, and less fatigue after physical activity all become noticeable.
The key is progressive overload — gradually making the exercise slightly harder over time so your muscles keep adapting. For the glute bridge, that might look like:
- Adding a two-second hold at the top of the movement
- Placing a light resistance band just above your knees while bridging
- Progressing to a single-leg variation once both legs feel strong
What you want to avoid is doing the exact same thing, at the exact same difficulty, forever. Your muscles are smart — they adapt and then stop being challenged unless you give them a reason to keep growing.
Pairing glute bridges with the other safe workouts for older adults covered throughout this post creates a balanced, full-body routine that builds real functional strength. The goal isn’t just stronger muscles on paper — it’s moving through your days with more confidence, less pain, and greater independence.
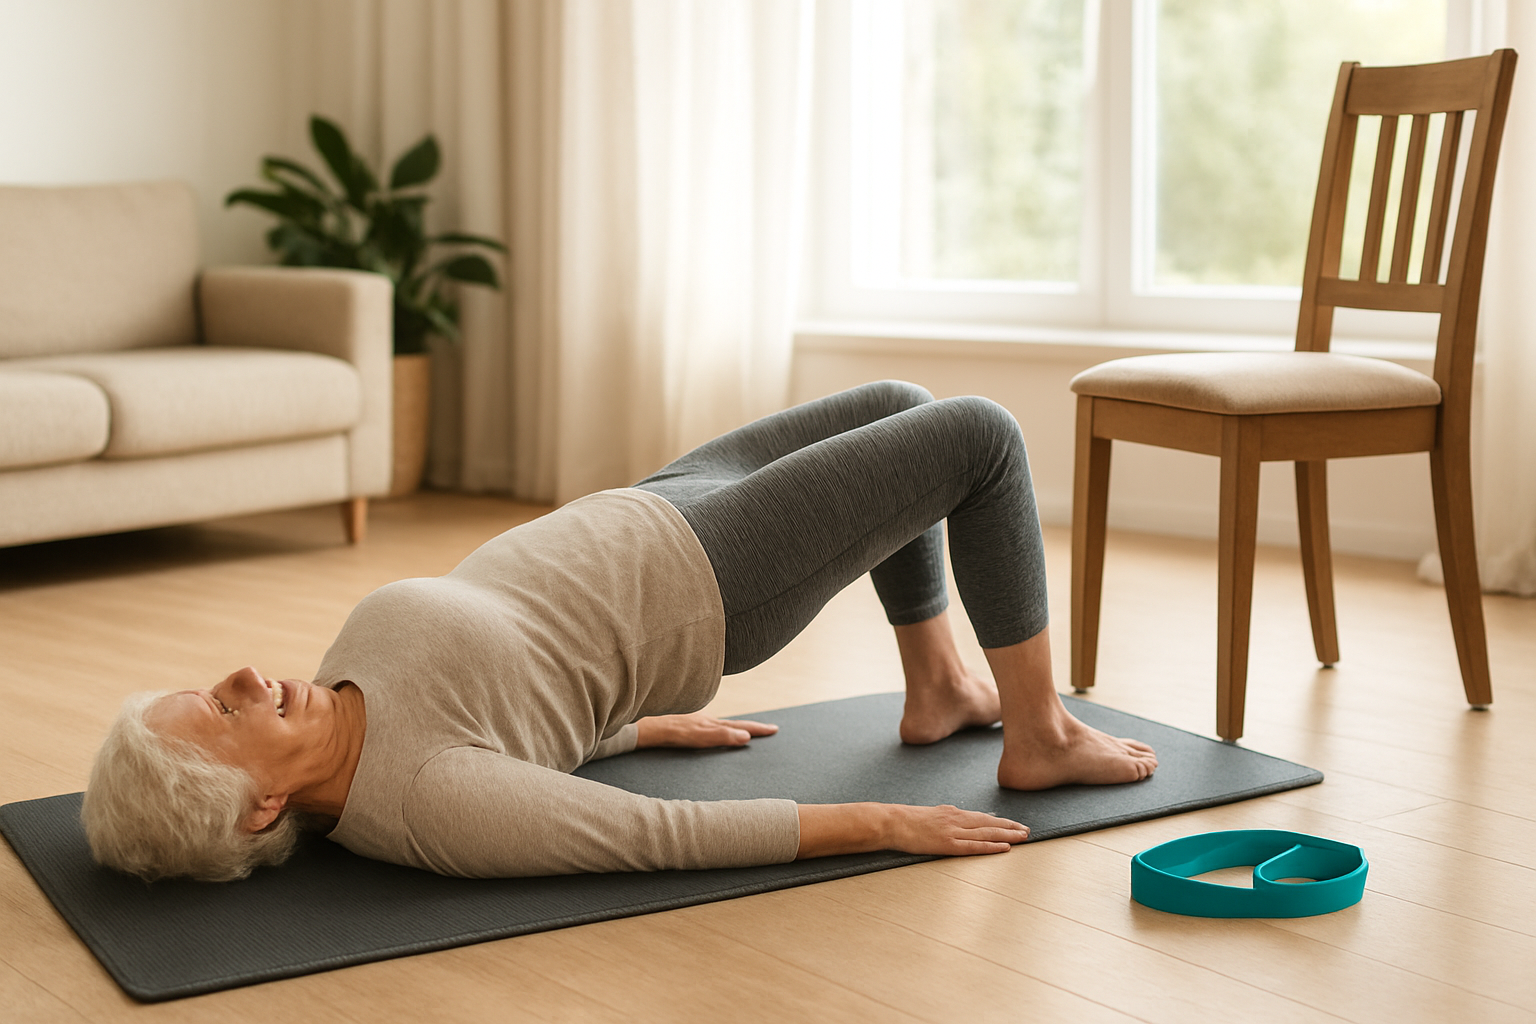
Staying strong as you get older isn’t just about looking good — it’s about staying independent, moving without pain, and feeling confident in your everyday life. These seven moves cover all the bases, from building lower body strength with chair squats to improving your posture with resistance band rows. The best part? None of them require a gym membership or fancy equipment, and they can all be adjusted to match your current fitness level.
Start small, be consistent, and don’t rush the process. Even doing two or three of these exercises a few times a week can make a real difference in how you feel and move. Talk to your doctor before starting if you have any existing health concerns, and consider working with a trainer for a session or two to make sure your form is on point. Your future self will thank you for putting in the work today.