


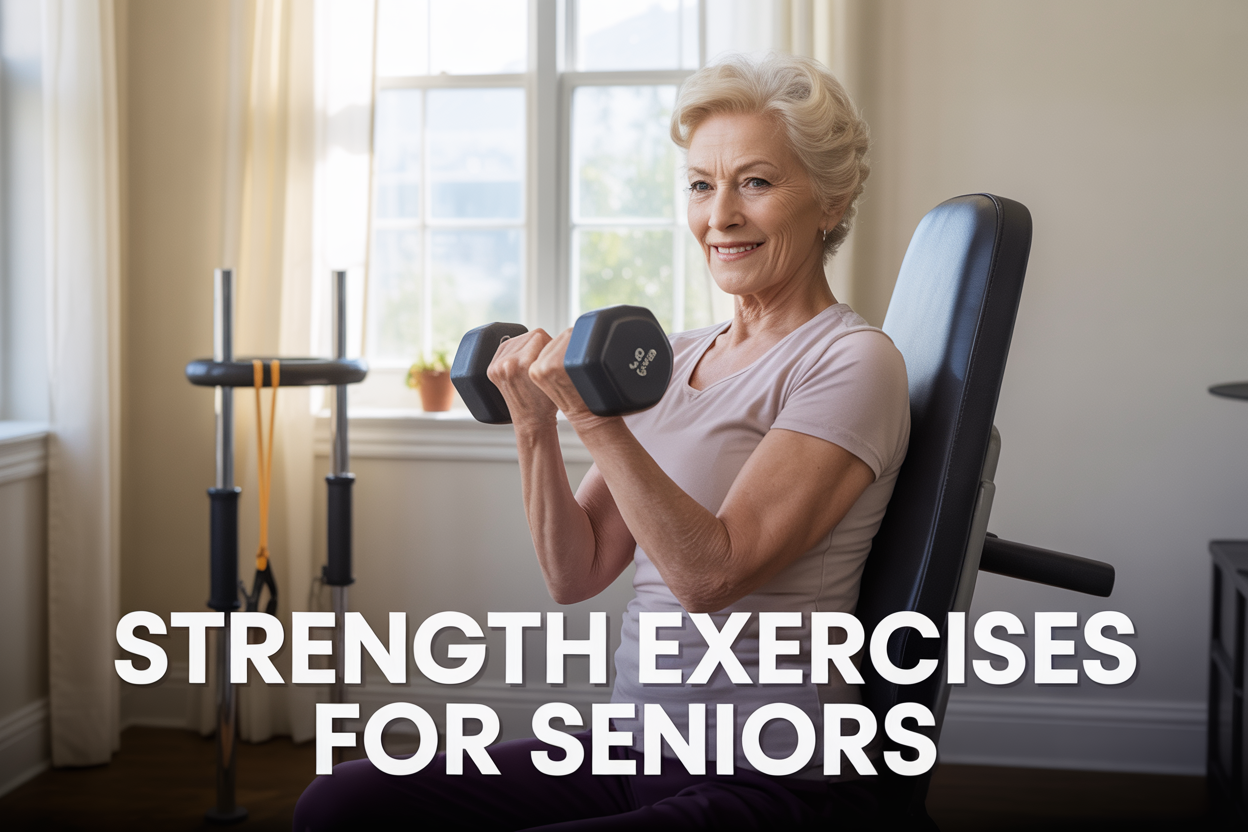
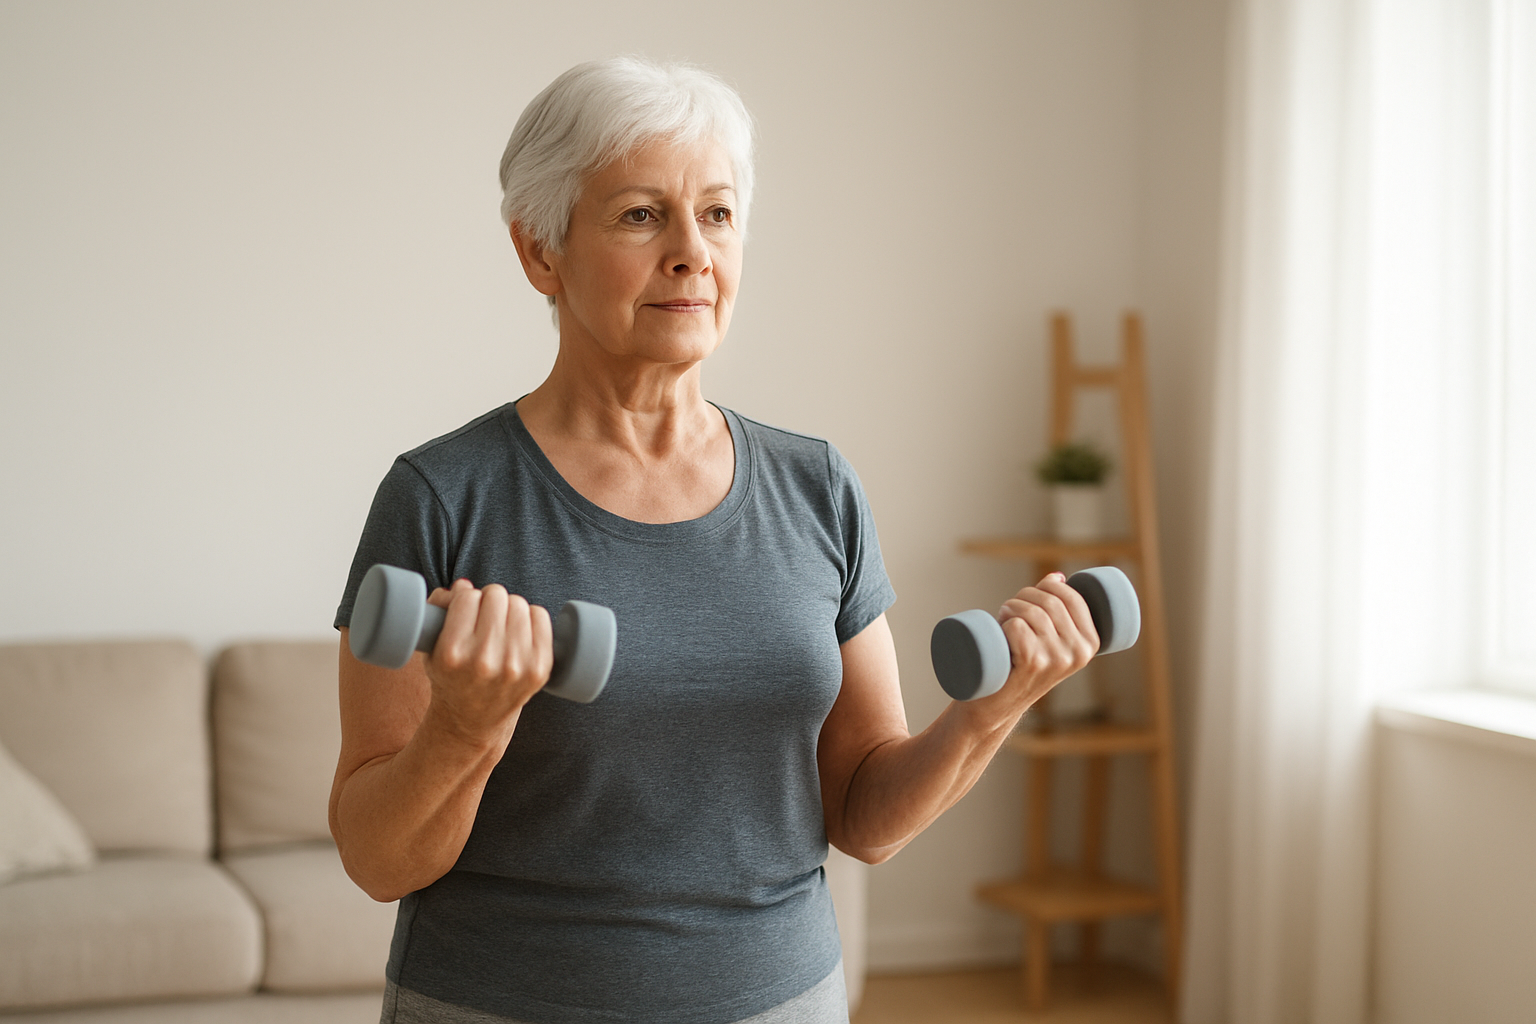
7 Strength Exercises Every Senior Should Do Weekly
Getting older doesn’t mean slowing down — it means training smarter. If you’re a senior looking to stay strong, steady on your feet, and independent for years to come, this guide is written specifically for you.
Strength training for seniors isn’t about lifting heavy or hitting the gym seven days a week. It’s about moving your body in ways that actually matter — carrying groceries without strain, getting up from a chair with ease, and walking confidently without worrying about your balance.
Here’s what you’ll find in this guide:
- Why strength exercises for aging adults matter more than most people realize — and what happens to your body when you skip them
- Safe, beginner-friendly moves like chair squats for seniors and resistance band exercises that work your whole body without beating up your joints
- How to build a simple weekly workout plan for seniors that fits into real life and actually sticks
No complicated equipment. No gym membership required. Just seven proven, low impact strength exercises that belong in every senior exercise routine — starting this week.
Table of Contents
Why Strength Training Is Essential for Seniors
How Muscle Loss Accelerates After Age 60
Most people don’t realize how quietly and quickly muscle disappears as we age. The process actually starts in your 30s, but after 60, it shifts into a higher gear. Scientists call this sarcopenia — the gradual loss of muscle mass and strength that comes with aging — and it’s more serious than most people give it credit for.
Here’s a simple breakdown of what’s happening in your body:
- Ages 30–60: You lose roughly 3–5% of muscle mass per decade
- After age 60: That rate can double or even triple without resistance-based activity
- After age 70: Some adults lose up to 15% of their remaining muscle mass per decade
- Inactivity multiplies the effect: Even short periods of bed rest or sedentary living can cause significant muscle loss within days
The reason this happens is a combination of hormonal changes (dropping levels of testosterone, estrogen, and growth hormone), reduced protein synthesis, and often, simply moving less than before. Your nervous system also becomes less efficient at firing muscle fibers, which is why reaction time and balance start to slip.
The good news? Muscle loss is not inevitable. Strength training for seniors is one of the most effective tools we have to slow this process dramatically — and in many cases, partially reverse it.
Key Health Benefits Beyond Just Building Muscle
When most people think about lifting weights or doing resistance exercises, they picture bigger arms or a stronger back. But for older adults, the benefits go far deeper than that.
Bone Density
Resistance training puts stress on bones in a good way. That stress stimulates bone-forming cells called osteoblasts, which helps increase or maintain bone density. This is a big deal for seniors because osteoporosis affects an estimated 10 million Americans over 50, and another 44 million have low bone density. Strength exercises for aging adults can genuinely reduce the risk of fractures from falls.
Metabolic Health
Muscle tissue is metabolically active — meaning it burns calories even at rest. As muscle mass drops, your resting metabolism slows down, blood sugar regulation gets harder, and the risk of type 2 diabetes climbs. Regular strength training helps reverse this by improving insulin sensitivity and keeping your metabolism more active throughout the day.
Heart Health
Low impact strength exercises, done consistently, can lower resting blood pressure, improve cholesterol levels, and reduce the strain on your cardiovascular system. The American Heart Association recommends strength training at least twice a week for adults of all ages, including seniors.
Mental Health and Brain Function
This one surprises a lot of people. Research published in journals like JAMA Internal Medicine and Frontiers in Aging Neuroscience shows that regular resistance training is linked to:
- Reduced symptoms of depression and anxiety
- Better memory and cognitive function
- Lower risk of dementia
- Improved sleep quality
Joint Health and Pain Reduction
Stronger muscles support and protect your joints. Many seniors dealing with knee pain, hip discomfort, or lower back issues actually experience significant relief after a few weeks of consistent strength training, because the muscles surrounding those joints get better at absorbing impact and reducing stress on cartilage.
| Health Area | What Strength Training Does |
|---|---|
| Bones | Increases density, reduces fracture risk |
| Metabolism | Burns more calories at rest, improves blood sugar |
| Heart | Lowers blood pressure and cholesterol |
| Brain | Improves memory, mood, and sleep |
| Joints | Reduces pain, improves stability |
| Balance | Strengthens stabilizer muscles, cuts fall risk |
How Weekly Strength Training Improves Daily Independence
There’s a real and direct connection between muscle strength and the ability to live life on your own terms. The things seniors often worry about losing first — driving, getting up from a chair, carrying groceries, climbing stairs — are all powered by the same muscle groups that a good senior exercise routine targets.
Think about what happens when leg strength declines:
- Getting up from a chair becomes harder, then scary, then impossible without help
- Climbing stairs requires holding the rail, then avoiding stairs altogether
- Getting in and out of a car feels like a workout in itself
- The fear of falling starts to limit social activity and confidence
A weekly workout plan for seniors doesn’t need to be complicated or intense to make a genuine difference here. Studies show that just two to three sessions per week of resistance or low impact strength exercises can:
- Reduce fall risk by up to 34% (according to the British Journal of Sports Medicine)
- Improve gait speed and balance in as little as 8 weeks
- Make Activities of Daily Living (ADLs) like dressing, bathing, and cooking easier and less exhausting
- Delay or prevent the need for assisted living for many adults
Balance exercises for elderly adults and senior fitness tips often focus on the big picture, but it’s worth zeroing in on the small stuff: opening a jar, carrying laundry, playing with grandchildren on the floor and getting back up again. These moments matter enormously for quality of life and emotional wellbeing. Strength training is what keeps them possible.
What to Expect in the First Few Weeks of Training
Starting a new best exercises for older adults routine can feel a little uncertain, especially if it’s been a while since you’ve done any formal exercise. Knowing what’s normal helps you stick with it through the adjustment period.
Week 1–2: Your Body Is Learning
The first thing you’ll notice isn’t necessarily getting stronger — it’s getting more coordinated. Your brain and nervous system are relearning how to fire muscle fibers efficiently. You may feel mild muscle soreness 24–48 hours after your first few sessions. This is called delayed onset muscle soreness (DOMS), and it’s a completely normal sign that your muscles are adapting. It should feel like a dull ache, not sharp pain.
What’s normal in weeks 1–2:
- Mild fatigue after workouts
- Soreness in muscles you didn’t know you had
- Movements feeling awkward or uncoordinated
- Needing to stop and rest more than expected
Week 3–4: Early Gains Show Up
By weeks three and four, most people start noticing real changes. These early improvements are mostly neurological — your nervous system gets better at recruiting muscle fibers, which means movements feel more natural and less tiring even before you’ve actually built much new muscle tissue.
What you might notice:
- Movements start to feel more controlled and less effortful
- Soreness after workouts begins to reduce
- Energy levels during daily activities start to improve
- Some tasks at home feel a bit easier than before
Week 5–8: Strength Starts to Build
This is where the physical changes become more tangible. Muscle fibers are actually thickening and strengthening, and most seniors report noticeable improvements in how they move, how confident they feel on their feet, and how much less effort daily tasks require.
Tips for getting through the early weeks successfully:
- Start lighter than you think you need to — it’s far better to feel like the weight was too easy on day one than to be too sore to move on day two
- Focus on form, not load — doing a movement correctly with light resistance beats struggling through it with heavy weight
- Rest between sessions — at least one full rest day between strength workouts gives muscles time to repair and grow
- Track something small — even just writing down how many reps you did can give you a motivating sense of progress over time
- Don’t skip the warm-up — five minutes of gentle movement before your workout significantly reduces injury risk and makes the session feel better overall
The first few weeks are always the hardest. Your body is adapting, your routine isn’t locked in yet, and the benefits aren’t fully visible. Push through that window, and the habit becomes much easier to maintain.
How to Exercise Safely and Effectively as a Senior
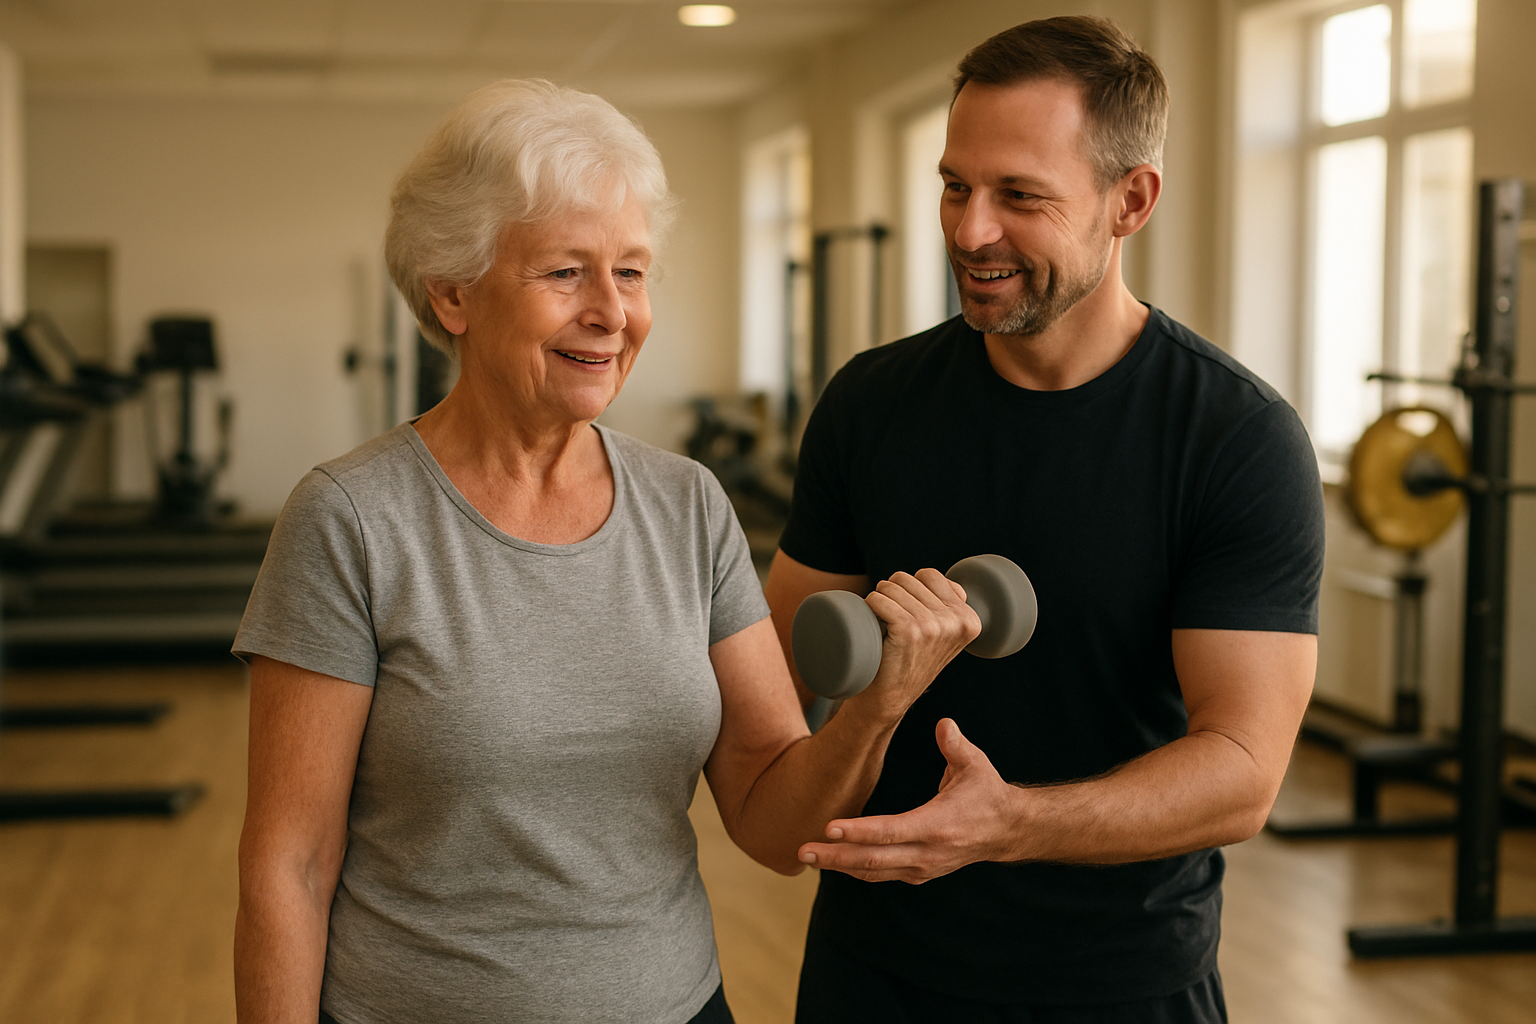
A. Importance of Consulting a Doctor Before Starting
Before you pick up a dumbbell or strap on a resistance band, a quick conversation with your doctor can save you a lot of trouble down the road. This isn’t about being overly cautious — it’s just smart planning. Your physician can flag any underlying conditions that might affect how you train, such as osteoporosis, arthritis, heart disease, or joint issues that require modifications to certain movements.
Here’s what a pre-exercise medical check typically covers:
- Cardiovascular screening — making sure your heart can handle increased physical activity
- Joint and bone health assessment — identifying areas that need extra care or lighter loads
- Medication review — some medications affect heart rate, blood pressure, or balance, which directly impacts how you should train
- Baseline fitness evaluation — understanding where you’re starting from so progress can be tracked meaningfully
If you’ve been inactive for a long period, your doctor might recommend starting with a physical therapist who specializes in senior fitness tips and can design a program tailored specifically to your needs. Many older adults are cleared for low impact strength exercises with little to no restrictions — but knowing that ahead of time gives you real confidence to train without second-guessing yourself.
Think of your doctor as your first coach, not a gatekeeper. Getting that green light means you can dive into your senior exercise routine knowing you’re building strength on a solid, safe foundation.
B. Simple Warm-Up Routines to Prevent Injury
Skipping a warm-up when you’re older isn’t just a bad habit — it’s a genuine injury risk. Muscles and connective tissues become less elastic with age, which means jumping straight into strength training for seniors without preparing your body first is asking for trouble. A proper warm-up raises your core temperature, increases blood flow to your muscles, and gets your joints moving through their range of motion before any real load is applied.
The good news is that you don’t need anything fancy. A 5 to 10 minute warm-up is plenty, and it can be done seated or standing depending on your comfort level.
Effective Warm-Up Options for Older Adults
Seated Warm-Up (Great for Beginners or Those with Balance Concerns)
| Exercise | Duration | What It Does |
|---|---|---|
| Seated Marching | 60 seconds | Warms up hips and gets blood moving |
| Ankle Circles | 30 seconds each foot | Loosens ankles and reduces stiffness |
| Shoulder Rolls | 10 forward, 10 backward | Releases tension in the upper back and shoulders |
| Seated Torso Twists | 10 reps per side | Gently mobilizes the spine |
| Neck Side Tilts | 5 reps per side | Relieves neck tightness safely |
Standing Warm-Up (Once You Feel Steady)
| Exercise | Duration | What It Does |
|---|---|---|
| March in Place | 60–90 seconds | Elevates heart rate gently |
| Heel-to-Toe Walks | 30 seconds | Improves balance and warms up calves |
| Hip Circles | 10 per direction | Opens up the hip joints |
| Arm Swings | 20 reps | Loosens the shoulder girdle |
| Gentle Bodyweight Squats (partial depth) | 8–10 reps | Prepares knees, hips, and quads for work |
One thing many seniors overlook is the value of dynamic stretching during warm-up rather than static stretching. Holding a stretch cold can actually strain a muscle that isn’t ready yet. Save the longer, held stretches for your cool-down when your muscles are already warm and pliable.
If you’re doing balance exercises for elderly individuals like standing calf raises or side leg raises later in your session, spend a little extra time warming up your ankles and hips. Those joints do a lot of stabilization work and deserve attention before you put them under load.
C. How to Listen to Your Body and Avoid Overtraining
One of the most valuable skills any aging adult can develop isn’t a physical one — it’s knowing the difference between productive discomfort and a warning signal. Strength training for seniors should feel challenging, but it should never feel dangerous.
The Difference Between Good Pain and Bad Pain
- Good discomfort: A mild burning sensation in the muscle you’re working, slight fatigue, feeling “worked” after a session. This is normal and means your muscles are being stimulated to grow stronger.
- Warning signs to stop immediately: Sharp or stabbing pain, joint pain (especially in knees, hips, or shoulders), chest tightness, dizziness, shortness of breath, or pain that radiates down your arm or leg.
If any of those warning signs show up, stop the exercise and rest. If symptoms persist, contact your doctor before continuing your weekly workout plan for seniors.
Practical Ways to Avoid Overtraining
Start lower than you think you need to. Most people overestimate what they can handle when returning to exercise. Begin with lighter resistance, fewer sets, and shorter sessions. You can always add more — you can’t undo an injury.
Track how you feel 24–48 hours after training. Some muscle soreness the day after a session is completely normal and actually expected, especially in the early weeks. But if you’re feeling exhausted, your joints are aching, or your sleep is suffering, that’s a sign you may be doing too much too soon.
Use the “talk test” during exercise. You should be able to carry on a short conversation while doing most of the best exercises for older adults. If you’re gasping for breath and can’t string a sentence together, dial down the intensity.
Build rest into your routine — on purpose. Muscles grow and repair during rest, not during the workout itself. For older adults, the body often needs slightly longer to recover between sessions. A weekly workout plan for seniors typically includes 1–2 rest days between strength sessions, which is not laziness — it’s strategy.
Signs You’re Finding the Right Balance
- You feel energized (not wiped out) a few hours after a session
- Your strength is gradually improving over weeks
- You’re sleeping well and your mood is good
- Everyday tasks like climbing stairs or carrying groceries feel noticeably easier
Paying attention to these signals builds a kind of body awareness that makes your whole senior fitness journey more sustainable and enjoyable. The goal isn’t to push through at all costs — it’s to train consistently over months and years, which is how real, lasting strength is built.
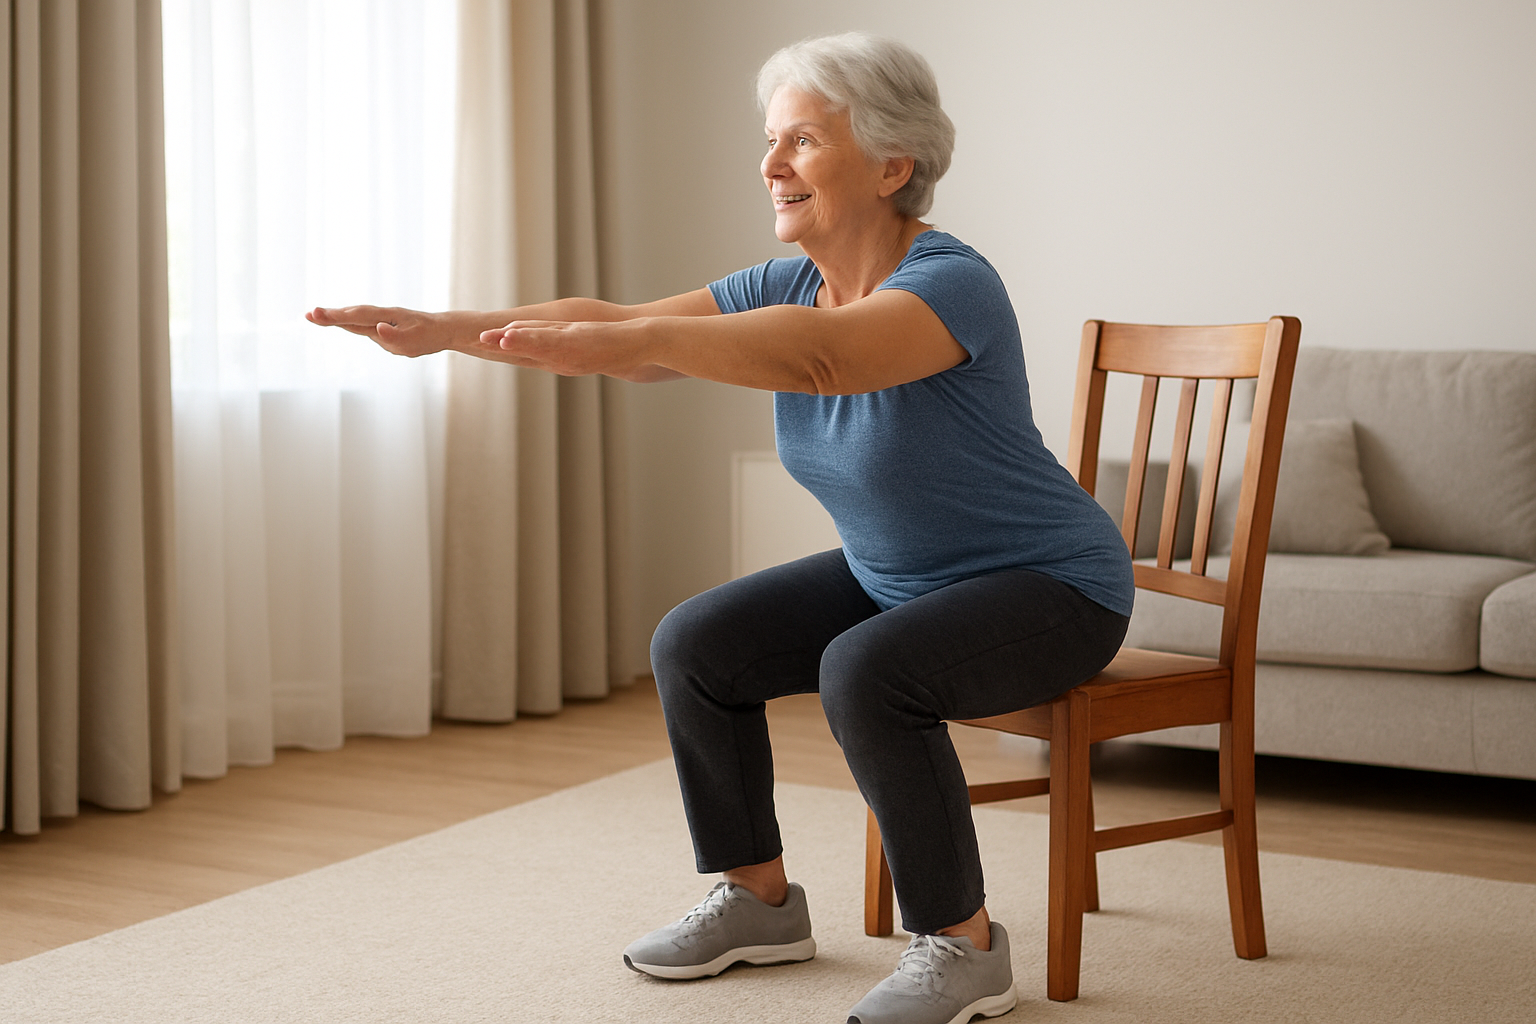
Chair Squats for Stronger Legs and Better Stability
Why Leg Strength Is Critical for Fall Prevention
Falls are the leading cause of injury among older adults, and weak legs are one of the biggest reasons they happen. When your quads, hamstrings, and glutes lose strength over time, everyday movements like getting up from a chair, climbing stairs, or walking on uneven ground become genuinely risky.
Strong legs do more than just move you around — they act as your body’s first line of defense against losing your balance. When you stumble or slip, it’s your leg muscles that react in a split second to catch you before you hit the ground. Without that strength, your reaction time and ability to self-correct drops significantly.
Chair squats are one of the best low impact strength exercises for tackling this problem head-on. They directly train the muscles you rely on most for standing, sitting, and walking — and they do it in a way that feels familiar and safe. The chair is right there as a backup, which removes the fear factor that keeps many seniors from squatting at all.
Building leg strength through exercises like chair squats also supports your joints, reduces knee pain over time, and helps your body distribute weight more evenly. That means less strain on any one area and better overall function throughout your day.
Step-by-Step Instructions for Proper Form
Getting your form right from the start makes chair squats safer and far more effective. Here’s how to do them correctly:
What you need:
- A sturdy chair with no wheels
- Flat, non-slip shoes
- A clear space around you
Step-by-step:
- Start seated — Sit near the front edge of the chair with your feet hip-width apart and flat on the floor.
- Lean slightly forward — Shift your chest forward over your knees. This is the natural hinge that gets you out of a seat. Don’t hunch your back; keep your spine long.
- Press through your heels — Push the floor away with your feet and drive your hips up to standing. Squeeze your glutes at the top.
- Stand tall — At the top, your hips should be fully extended and your core gently braced. Don’t lock your knees hard.
- Lower back down slowly — Hinge at the hips first, reach your backside back toward the chair, and lower yourself down with control. Don’t just drop.
- Touch and go — Lightly tap the chair seat with your glutes and immediately stand again. Avoid fully relaxing into the seat between reps.
Key form tips:
- Keep your knees tracking over your toes — they shouldn’t cave inward
- Your weight should stay mostly in your heels, not your toes
- Keep your chest up and eyes forward throughout the movement
- Breathe in as you lower, breathe out as you stand
Aim for 2–3 sets of 8–12 repetitions, resting about 60 seconds between sets. This is a solid starting point for any senior fitness routine.
How to Progress as You Get Stronger
One of the best things about chair squats is that they naturally build toward harder variations as your strength improves. You don’t need to jump to fancy equipment — small tweaks make a big difference.
Here’s a simple progression ladder you can follow:
| Stage | What It Looks Like | When to Move On |
|---|---|---|
| Beginner | Full chair squat, using hands on thighs for a push-off assist | When 12 reps feel easy for 2 weeks straight |
| Intermediate | Chair squat with arms crossed over chest or extended forward | When 12–15 reps feel manageable with good form |
| Advanced | Slow tempo squats (3 seconds down, 1 second up) | When you want more challenge without adding weight |
| Weighted | Holding a light dumbbell or household item at chest level | When you’re ready to build more muscle |
| Box Squat depth | Using a lower surface to increase range of motion | When flexibility and strength allow |
Progression tips:
- Add one extra rep per session rather than jumping up too fast
- Try pausing at the bottom for 2 seconds to increase difficulty without adding weight
- Work toward doing squats without touching the seat at all for a genuine freestanding squat
Progressing gradually is the heart of smart strength training for seniors. Your muscles and joints need time to adapt, and that patience pays off with real, lasting strength.
Modifications for Those With Knee or Hip Concerns
Knee or hip discomfort doesn’t mean you have to skip chair squats — it usually just means you need to adjust the movement to work with your body, not against it.
For knee pain:
- Reduce your range of motion — You don’t need to lower all the way toward the chair. Even a partial squat, where you lower just a few inches, still builds strength without irritating the joint.
- Widen your stance — A slightly wider foot position can take pressure off the front of the knee.
- Check your knee tracking — Knees that cave inward put extra stress on the joint. Focus on pushing your knees gently outward as you stand.
- Use a higher chair or add a firm cushion — Reducing how far you lower yourself protects sensitive knees while still working the muscles.
For hip pain or limited hip mobility:
- Keep the movement shallow — Stop the squat before you feel any pinching in the hip crease.
- Point your toes slightly outward — A 10–15 degree toe-out position opens up the hip joint and reduces impingement for many people.
- Avoid sitting too deep into the chair — Starting from a higher seat position means less hip flexion required to stand up.
- Move slowly — Hip joints respond well to controlled, deliberate movement. Rushing through the motion tends to increase discomfort.
General guidance for both concerns:
- Mild muscle fatigue is normal and fine. Sharp, stabbing, or joint pain is a signal to stop.
- Warm up before your workout with a few minutes of gentle walking or marching in place to get blood moving into the joints.
- If pain persists after modifying the exercise, check in with a physical therapist. They can identify exactly what’s causing the issue and give you a plan that’s specific to your body.
Chair squats are one of the most adaptable exercises in any senior exercise routine, which is exactly what makes them worth including every single week.
Wall Push-Ups for Upper Body Strength Without Strain
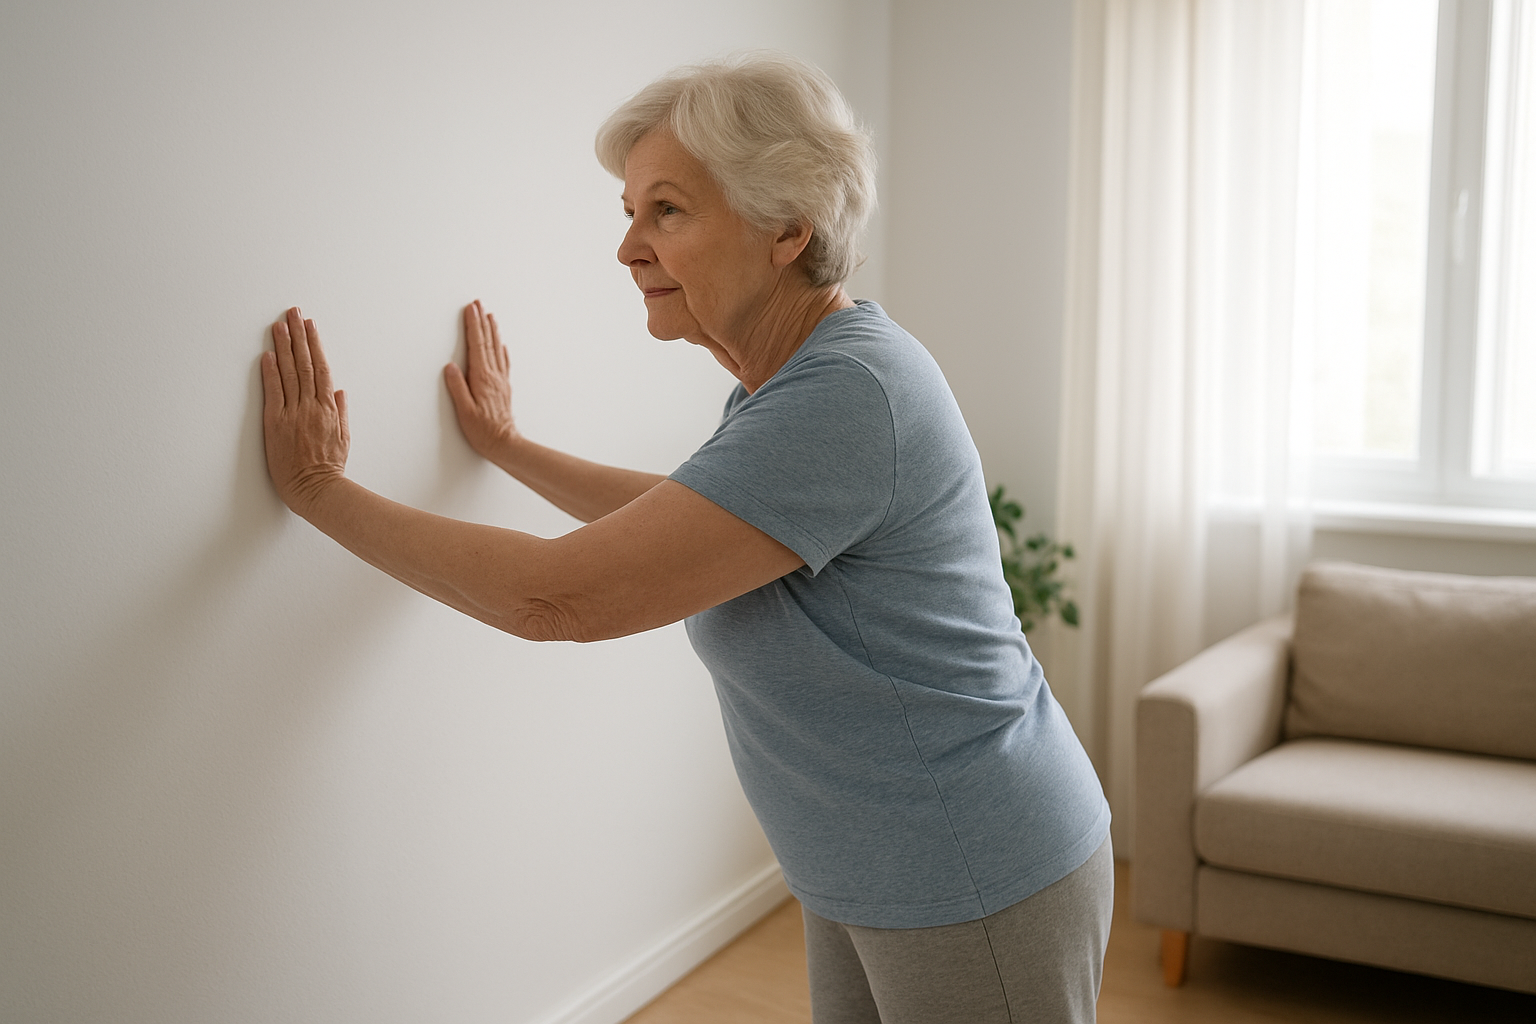
Benefits of Building Chest and Arm Strength Safely
Wall push-ups are one of the best-kept secrets in low impact strength exercises for older adults. They give you all the upper body benefits of a traditional push-up without the stress of supporting your full body weight on the floor. That means no sore wrists from awkward angles, no struggling to get back up, and no strain on your lower back.
Here’s what you actually gain from making wall push-ups a regular part of your senior exercise routine:
- Chest strength — The pectoral muscles get a solid workout, helping you push open heavy doors, lift objects off shelves, and carry groceries without fatigue.
- Arm and shoulder strength — Your triceps and front deltoids kick in with every rep, which directly supports everyday tasks like reaching overhead or pushing yourself up from a chair.
- Better posture — Strengthening the pushing muscles of the upper body helps counteract the forward-hunching posture that becomes more common with age.
- Improved joint health — Moving the shoulder joints through a controlled range of motion regularly keeps them lubricated and mobile, reducing stiffness over time.
- Bone density support — Even this mild form of resistance training places gentle stress on the bones of the arms and wrists, which can help slow bone density loss — a major concern for aging adults.
- Reduced injury risk — A stronger upper body makes falls less dangerous. When you can brace yourself, you have a much better chance of catching yourself before you hit the ground.
The wall push-up is one of those exercises that looks too simple to be effective. Don’t be fooled. Done consistently, it builds real, functional strength that carries over into your daily life.
Correct Technique to Maximize Results
Getting the form right is the difference between an exercise that actually builds strength and one that just burns a little time. Follow these steps carefully the first few times until the movement feels natural.
Step-by-Step Wall Push-Up Guide
- Find a clear wall — Make sure there are no baseboards, outlets, or picture frames in the way. A smooth, flat section of wall is ideal.
- Stand facing the wall — Position yourself about arm’s length away. You can test this by extending one arm and touching the wall with your fingertips.
- Place your hands on the wall — Put your palms flat on the wall at shoulder height and shoulder width apart. Your fingers should point upward or slightly outward — whatever feels comfortable for your wrists.
- Check your body position — Your body should form one straight line from your head to your heels. Don’t let your hips jut backward or your lower back sag forward.
- Engage your core — Before you even move, lightly tighten your abdominal muscles. This protects your lower back and makes the exercise more effective.
- Bend your elbows — Slowly lower your chest toward the wall by bending your elbows. They should flare out slightly to the sides — roughly at a 45-degree angle from your body. Avoid letting them flare straight out at 90 degrees, which puts extra stress on the shoulder joints.
- Get close to the wall — Lower yourself until your nose or chin is just a few inches from the wall. Don’t rush this part. The slower and more controlled, the better.
- Push back out — Press firmly through your palms and straighten your arms to return to the starting position. Breathe out as you push.
Common Mistakes to Avoid
| Mistake | Why It’s a Problem | Quick Fix |
|---|---|---|
| Standing too close to the wall | Limits range of motion, reduces effectiveness | Step back until arms are nearly extended at start |
| Letting hips sag or stick out | Takes the work away from chest and arms | Keep the whole body in one straight line |
| Holding your breath | Raises blood pressure, causes dizziness | Inhale on the way in, exhale on the way out |
| Moving too fast | Reduces muscle engagement, increases joint strain | Count 2 seconds down, 1 second pause, 2 seconds back |
| Flaring elbows straight out | Stresses shoulder joints unnecessarily | Keep elbows at roughly 45 degrees to the body |
Aim for 2 to 3 sets of 8 to 15 repetitions, resting about 60 seconds between sets. If you can’t do 8 yet, start with whatever number you can manage with good form and build from there.
How to Gradually Increase Resistance Over Time
One of the biggest strengths of wall push-ups — no pun intended — is that they have a built-in progression path. As you get stronger, you can make the exercise harder without needing any special equipment.
The Wall Push-Up Progression Ladder
Think of it like climbing a ladder. You start at the top (easiest) and work your way down as your strength grows.
Stage 1 — Wall Push-Ups (Beginner)
- Hands on the wall at shoulder height
- Body nearly upright
- Easiest on joints and muscles
- Perfect starting point for most seniors beginning a strength training routine
Stage 2 — Incline Push-Ups on a Counter
- Place hands on a sturdy kitchen counter or a chest-height surface
- Your body is now at a steeper angle, increasing the challenge
- More resistance than the wall, but still very manageable
- A great middle step for strength training for seniors
Stage 3 — Incline Push-Ups on a Low Surface
- Use a stable bench, a sturdy coffee table, or the seat of a couch
- Your body is now nearly parallel to the floor
- Significantly more demanding
- Only move to this stage when you can do 15 reps at Stage 2 with clean form
Stage 4 — Floor Push-Ups
- Full push-up from the knees or toes
- This is the traditional version most people know
- Only appropriate once you’ve built real strength through the earlier stages
Progression Rules to Follow
- Don’t rush the progression. Stay at each stage until you can comfortably complete 3 sets of 12 to 15 reps with proper form before moving to the next level.
- Add reps before moving to a harder variation. If you’re doing 10 reps at Stage 1, work toward 15 before shifting to Stage 2.
- Listen to your body. Muscle fatigue during the exercise is normal. Sharp joint pain is not. If something hurts in your shoulders, wrists, or elbows, stop and reassess your form or back down to an easier variation.
- Track your workouts. Even a simple notepad on the fridge works. Write down how many sets and reps you did each day. Watching those numbers improve over weeks is one of the most motivating things you can do.
- Don’t skip rest days. Muscles grow and get stronger during recovery, not during the workout itself. Two to three sessions per week with rest days in between is the sweet spot for most older adults.
The wall push-up might seem like a beginner move, but the principles behind it — controlled progressive overload, consistent practice, and smart form — are the same principles elite athletes use. The only difference is your starting point. And starting is everything.
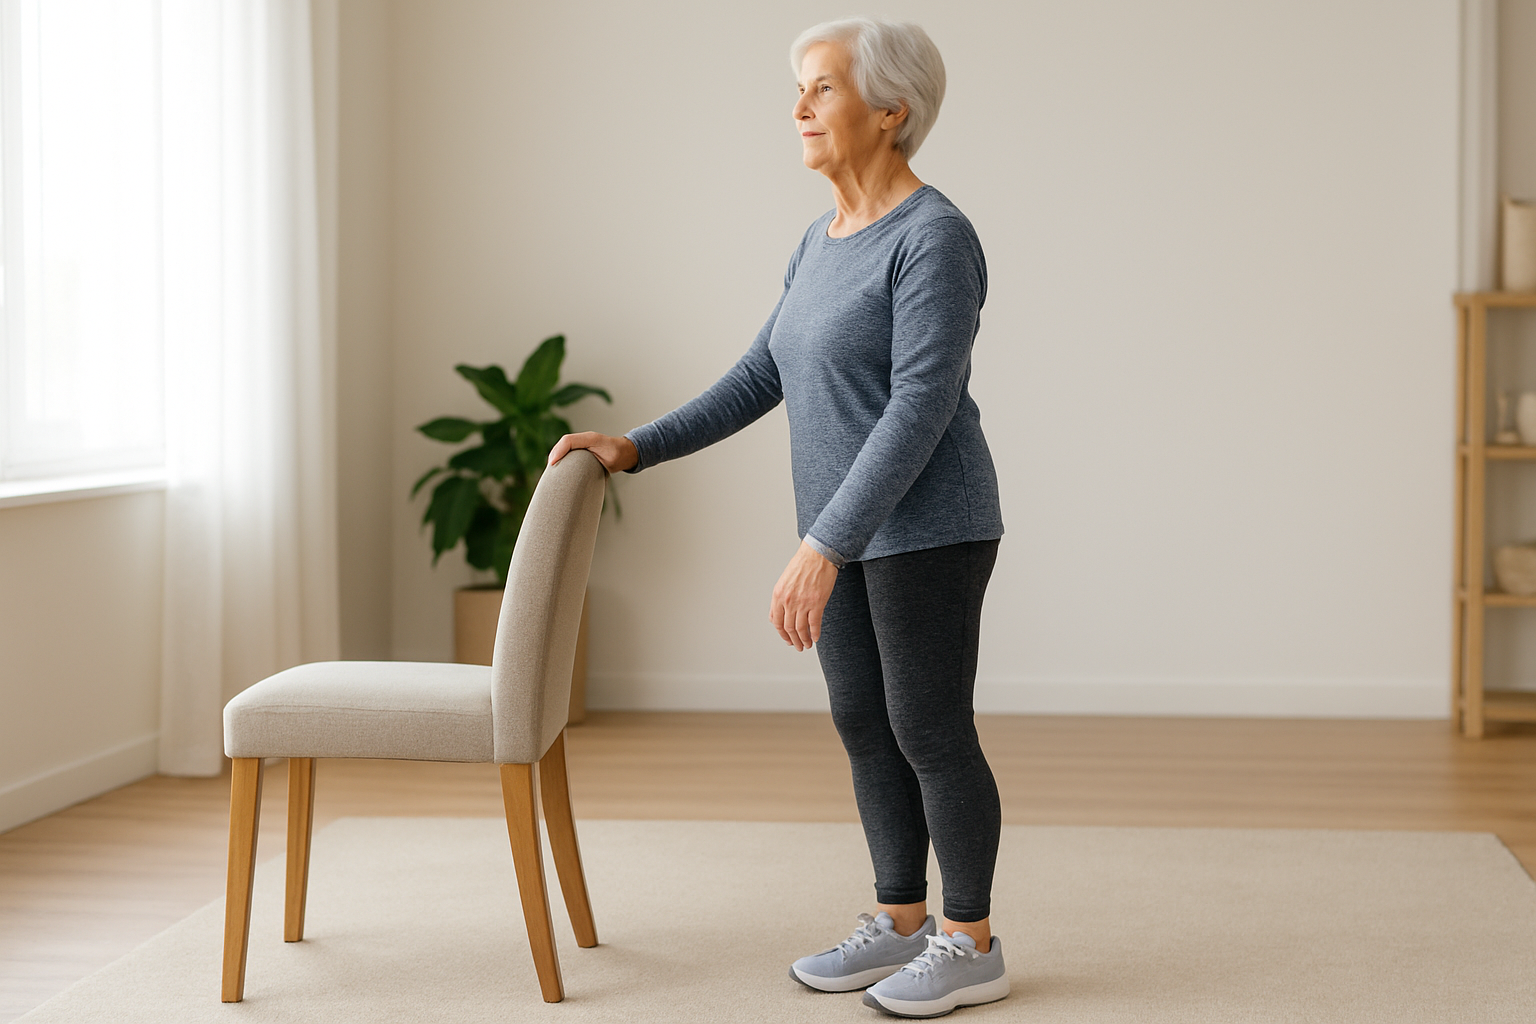
Standing Calf Raises for Balance and Ankle Support
Why Ankle and Calf Strength Reduces Fall Risk
Falls are one of the biggest health concerns for older adults, and weak ankles and calves play a much larger role in this than most people realize. Your calf muscles and the muscles surrounding your ankles act like a built-in stabilization system every single time you take a step, navigate uneven ground, or make a quick change in direction.
When those muscles are weak, your body loses its ability to make the tiny, split-second adjustments that keep you upright. Think of it like trying to balance on a wobbly table leg — if the base isn’t solid, everything above it is at risk.
Strong calves help you:
- Push off the ground properly when walking, which reduces shuffling gait — a common fall risk in older adults
- React quickly when you start to tip forward or backward
- Maintain grip between your feet and the floor, giving your whole body a stable foundation
- Reduce ankle rolling on uneven surfaces like grass, curbs, or gravel
As part of a solid senior exercise routine, standing calf raises are one of the simplest and most underrated balance exercises for elderly adults that deliver real, measurable results. Research consistently shows that lower leg strength is directly connected to better balance scores and lower fall rates in aging adults.
Proper Technique Using a Chair for Support
Getting the form right on calf raises is straightforward, but the details matter — especially when it comes to safety and getting the most out of each rep.
What you need:
- A sturdy chair, kitchen counter, or wall
- Flat, supportive footwear (or bare feet on a non-slip surface)
- A clear space of about 2 feet around you
Step-by-step instructions:
- Stand behind the chair and place both hands lightly on the back for support. You’re not leaning heavily on it — just using it to stay steady.
- Place your feet hip-width apart, with toes pointing straight forward or very slightly outward.
- Slowly rise up onto the balls of your feet, lifting your heels as high as you comfortably can. Aim for a full range of motion.
- Pause at the top for 1–2 seconds. This is where the real balance work happens.
- Lower your heels back down slowly and with control. Don’t let them drop — the lowering phase is just as important as the lifting.
- Repeat for 10–15 repetitions, rest for 30–60 seconds, and complete 2–3 sets.
Key form tips:
- Keep your core lightly engaged throughout — think tall posture, not rigid
- Avoid locking your knees; keep them soft and slightly bent
- Don’t lean into the chair for balance; let your legs do the work
- Breathe normally — exhale as you rise, inhale as you lower
This is one of those low impact strength exercises that doesn’t feel like much in the moment, but after a few weeks you’ll notice a real difference in how steady you feel on your feet.
Easy Ways to Add More Challenge as Strength Improves
One of the best things about calf raises is that they scale up really naturally as you get stronger. You don’t need fancy equipment — just small adjustments that force your muscles to work a little harder each time.
Progression options from easiest to most challenging:
| Level | Modification | What It Does |
|---|---|---|
| Beginner | Two hands on chair back | Full support, builds initial strength |
| Intermediate | One hand on chair back | Increases balance demand |
| Advanced | Fingertips only on chair | Near-independent balance work |
| Challenge | No hands, arms at sides | Full balance training |
| Single-leg | One foot, other foot raised | Maximum calf and ankle activation |
Other ways to increase difficulty:
- Slow it down — Try a 3-second lift and 3-second lower. The slower tempo makes each rep significantly harder without adding any weight or risk.
- Add a hold at the top — Pausing for 3–5 seconds at the peak position seriously increases the demand on your stabilizing muscles.
- Try it on a slight incline — Standing with your heels hanging just slightly off a low step (while holding on for safety) gives a deeper range of motion and a bigger calf stretch.
- Add light ankle weights — Once single-leg raises feel manageable, 1–2 lb ankle weights can help continue building strength.
The goal is to always be just slightly outside your comfort zone — not in pain, but working hard enough that the last couple of reps feel like an effort.
How This Exercise Supports Better Posture
Most people don’t connect calf strength to posture, but the link is real and direct. Your body works as a chain from the ground up, and what happens at your feet and ankles ripples all the way up through your knees, hips, and spine.
Here’s how calf raises help your posture:
- They encourage you to stand tall. The act of rising onto the balls of your feet naturally lifts your chest, pulls your shoulders back, and lengthens your spine. Do this regularly and your body starts to carry that upright alignment into your everyday posture.
- They strengthen the posterior chain. Your calves are part of the back-of-body muscle group that includes your hamstrings and glutes. When these muscles are strong and engaged, they help counteract the forward-hunching posture that many seniors develop over time.
- They train proprioception. Proprioception is your body’s sense of where it is in space. Calf raises — especially single-leg variations — sharpen this awareness, which directly improves how you carry yourself when walking or standing.
- They reduce forward lean. Weak calves often cause older adults to lean slightly forward when standing, which puts extra pressure on the lower back and knees. Building calf strength helps you stand more evenly distributed over your feet.
For strength training for seniors, this is exactly the kind of exercise that delivers double duty — it builds muscle and supports the structural alignment your body needs to stay pain-free and upright every day.
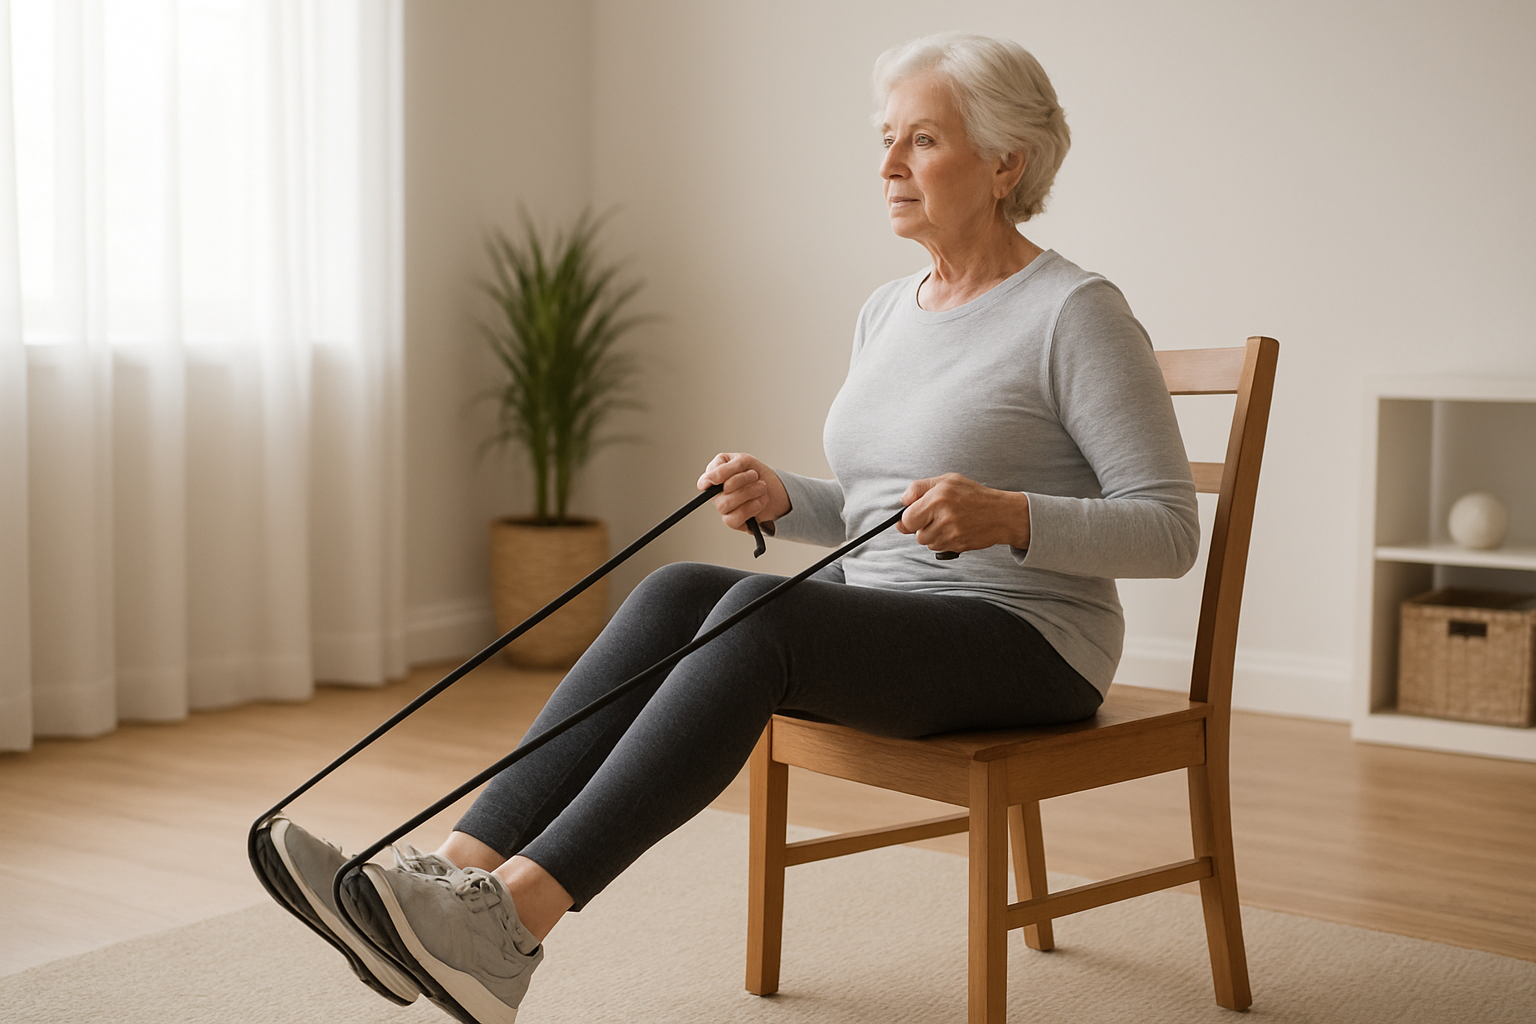
Seated Row With Resistance Bands for a Stronger Back
How a Strong Back Protects Against Chronic Pain
Your back does an enormous amount of work every single day — holding you upright, supporting your spine, helping you reach, lift, and carry. When the muscles that run along your spine, shoulders, and upper back get weak, that workload doesn’t disappear. It just shifts onto the wrong places — your joints, your discs, your hips — and that’s when chronic pain starts creeping in.
For older adults, a weak back is one of the leading contributors to persistent lower back pain, poor posture, and that dreaded “hunching forward” look that comes with age. The good news? You can reverse a lot of that damage with consistent resistance band exercises for seniors that specifically target the back muscles.
Here’s what a strong back actually does for you:
- Reduces compression on the spine — strong muscles act like a natural support brace around your vertebrae
- Improves posture — pulling your shoulders back and keeping your head aligned over your hips
- Lowers injury risk — when your back muscles are strong, everyday movements like picking something up off the floor become far safer
- Decreases everyday aches — tight, weak back muscles are often the hidden cause of that nagging soreness between your shoulder blades or across your lower back
- Supports balance — a stable back creates a more stable body overall, which matters enormously for fall prevention
The seated row is one of the best low impact strength exercises for achieving all of this without putting your body under the kind of stress that free weights or machines might cause.
Choosing the Right Resistance Band for Beginners
Walk into any sporting goods store and you’ll see a wall of resistance bands in what feels like 50 different colors and styles. It’s overwhelming, but the decision is actually pretty simple once you know what to look for.
Types of Resistance Bands
| Band Type | What It Looks Like | Best For |
|---|---|---|
| Loop Bands | Flat circular loop | Lower body exercises, not ideal for seated rows |
| Tube Bands with Handles | Long tube with plastic handles on each end | Perfect for seated rows — easiest to grip |
| Flat Therapy Bands | Long flat ribbon (no handles) | Physical therapy, gentle movements |
| Figure-Eight Bands | Short band shaped like an 8 | Targeted upper body work |
For the seated row, tube bands with handles are your best friend. The handles give you a secure grip and put less strain on your wrists and fingers — something that matters a lot for seniors dealing with arthritis or reduced hand strength.
Understanding Resistance Levels
Bands are typically color-coded by resistance level, though the colors vary by brand. As a general guide:
- Yellow or Light Pink — Very light resistance, great for absolute beginners or anyone recovering from injury
- Green — Light resistance, good starting point for most beginners
- Red — Medium resistance, suitable once you’ve built some baseline strength
- Blue — Medium-heavy, for those with more experience
- Black or Purple — Heavy resistance, typically for advanced users
Start lighter than you think you need to. This is one of the most common mistakes people make. If you can complete 12 repetitions with good form and feel almost nothing, go up a level. But if you’re struggling after 6 reps or your form starts falling apart, drop back down. There is zero shame in using a lighter band — your muscles don’t know the color, they only know the tension.
What to Look for When Buying
- Handles with foam or rubber grip — easier on the hands
- Latex-free options if you have any latex sensitivity
- A set with multiple resistance levels — these are often inexpensive and let you progress without buying new equipment
- At least 4–5 feet in length — shorter bands make it hard to get the right range of motion when seated
Step-by-Step Guide to Performing the Seated Row Correctly
This is one of the most beginner-friendly resistance band exercises for seniors, and it can be done from a chair, a sturdy stool, or even the floor if you prefer. No gym required.
What You’ll Need
- A tube resistance band with handles
- A sturdy chair without wheels
- Comfortable, non-restrictive clothing
Starting Position
- Sit toward the front edge of your chair — not all the way back. You want your hips at roughly a 90-degree angle with your feet flat on the floor.
- Extend your legs out in front of you, keeping a slight bend in your knees rather than locking them straight.
- Loop the center of the band around the bottoms of your feet — both feet together works well, or you can wrap it around just the balls of your feet for a slightly different angle.
- Hold one handle in each hand with your palms facing each other (neutral grip).
- Sit tall — spine straight, chest lifted, shoulders relaxed down and back. Avoid rounding forward or slumping.
Performing the Movement
Step 1 — Find your starting position:
Arms extended forward, slight tension already in the band. Don’t let the band go completely slack. There should be a gentle pull even before you begin the row.
Step 2 — Initiate with your back, not your arms:
This is the key technique point. As you begin to pull the handles toward your body, think about squeezing your shoulder blades together first. Imagine you’re trying to hold a pencil between your shoulder blades. Your arms will naturally follow.
Step 3 — Pull the handles toward your lower ribcage:
Draw both handles back until they reach the sides of your torso, just below your chest. Your elbows should travel close to your sides — not flaring out to the sides like wings.
Step 4 — Pause and squeeze:
At the end of the pull, hold for 1–2 seconds. This brief pause is where most of the real muscle work happens. You should feel the muscles between and below your shoulder blades contracting firmly.
Step 5 — Slowly return to start:
Control the release. Don’t just let the band snap your arms back forward. Take 2–3 seconds to extend back to the starting position. That slow return builds just as much strength as the pull itself.
Repeat for 10–12 repetitions per set. Aim for 2–3 sets.
Form Checkpoints to Watch For
- ✅ Spine stays tall throughout — no hunching at the top of the row
- ✅ Elbows stay close to your sides
- ✅ Shoulder blades actively squeeze together at the end of the pull
- ✅ Breathing is steady — exhale as you pull, inhale as you release
- ✅ Movement is slow and controlled, not fast or jerky
- ❌ Avoid leaning backward to complete the pull — that’s your lower back compensating
- ❌ Avoid shrugging your shoulders up toward your ears
- ❌ Avoid holding your breath
Modifying for Your Fitness Level
| Modification | Who It’s For |
|---|---|
| Loop band around feet and hold the band itself (no handles) | Those with grip difficulties |
| Perform one arm at a time | Anyone with shoulder asymmetry or post-surgery recovery |
| Use a lighter band with higher reps (15–20) | Building endurance rather than strength |
| Perform from a wheelchair with band anchored to a door | Limited mobility situations |
| Add a 3-second pause at the end of each pull | More advanced, want increased challenge |
As part of a senior exercise routine, the seated row hits muscles that almost every other common exercise ignores — specifically the rhomboids, middle trapezius, and rear deltoids. These muscles are critical for keeping your shoulders from rolling forward and maintaining the upright posture that keeps you looking and feeling younger. Done consistently as part of a weekly workout plan for seniors, this single exercise can make a noticeable difference in how your back feels within just a few weeks.
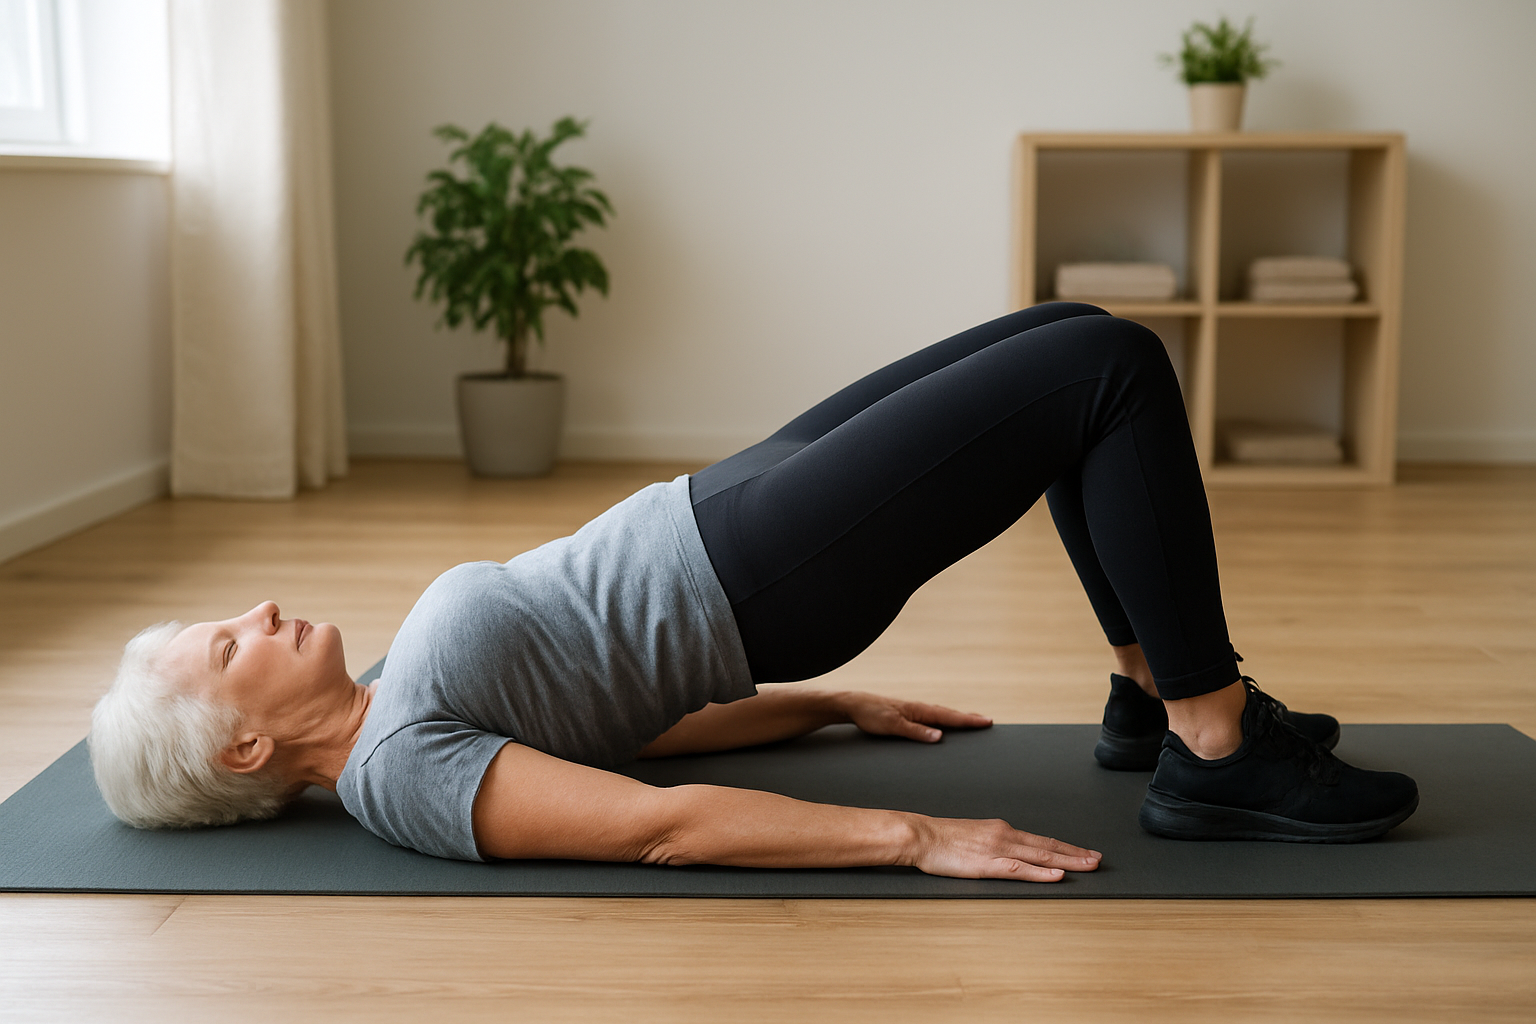
Glute Bridges for Core Stability and Hip Power
How Strong Glutes Improve Mobility and Posture
Most people don’t think about their glutes until something hurts — and by then, weakness in this area has already been causing problems for a while. Your glute muscles (the three muscles that make up your backside) are the powerhouse of nearly every movement you make during the day — standing up from a chair, climbing stairs, walking across a parking lot, even just holding yourself upright while you stand at the kitchen counter.
When these muscles are weak, your lower back tends to pick up the slack. That’s a big part of why so many older adults deal with chronic lower back pain. Weak glutes also throw off your hip alignment, which affects your knees, ankles, and everything above the waist. Strengthening this area as part of a regular senior exercise routine creates a kind of ripple effect — your posture improves, your stride gets more confident, and everyday tasks feel noticeably easier.
Strong glutes also play a direct role in balance. Since they help stabilize the pelvis, they keep you from wobbling when you shift your weight from one foot to the other — something you do thousands of times a day without realizing it.
Proper Technique to Protect the Lower Back
The glute bridge is one of the safest low impact strength exercises you can do, but only when your form is on point. Done incorrectly, it can actually load up your lower spine instead of your glutes — which defeats the whole purpose.
Here’s how to do it right:
- Lie flat on your back on a yoga mat, carpet, or firm mattress — something with just enough cushion to protect your spine.
- Bend your knees and place your feet flat on the floor, about hip-width apart. Your heels should be close enough that you can almost brush them with your fingertips.
- Press your lower back gently into the floor before you begin — this “neutral spine” position is your starting point.
- Take a breath in, then as you exhale, press through your heels and lift your hips off the floor, squeezing your glutes at the top.
- Hold for 2–3 seconds at the top. Your body should form a straight diagonal line from your shoulders to your knees — no arching your back to get higher.
- Lower slowly and with control, taking about 3 seconds to come back down.
- Rest briefly and repeat.
Key form checkpoints:
| What to check | What good form looks like |
|---|---|
| Foot position | Flat on floor, hip-width apart |
| Knee alignment | Pointing forward, not caving inward |
| Hip height | Aligned with knees and shoulders |
| Lower back | Not excessively arched at the top |
| Neck and shoulders | Relaxed, flat on the floor |
| Glute engagement | You should feel the squeeze, not your lower back |
A common mistake is pushing the hips way too high and arching the lower back. That’s your lumbar spine doing the work, not your glutes. Keep it controlled and focus on feeling the squeeze in the back of your hips rather than just going for height.
Beginner Variations to Build Confidence
If you’re just getting started with strength exercises for aging adults, or if you have any hip or knee discomfort, there are simple ways to make glute bridges more approachable without losing their benefits.
Partial Range Glute Bridge
Instead of lifting your hips all the way up, just raise them a few inches off the ground. This still activates the glutes with far less demand on the joints. As you get stronger over a few weeks, you’ll naturally be able to lift higher.
Supported Glute Bridge
Place a folded blanket or a small firm pillow under your lower back before you begin. This gives you a reference point and takes pressure off the spine as you learn the movement pattern.
Feet Elevated on a Chair
Place your feet flat on the seat of a sturdy chair instead of the floor. This position changes the angle slightly and can be easier on the knees for some people. It also gives you a little extra range of motion at the top.
Single Rep Focus
Rather than doing a set of repetitions, try doing just one slow, deliberate rep at a time. Lift, hold for five seconds, lower, rest, repeat. This lets you focus entirely on how the movement feels without fatigue making your form sloppy.
Recommended starting point for beginners:
- 2 sets of 8–10 reps
- Rest 60–90 seconds between sets
- 2–3 times per week as part of a broader weekly workout plan for seniors
How to Progress Toward a More Challenging Version
Once you can do 2–3 sets of 12 reps with clean form and no discomfort, it’s time to make things a little harder. Progression doesn’t mean you have to add heavy weights — small changes go a long way with this exercise.
Single-Leg Glute Bridge
This is the most effective progression and also one of the best balance exercises for elderly adults. From the standard position, extend one leg straight out while keeping the other foot flat on the floor. Perform your bridge on the single planted leg. This doubles the demand on the working glute and also challenges core stability.
Add a Hold at the Top
Instead of moving up and down rhythmically, pause at the top for 5–10 seconds before lowering. This isometric hold builds endurance in the glute muscles and teaches your body to stabilize under load.
Place a Resistance Band Above the Knees
Loop a light resistance band just above both knees. As you bridge up, actively press your knees outward against the band. This targets the gluteus medius (the outer glute), which is critical for hip stability and reducing the risk of falls.
Add a March at the Top
Once your hips are raised, slowly lift one foot an inch or two off the floor, hold for a second, place it back down, then lift the other. Alternating this “march” while maintaining hip height is genuinely challenging — and a great test of glute endurance.
Add a Dumbbell or Weighted Plate
Rest a light dumbbell or folded towel across your hips (held in place with both hands) as you perform the movement. Even a few pounds of added resistance makes a significant difference over time.
Progression timeline (approximate):
| Stage | What it looks like | When to move on |
|---|---|---|
| Beginner | Partial or supported bridge, 2×8 | After 2–3 weeks of consistent practice |
| Intermediate | Full bridge, 3×12, with 3-second hold | When reps feel easy and form is solid |
| Advanced | Single-leg bridge or banded bridge | When intermediate is consistently effortless |
| Challenge | Marching bridge or weighted bridge | Ongoing — keep adding challenge every few weeks |
The goal with strength training for seniors isn’t to push to exhaustion — it’s steady, manageable progress that builds real-world strength over time. The glute bridge, done consistently each week, delivers results that show up where it matters most: getting out of chairs more easily, walking with more confidence, and moving through your day without the nagging aches that used to slow you down.
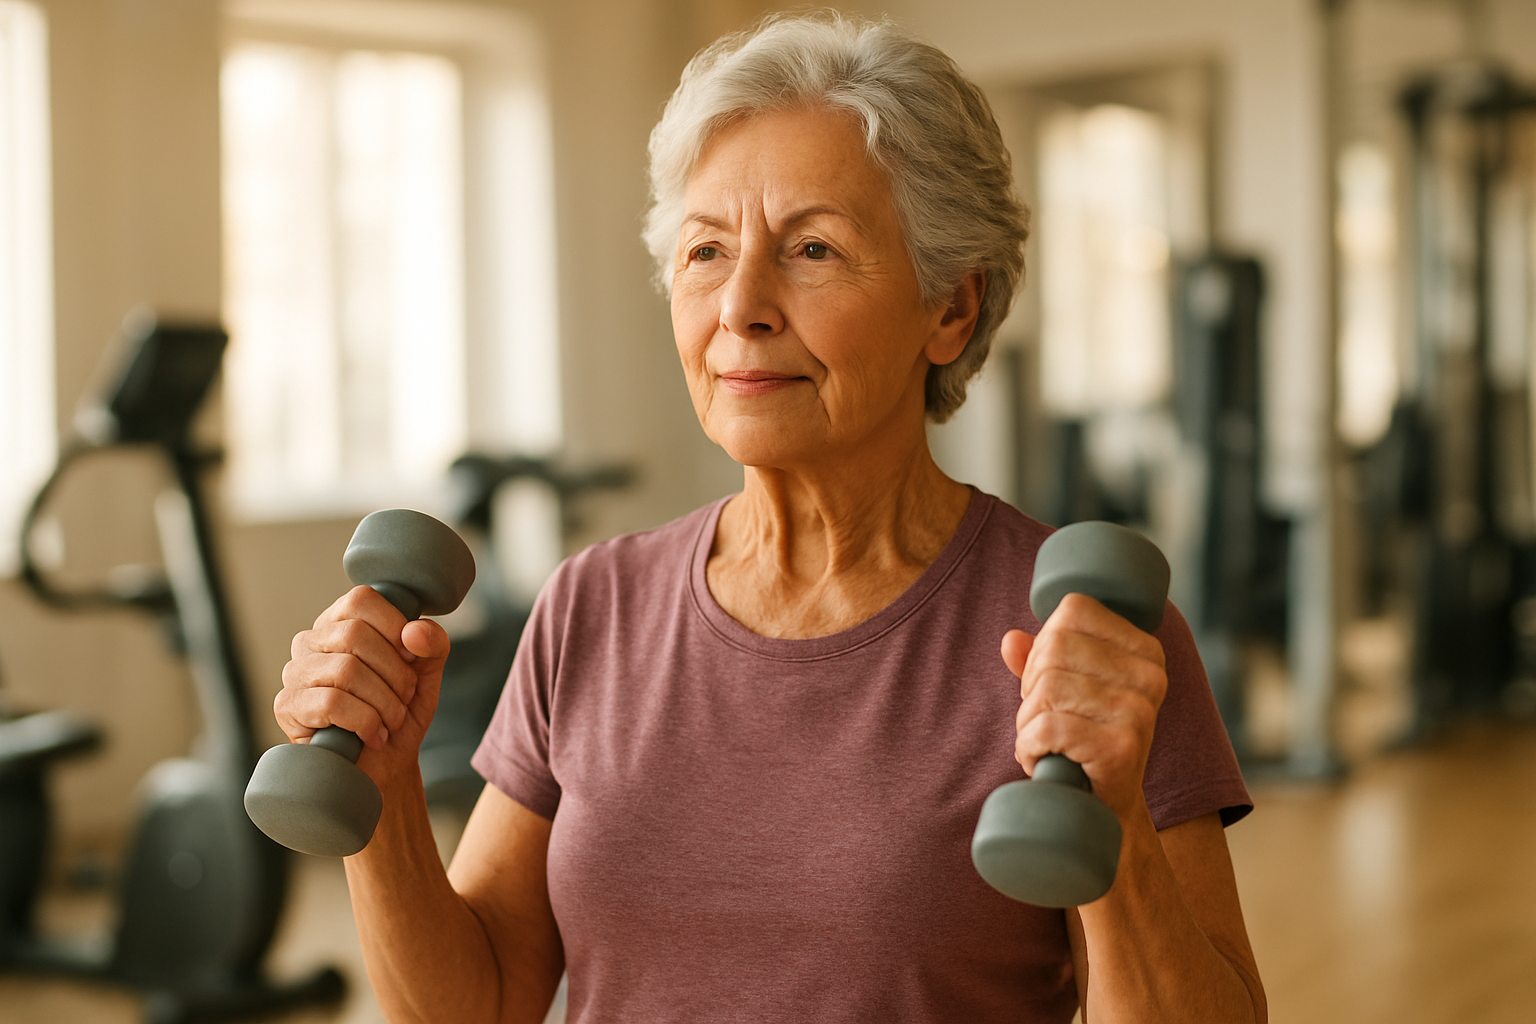
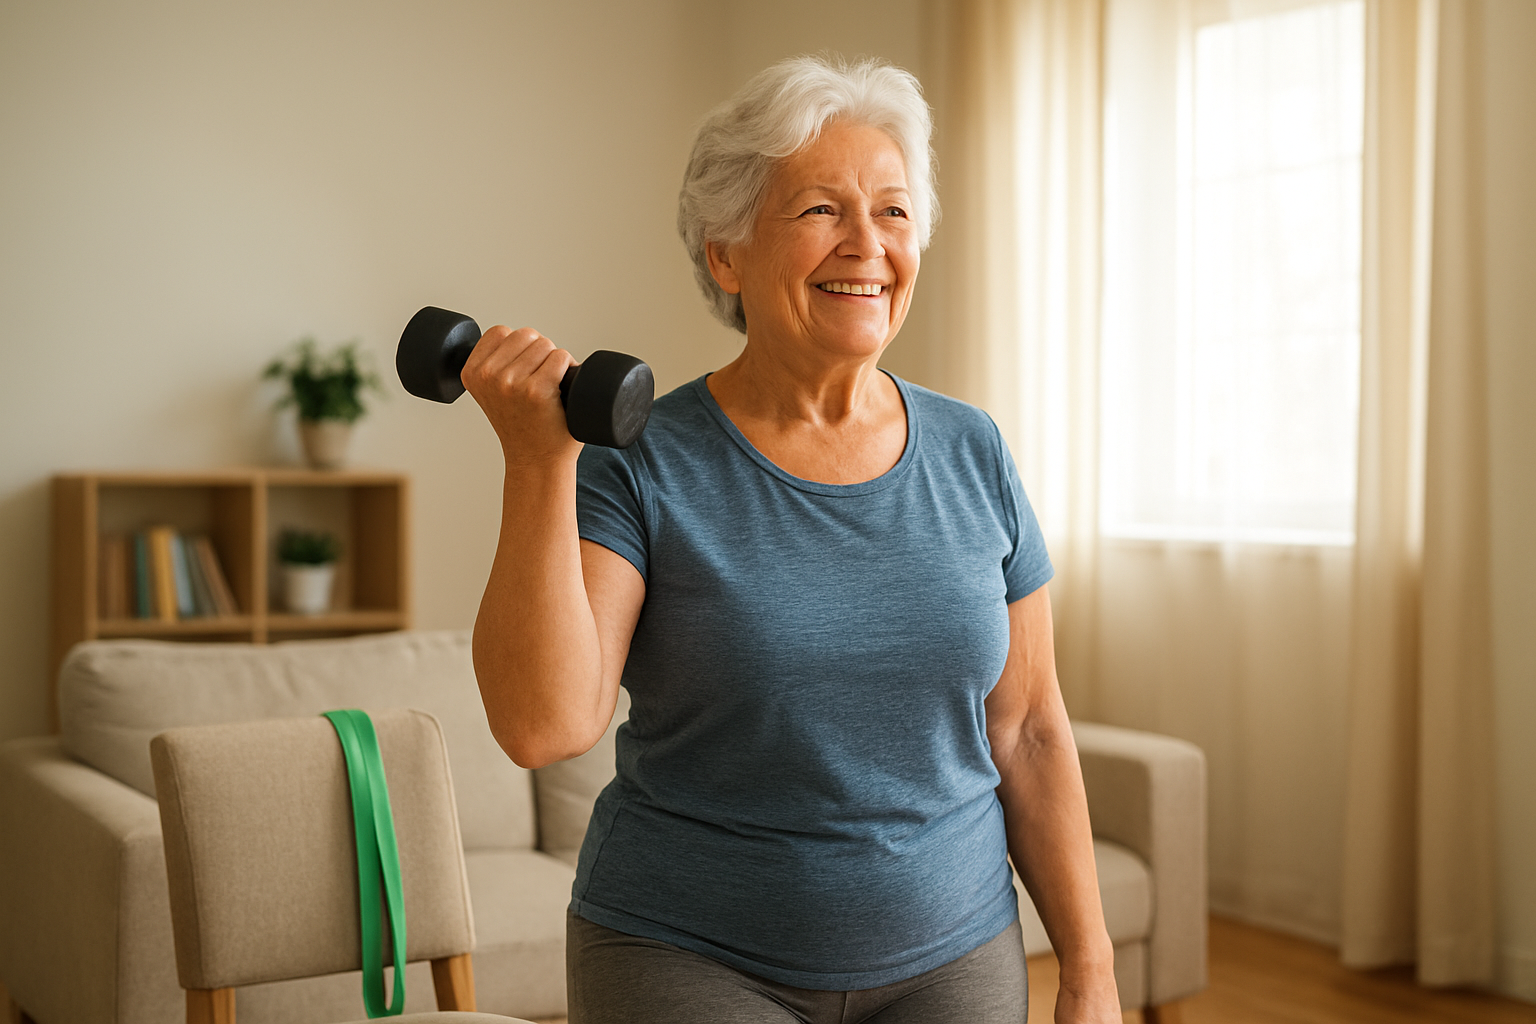
Dumbbell Bicep Curls for Functional Arm Strength
Everyday Tasks That Become Easier With Stronger Arms
Carrying groceries from the car to the kitchen. Lifting a grandchild for a hug. Pulling open a heavy door. Moving a laundry basket from one room to the next. These are the moments where arm strength quietly shapes your quality of life — and most people don’t realize how much they rely on it until it starts to fade.
For older adults, the biceps do a lot more than look good in a short sleeve shirt. They’re involved in almost every pulling and lifting motion you make throughout the day. When those muscles are strong and responsive, daily tasks feel effortless. When they’re weak, something as simple as getting a pot off a high shelf can feel like a real struggle — or worse, create a risk for injury.
Dumbbell bicep curls are one of the best low-impact strength exercises you can add to a senior exercise routine specifically because the payoff shows up in real life. Stronger arms mean:
- Easier grocery and bag carrying without shoulder strain or forearm fatigue
- Better ability to push and pull when getting in and out of a car
- More confidence when lifting objects at home without asking for help
- Reduced strain on joints because the muscle is doing the work instead of tendons and ligaments
- Greater independence in day-to-day activities, which matters more than most exercises get credit for
This kind of functional arm strength is exactly what strength training for seniors should target — movement that transfers directly from the gym (or living room) to everyday life.
Selecting the Right Dumbbell Weight to Start Safely
One of the biggest mistakes beginners make in any strength training for aging adults is grabbing a weight that’s either way too heavy or so light it offers zero challenge. Neither extreme does much for you.
Here’s a simple rule of thumb: pick a weight where the last two or three reps of a set feel genuinely hard, but you can still complete them with good form. If you’re breezing through 12 reps without any effort, go a little heavier. If your form is breaking down by rep 6, drop down.
For most seniors starting out, a safe and practical starting range looks like this:
| Starting Fitness Level | Suggested Dumbbell Weight |
|---|---|
| Little to no recent exercise | 2–5 lbs |
| Moderately active, some strength base | 5–8 lbs |
| Regularly active, comfortable with weights | 8–12 lbs |
These are just starting points, not permanent labels. The goal is to gradually increase the weight as you get stronger — a concept called progressive overload — which is what actually builds muscle over time.
A few other things to keep in mind when choosing your weight:
- Start lighter than you think you need to. It’s much smarter to work your way up than to strain something on day one.
- Use dumbbells with a comfortable grip. Rubberized or neoprene-coated dumbbells are easier on the hands and less likely to slip.
- Don’t skip both sides. Always curl with both arms to keep strength balanced and avoid compensating with one side.
- Check in with your doctor if you have any history of shoulder, elbow, or wrist issues before adding weighted curls to your routine. A light resistance band can sometimes be a gentler alternative to start with.
The weight you use matters less than the habit you build. Showing up consistently with a manageable weight will do far more for your strength than heroic efforts with something too heavy.
Tips for Maintaining Proper Form Throughout Each Rep
Good form is what separates an exercise that works from one that hurts. With bicep curls, the movement looks simple — and it is — but there are a few form mistakes that seniors commonly make that reduce the effectiveness of the exercise and put unnecessary stress on the elbows and lower back.
Here’s how to do a bicep curl the right way, step by step:
- Stand with your feet shoulder-width apart, or sit in a sturdy chair if standing balance is a concern. Both versions work just as well.
- Hold a dumbbell in each hand, arms fully extended at your sides, palms facing forward.
- Keep your elbows tucked close to your torso — they should stay in place like they’re pinned to your sides throughout the entire movement.
- Curl the weights up slowly toward your shoulders, squeezing the bicep at the top. Aim for a 2-second lift.
- Lower the weight back down with control — don’t just drop it. A slow 3-second descent is where a lot of the strength-building actually happens.
- Breathe out as you curl up, breathe in as you lower down. Don’t hold your breath.
Common form mistakes to watch for:
- Swinging the back or shoulders to help lift the weight — this means the weight is too heavy
- Flaring the elbows outward instead of keeping them tucked
- Rushing through reps without control, especially on the way down
- Locking the elbows at the bottom — keep a soft bend to protect the joint
- Shrugging the shoulders up during the curl, which adds tension to the neck instead of the bicep
If you want to check your form, do a set in front of a mirror or ask someone to watch you. Filming yourself for a few seconds on your phone is another great way to catch habits you might not feel in the moment.
For seniors who experience any wrist discomfort during the standard curl, try a hammer curl variation — holding the dumbbell so your palms face each other (like you’re holding a hammer) throughout the movement. This takes pressure off the wrist while still targeting the biceps and forearms effectively.
Aim for 2 to 3 sets of 10 to 12 reps, two to three times per week as part of a balanced senior fitness routine. Give your muscles at least one rest day between sessions so they have time to recover and grow stronger.
Side Leg Raises for Hip Strength and Better Balance
Why Hip Strength Is Vital for Walking and Climbing Stairs
Your hips do a lot more heavy lifting than most people realize. Every time you take a step, climb a stair, or push yourself up from a chair, your hip muscles are doing a big chunk of the work. When those muscles get weak — which naturally happens as we age — everyday activities start to feel harder, slower, and a little shakier.
Weak hips are one of the leading reasons older adults develop an unsteady gait. That wobble in your step isn’t just annoying — it raises your fall risk significantly. Hip weakness also puts extra strain on your knees and lower back, which is why some seniors end up dealing with joint pain that actually starts at the hip but shows up elsewhere.
The good news is that the hip abductors (the muscles on the outside of your hip) respond really well to targeted training. Side leg raises hit these muscles directly and consistently. After just a few weeks of doing them regularly, most seniors notice:
- A more stable, confident stride when walking
- Less effort climbing stairs or stepping up curbs
- Better balance when standing on one leg (like when you’re putting on pants or shoes)
- Reduced knee and lower back discomfort
This is one of those balance exercises for elderly that doesn’t look impressive but quietly makes a huge difference in day-to-day life.
How to Perform Standing Side Leg Raises With Good Posture
Getting the form right is everything with this move. Done correctly, you’ll feel it in exactly the right place. Done sloppily, you’ll just be swaying back and forth without much benefit.
Step-by-step instructions:
- Start standing tall with your feet hip-width apart. Keep a slight bend in both knees — never lock them out.
- Engage your core by gently pulling your belly button toward your spine. This protects your lower back throughout the movement.
- Slowly lift one leg out to the side, keeping your toes pointing forward (not toward the ceiling). Aim for a lift of about 12–18 inches. You don’t need to go higher — quality beats height every time.
- Pause at the top for one second and really feel the squeeze in your outer hip.
- Lower your leg back down slowly — this is where a lot of the strength-building happens, so don’t just drop it.
- Complete your reps on one side before switching.
Common mistakes to avoid:
| Mistake | Why It’s a Problem | Fix |
|---|---|---|
| Leaning your upper body to the side | Removes work from the hip, strains the spine | Keep your torso completely upright |
| Turning your toes upward | Shifts work to different muscles | Keep toes facing forward throughout |
| Rushing through the movement | Reduces muscle engagement | Count 2 seconds up, 1 second hold, 2 seconds down |
| Lifting the leg too high | Causes hip hiking and compensations | Stop at a comfortable, controlled height |
Aim for 10–15 repetitions per side to start. The movement should feel like a steady burn in your outer hip, not a sharp pain anywhere.
Using a Chair for Added Safety and Stability
There’s absolutely no shame in using a chair for this exercise — in fact, for many seniors, it’s the smarter choice. Having a chair nearby lets you focus entirely on the movement without worrying about tipping over. That mental peace makes the exercise more effective, not less.
How to use a chair properly:
- Place a sturdy chair (no wheels) to your side or slightly in front of you
- Rest your fingertips lightly on the back of the chair — just enough to steady yourself, not enough to lean into it
- Try to do the movement with as little weight on your hand as possible; the goal is to train your balance, not bypass it
Progression from chair-assisted to freestanding:
- Week 1–2: Full hand grip on the chair back for support
- Week 3–4: Fingertip touch only — rest just one or two fingers lightly
- Week 5–6: Hover your hand near the chair without touching
- Week 7+: Try the movement without the chair, standing near a wall just in case
This gradual reduction in support is actually one of the best balance exercises for elderly adults you can build into a routine. Your body learns to stabilize itself progressively, rather than being thrown into full freestanding balance all at once.
Progression Tips to Keep Challenging Your Muscles
Your muscles adapt. That’s a good thing — it means the training is working. But once they’ve adapted, you need to give them a new challenge to keep getting stronger. Here’s how to smartly progress with side leg raises over time:
Add an ankle weight
Once bodyweight side leg raises start feeling easy, strap on a light ankle weight (start with 1–2 lbs). This simple addition dramatically increases the load on your hip abductors without changing the exercise at all.
Slow the movement down
Try a 4-second lift and a 4-second lower. This “time under tension” approach makes the same movement significantly harder and builds strength without needing heavier weights.
Add a brief hold at the top
Instead of a one-second pause, hold for 3–5 seconds at the peak of the lift. That static hold fires up the stabilizing muscles in a different way.
Try the lying version
Side-lying leg raises (done on a mat on the floor) remove any balance challenge but allow for even greater range of motion and muscle isolation. This is a great variation to rotate in.
Increase your reps gradually
- Beginner: 10 reps per side
- Intermediate: 15 reps per side
- Advanced: 20 reps per side with ankle weights
The key in any senior exercise routine is to progress slowly and intentionally. Jumping ahead too quickly is how strains happen. Aim to increase difficulty only when you can comfortably complete your current level with good form for two sessions in a row.
How This Move Complements the Other Six Exercises
Side leg raises don’t just stand alone — they slot into a complete strength training for seniors routine in a really smart way. Each of the seven exercises in this routine targets a different area of the body, and together they build the kind of whole-body strength that keeps you moving well and staying independent.
Here’s how the side leg raise connects with the rest:
- Chair Squats build strength in the front of your legs and glutes. Side leg raises fill in the gap by strengthening the outer hips, giving you a more complete lower body.
- Glute Bridges work your glutes and hamstrings from the back. Side leg raises target the hip abductors on the outside — together, these two moves create strong, balanced hips from every angle.
- Standing Calf Raises improve ankle stability. Pair that with stronger outer hips from side leg raises, and you’ve built a foundation that makes balance dramatically better.
- Seated Rows and Wall Push-Ups handle your upper body pulling and pushing strength. By including side leg raises, you make sure your lower body isn’t being neglected in the routine.
- Dumbbell Bicep Curls build functional arm strength. When your hips and arms are both strong, daily tasks — carrying groceries, climbing stairs, getting in and out of the car — become genuinely easier.
Think of this full low impact strength exercise routine as a team. Every exercise plays its position. Side leg raises are the quiet, reliable player that keeps your hips steady, your balance sharp, and your gait smooth — and that matters every single day, not just during your workout.
Building a Consistent Weekly Strength Routine That Sticks
How Many Days Per Week to Train for Best Results
For most seniors, two to three days of strength training per week hits the sweet spot. That’s enough to build real muscle, improve bone density, and boost everyday function — without overdoing it and risking injury or burnout.
Here’s a simple breakdown of how different training frequencies stack up:
| Training Frequency | Best For | Notes |
|---|---|---|
| 2 days/week | Beginners or those returning after a break | Great starting point; allows full recovery |
| 3 days/week | Intermediate seniors ready to progress | Ideal for most older adults chasing results |
| 4+ days/week | Very active seniors with a solid base | Split routines needed; recovery still essential |
Rest days are not lazy days — they’re when your muscles actually repair and get stronger. Aim to never do back-to-back strength sessions, especially when starting out. Walking, stretching, or light yoga on off days keeps you moving without putting extra strain on your joints.
Pairing Exercises for a Balanced Full-Body Session
The seven exercises covered in this blog work beautifully together, and the key is making sure you’re hitting your whole body each session rather than overloading one area.
A smart approach is to pair a lower body exercise with an upper body exercise, then rotate through. This gives one muscle group a brief rest while the other works. It also keeps your heart rate up in a gentle, manageable way.
Sample Full-Body Session (about 30–40 minutes):
- Warm-up (5 minutes): March in place, shoulder rolls, gentle neck stretches
- Round 1: Chair Squats + Wall Push-Ups
- Round 2: Standing Calf Raises + Seated Row with Resistance Band
- Round 3: Glute Bridges + Dumbbell Bicep Curls
- Finisher: Side Leg Raises (both sides)
- Cool-down (5 minutes): Seated hamstring stretch, deep breathing
Each exercise can be done for 2–3 sets of 10–15 repetitions, resting about 60 seconds between sets. If you’re new to senior exercise routines, start with 1–2 sets and work your way up gradually.
This kind of balanced structure means you’re never skipping muscle groups — your legs, core, back, and arms all get attention every week.
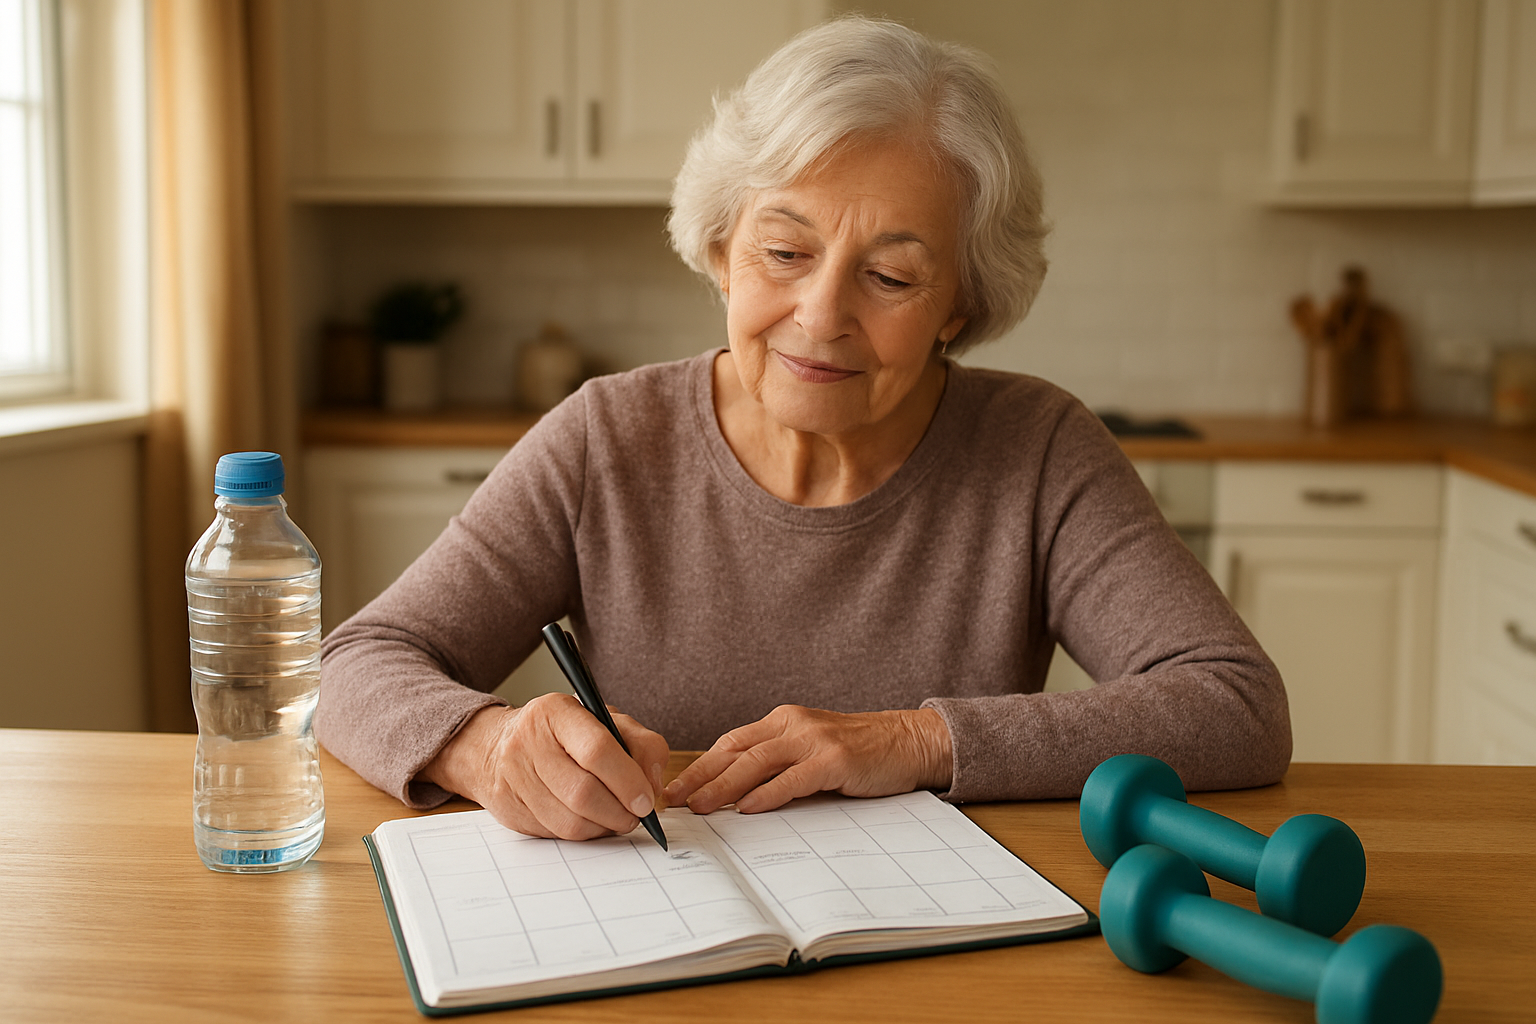
Tracking Progress to Stay Motivated Long Term
One of the biggest reasons seniors (and honestly, people of any age) abandon a workout plan is that they can’t see their progress. Tracking gives you proof that what you’re doing is working, even when the changes feel small.
You don’t need a fancy app or spreadsheet. A simple notebook works perfectly. After each session, jot down:
- What exercises you did
- How many sets and reps you completed
- How hard it felt (easy, moderate, challenging)
- Any notes — knee felt good today, balance was better, etc.
Over weeks and months, you’ll start noticing patterns. You’ll look back and see that you once struggled with 8 chair squats and now you’re breezing through 15. That kind of concrete evidence is incredibly motivating.
Other ways to track non-scale victories:
- Can you get up from a chair more easily than before?
- Are you climbing stairs with less effort?
- Is your posture more upright during the day?
- Do you feel less fatigued after grocery shopping or yard work?
These real-life improvements are exactly what low-impact strength exercises are designed to deliver — and they matter far more than any number on a scale. Taking a short monthly note about how daily activities feel is a great habit that helps you stay connected to your “why.”
How to Adjust the Routine as Fitness Improves
A good strength training program for seniors should grow with you. Doing the exact same thing week after week will eventually stop producing results — your body adapts. That’s a sign of progress, not a problem.
Here’s how to know it’s time to level up:
- You can complete all sets and reps with good form and it feels fairly easy
- You’re not sore at all the day after (early on, mild soreness is normal)
- You feel like you could do more without risking injury
Ways to progress safely:
- Add more reps first. If you’re doing 10 chair squats, try 12–15 before adding any resistance.
- Increase resistance gradually. Move from a lighter resistance band to a medium one, or pick up slightly heavier dumbbells.
- Add a third set. Going from 2 sets to 3 is a meaningful step up without requiring new equipment.
- Reduce rest time slightly. Shortening rest from 90 seconds to 60 seconds makes the session more challenging.
- Try more challenging variations. Wall push-ups can progress to countertop push-ups. Chair squats can progress to standing squats without holding the chair for balance.
The golden rule of progression for older adults: small steps, consistently applied, lead to big changes over time. Jumping ahead too fast is one of the most common mistakes in any weekly workout plan for seniors, and it’s how injuries happen. Respect where your body is today while still challenging it to do a little more than last week.
Staying strong as you get older isn’t just about looking fit — it’s about being able to live life on your own terms. These seven exercises cover all the right areas, from your legs and core to your arms and back, giving your body the support it needs to move with confidence every single day. And the best part? None of them require a gym membership or fancy equipment.
The hardest part is just getting started. Pick two or three exercises from this list and work them into your week. Once they feel comfortable, build from there. Small, steady steps are what create real, lasting change — and your future self will absolutely thank you for putting in the effort now.