


Table of Contents
A SHORT AUDIO OF THE POST
Introduction
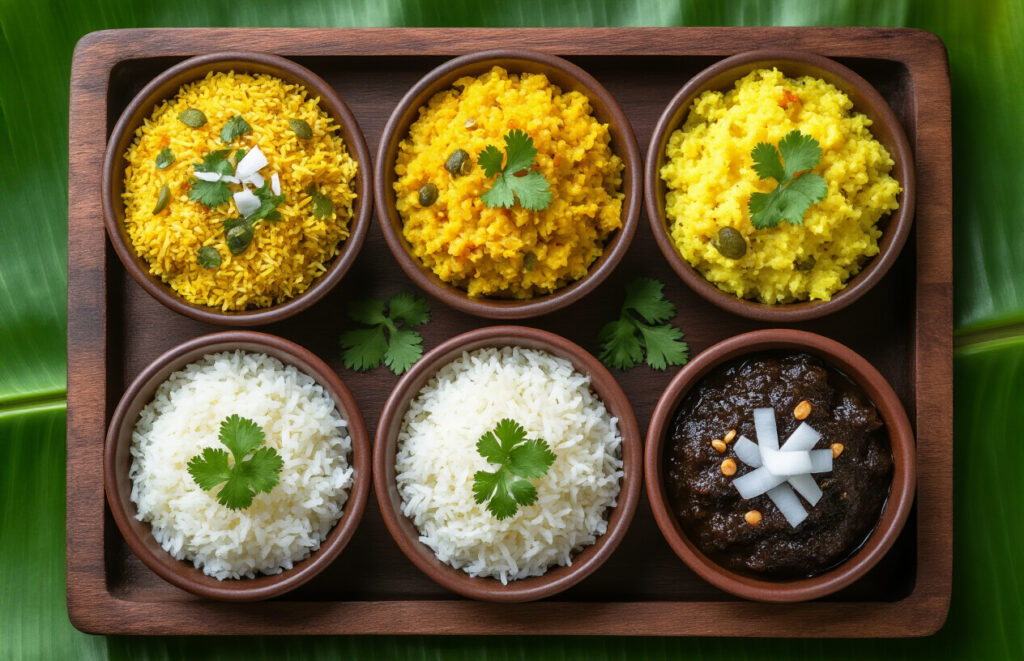
Searching for a quick and wholesome South Indian breakfast? For busy home cooks who enjoy tasty morning meals, rava upma, dhalia upma, rice upma, poha upma, and puli upma are ideal. To keep your breakfast interesting, we’ll go over the fundamental methods for making the ideal upma base and offer some easy variations. To round out your South Indian breakfast experience, you’ll also discover time-saving tricks and traditional serving ideas.
Understanding South Indian Upma Varieties
What is upma and its origins
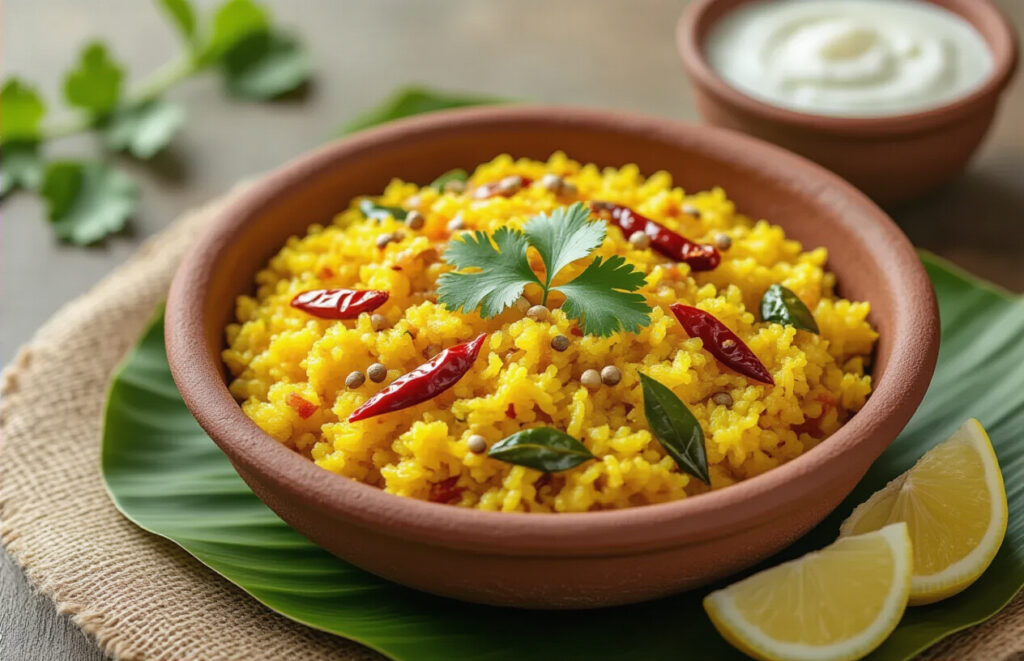
Have you ever had a craving for a quick, savoury, and filling meal? For you, that’s upma! In essence, this South Indian breakfast mainstay is a thick porridge prepared from dry-roasted semolina (rava or sooji) cooked with vegetables, spices, and occasionally nuts.
Originating in South India, specifically in Tamil Nadu and Karnataka, upmaa has long been a popular breakfast food there. The Tamil words “uppu,” which means salt, and “maavu,” which means flour, are the roots of the word “upma.” The traditional version uses semolina, but inventive cooks throughout India have created a wide variety of regional variations.
Common ingredients across upmaa varieties
Some ingredients are the same regardless of the type of upmaa you’re making:
Base ingredient: vermicelli, rice, poha (flattened rice), dhalia (broken wheat), or rava (semolina).
Tempering : Curry leaves, urad dal, chana dal, and mustard seeds are used for tempering.
Aromatics: onions, ginger, and green chillies
Vegetables: tomatoes, peas, and carrots
Acid: Lemon juice (final addition)
Add some fresh coconut and coriander leaves as garnish.
What is the magical part? Despite variations in the base, the process remains remarkably consistent!
Nutritional benefits of upma dishes
Not only is upuma tasty, but it’s also a great food. This is what you will receive:
Complex carbohydrates : provide energy that lasts all morning.
Protein: Particularly when lentils or nuts are added.
Fibre: Found in whole grain products like dhalia and vegetables
Low fat: The majority of upmas temper with very little oil.
Nutrition: that can be easily customised by adding protein, nuts, or vegetables
Why upuma is a perfect breakfast option
Morning rush? Upma’s got your back. This dish wins the breakfast game for several reasons:
Quick to make—15 minutes is all you need. Seriously, who has time for elaborate cooking at 7 AM?
It’s filling without being heavy. No mid-morning hunger pangs or food coma here.
The one-pot preparation means fewer dishes to wash (your future self will thank you).
Most ingredients are pantry staples you already have on hand.
It travels well in lunch boxes and tastes great even at room temperature.
.
Mastering Rava Upma
Essential ingredients for authentic rava upuma
Without the proper ingredients, rava upuma is impossible to master. What you’ll need is as follows:
Rava :The best type of semolina (Rava/Sooji) is medium or fine.
Oil or Ghee: Oil works just as well, but ghee adds that genuine flavour.
Mustard seeds: You can’t compromise on the pop and sizzle.
Curry leaves: New ones add a burst of flavour.
Green chillies: Tailor them to your preferred level of heat.
Ginger : Finely chopped ginger adds a subtle kick.
Onions: Ideally chopped finely
Peanuts and cashews: For that delicious crunch
Vegetables: beans, peas, and carrots (optional)
Water: The proportion is important (typically 1:2 or 1:2.5 rava to water).
Salt : Add salt to taste.
Lemon juice: To add a final touch of tang
Step-by-step cooking process
Roast the rava until it turns a light golden brown and is fragrant. Put aside.
In a deep pan, heat oil or ghee.
Wait for the mustard seeds to splutter after adding them.
Add peanuts and cashews and cook until golden.
If using, add asafoetida, urad dal, and chana dal.
Add curry leaves, ginger, and green chilies.
Add onions and sauté until they become transparent.
If using, add the vegetables and cook for two to three minutes.
Bring to a boil after adding salt and water (roughly 2 to 2.5 cups for 1 cup of rava).
Reduce the heat and stir constantly as you gradually add the roasted rava.
Cook for two to three minutes on low heat with a lid on.
Using a fork, fluff, squeeze the lemon juice, and sprinkle with the coriander.
Tips for achieving perfect texture
Have you ever prepared gluey upuma? We’ve all been there, yes. You’ll save money by using these tips:
To avoid lumps and give it a nutty flavour, always roast the rava first.
When adding rava to water, stir constantly to prevent lumps.
The proportion of water is important; too much water makes upmaa soggy, and too little water makes it dry.
Once the rava is added, don’t overcook it; it should stay fluffy.
After cooking, leave it covered for five minutes to achieve the ideal texture.
Before serving, fluff with a fork rather than a spoon.
Add a little hot water and stir gently if it’s too dry.
Serving suggestions and accompaniments
Upuma is the kind of friend who gets along with everyone. Combine it with:
Coconut chutney: The traditional side dish
Sambar: For a heartier meal.
Pickles: Give every bite a burst of tang.
Chai or filter coffee: The ideal combination of drinks
Lemon wedges: For people who prefer a little more tang
Serve it hot, ideally fresh off the stove. Leftover upmaaa? Sprinkle some water before reheating to bring back its moisture.
Delicious Dhalia Upma Guide

Choosing the right broken wheat
Have you ever taken the first bag of broken wheat off the shelf? I’ve been there! But believe me, it makes a huge difference.
Avoid the extremely fine dalia and instead look for medium-coarse, slightly yellowish dalia. Your dhalia upma has the ideal texture—fluffy but substantial—thanks to the coarser grains. Grain fineness? You’ll have mush in the end.
Your dalia will taste nuttier the fresher it is. Try it out with a quick sniff; it should smell clean, not musty. While you’re at it, look up the packaging date!
Preparing dhalia for maximum flavor
Your secret weapon is roasting. Dry-roast your dalia in a pan until it releases that lovely nutty aroma and turns light golden. On medium heat, this takes roughly three to four minutes.
Soaking beforehand? Don’t do it! Dalia cooks flawlessly without soaking, in contrast to ordinary wheat. To get rid of any dust, simply give it a quick rinse in cold water.
One cup of dalia to two and a half cups of water is the magic ratio, or 1:2.5. You’ll get soggy upma if you do any more. Less? Hi there, grains that aren’t cooked enough!
Health benefits specific to dhalia upma
Dhalia is a nutritional powerhouse in addition to being delicious! Compared to semolina or white rice, it has more fibre, which prolongs feelings of fullness. Ideal for those hunger pangs in the middle of the morning.
It is perfect for diabetics because the complex carbohydrates release energy gradually. It also contains a lot of B vitamins, which increase metabolism.
Including vegetables in your dhalia upma? You now have a full meal that includes fibre, proteins, and other vital nutrients.
Troubleshooting common cooking issues
Are you going crazy because of Lumpy Upma? The solution is as easy as adding the dalia to hot water and stirring constantly. Don’t dump everything at once!
Use a fork to gently fluff your upma after adding a little hot water if it comes out too dry. Too damp? Cook over low heat, uncovered, for a few more minutes.
Burned bottom? In some households, that is considered a delicacy! However, the next time, use a heavy-bottomed pan and reduce the heat if you’re not a fan
Rice Upma Made Simple
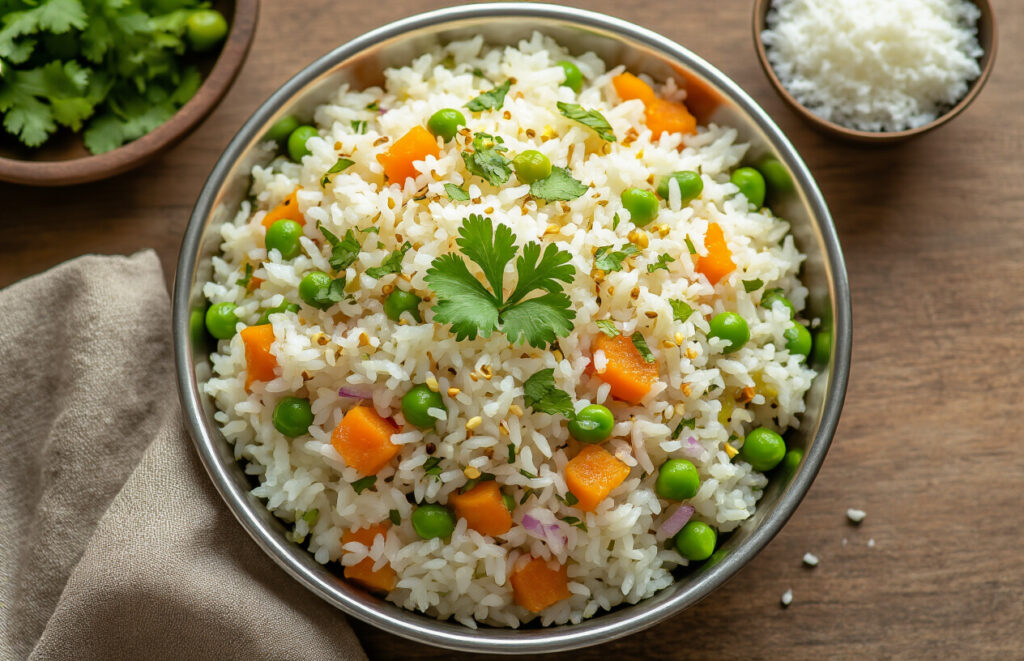
Best rice varieties for upma
Short to medium-grain rice types are necessary for the ideal rice upma. They provide that classic upma consistency because they contain the ideal amount of starch. Your best options are as follows:
Sona Masuri: The pinnacle of South Indian upma
Surti Kolam: The ideal ratio of stickiness to fluff
Ponni rice: Excellent at absorbing flavours
Rice that has been parboiled has a wonderful texture without becoming mushy.
You can also use leftover rice! Just make sure it’s not refrigerator-cold when you start cooking.
Pre-preparation techniques
The key to perfectly separated, non-sticky rice upma? The preparation is key.
Rinse your rice two or three times until the water is largely clear. The game-changing step is to dry roast the rice before cooking it. This additional 3-minute step helps preserve grain integrity and gives your upma that unique nutty aroma.
Before roasting, some grandmothers insist on soaking the rice for 15 to 20 minutes and then completely draining it. When it comes to texture control, this method is magical.
Do you want to avoid wasting morning time? The night before, measure and roast your rice. When you get out of bed, it will be ready for quick cooking because it is kept in an airtight container.
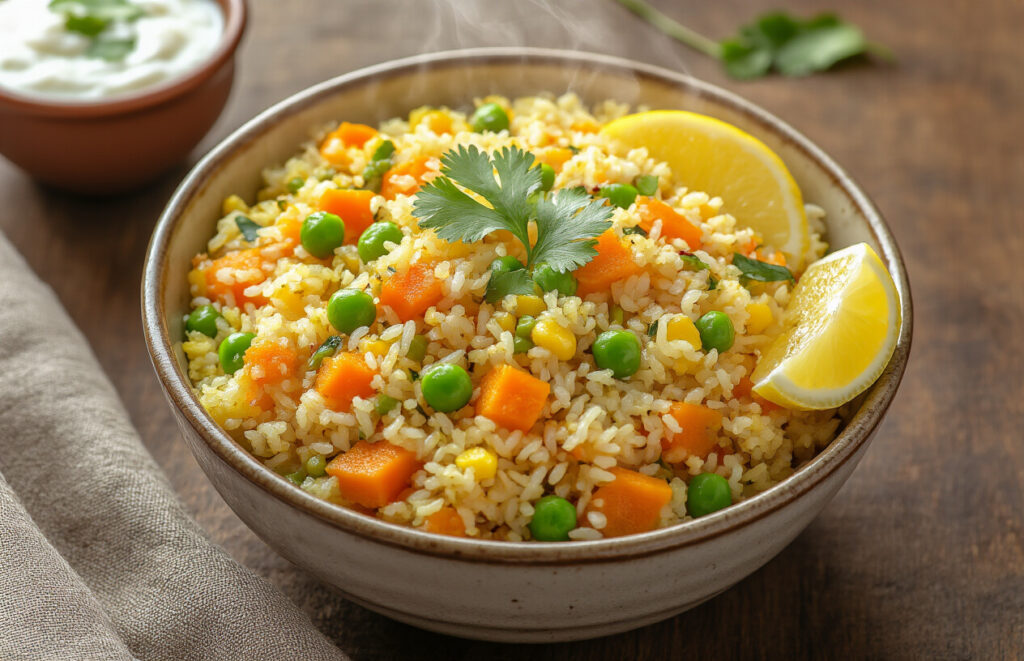
Adding vegetables and protein
Similar to a blank canvas, plain rice upma is excellent but lacking in flavour.
Almost any vegetable can be added to rice upma, which is one of its many wonderful qualities. The classic combo includes:
Carrots (small dice)
Fresh or frozen peas
Why stop there, though? Consider including:
Bell peppers for colour and crunch
Cashews or peanuts that have been roasted
To ensure that everything cooks evenly with the rice, it’s important to cut everything into uniform-sized pieces, like tiny dice.
Making rice upma more flavorful
What distinguishes a rice upma that makes you close your eyes with pleasure from one that is bland? putting flavours on top.
Begin by properly tempering (tadka). Add curry leaves, dried red chillies, asafoetida, and mustard seeds until they pop in heated ghee or oil. The entire dish is infused with this aromatic base.
Don’t skimp on the spices:
Green chillies and grated ginger give a dimension of heat.
Do not add turmeric in this upma, unlike Rava upma
A table spoonful of urad dal and chana dal
When the tadka is ready, add water in the same ratio as 1:2
Season with salt to taste.
After the water has boiled and developed an aromatic flavour, it is time to gradually add the ground rice. Continue stirring the water and rice until the water has blended with the rice and the upma is ready to serve.
The true secret? coconut. It turns plain rice upma into something special, whether it’s added as a freshly grated garnish or stirred in while cooking.
For a rich rice upma flavour, try adding two to three teaspoons of coconut oil at the end.
Quick and Easy Poha Upma
A. Selecting and preparing flattened rice
Have you ever reached for some poha and ended up with a mushy mess? I’ve been there. Selecting the ideal thickness is the first step towards making the ideal poha upma. For upma, a medium thickness is ideal—neither too thick, which will remain hard, nor too thin, which will turn to paste.
Move your poha to an airtight container as soon as you get home from the store. No one wants stale, soggy flakes, and this stuff absorbs moisture like a sponge.
Poha preparation is very easy. Simply give it a quick 30-second rinse in a colander with cold water. When the flakes become slightly softer and break easily when pressed between your fingers, you’ll know it’s ready. You don’t want to drown it, so don’t do too much washing!
B. Traditional maharashtrian poha upma style
The authentic Your taste buds will dance when you taste Maharashtra poha upma. Any cook will love the crackling sound that comes from starting with a small amount of mustard seeds, curry leaves, and hing in hot oil.
Add the green chillies and finely chopped onions and toss until golden. After your poha has soaked, add the turmeric (that beautiful yellow!). Add a little lemon juice, sugar, and chopped coriander, and you’re done.
Why is this version unique? The ideal ratio of sweet, tangy, and spicy flavours. Those peanuts, too! Don’t even consider omitting them; they give this the necessary crunch to make it breakfast royalty.
C. South Indian variations of poha dishes
In the south, poha is rewritten. Have you ever tried Karnataka’s Avalakki Upma? It will make you forget about all other breakfast foods because it is packed with grated coconut and a unique blend of spices.
We get Aval Upma from Tamil Nadu, which is a complete meal in and of itself. They frequently add vegetables like carrots and peas. For added zing, the tempering typically calls for additional curry leaves and occasionally a pinch of ginger.
Not to mention Kerala’s Aval Vilayichathu, which is topped with bananas and coconut and sweetened with cardamom and jaggery. I don’t mind that it’s essentially dessert for breakfast.
D. Time-saving tips for busy mornings
Poha upma is already swift, but here’s how to make it even faster:
Prepare your vegetables the night before by chopping the coriander, onions, and chillies and putting them in the refrigerator.
Have a “tadka kit” on hand, which is a tiny container with measured peanuts, curry leaves, and mustard seeds.
Learn to multitask by starting your tadka in the pan while your poha soaks, which only takes two minutes.
Purchasing high-quality non-stick cookware reduces the amount of time spent cleaning and cooking.
Poha upma actually tastes great at room temperature, so it’s ideal for lunchboxes. Make extra and pack it for lunch.
Poha upma is wonderful because it doesn’t require perfection. You can put this together and still have a tasty dish even if you’re half asleep.
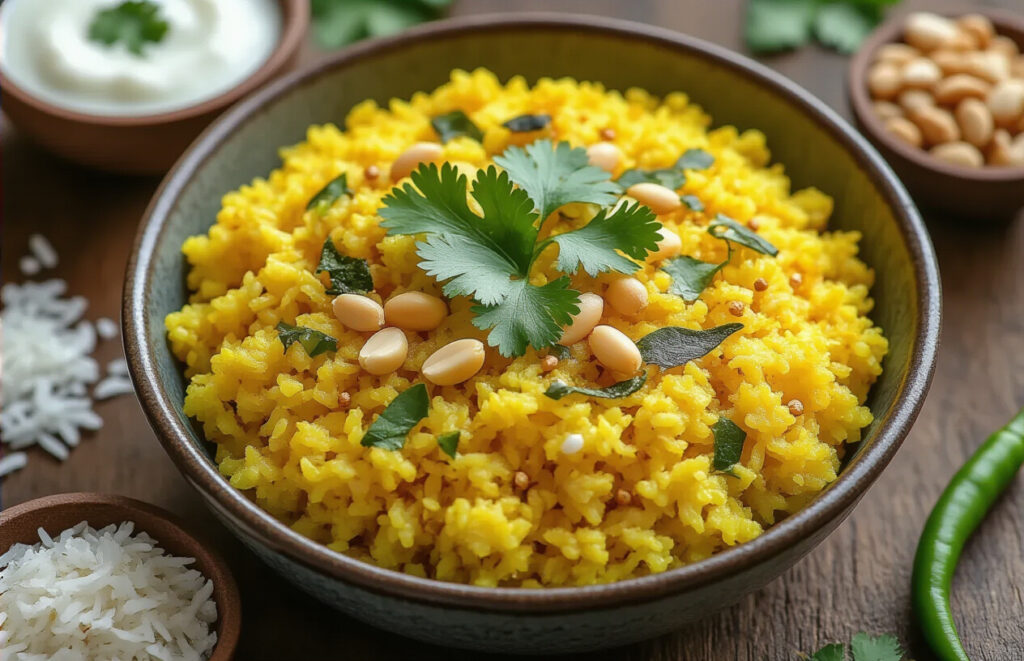
Tangy Puli Upma Essentials
Understanding the tamarind element
Have you ever had a taste that makes your taste buds sing? In puli upma, tamarind serves that purpose. This tart fruit is the main attraction here; it’s not merely an ingredient; it’s THE ingredient.
There are various forms of tamarind for puli upma. While some choose the premade paste, others soak the raw tamarind pulp in water. In any case, you’re searching for the ideal tangy kick that elevates regular upma to a unique level.
The key? achieving the proper level of focus. Your upma will fall flat if it is too little. If you do too much, you’ll spend hours making that puckered face. The sweet spot (or sour spot, perhaps) is reached when you use about 2 tablespoons of tamarind paste for every 2 cups of semolina.
Balancing sour and spicy flavors
Puli upma preparation is similar to leading an orchestra in that each flavour must be able to play its part without overpowering the others.
The sourness comes from the tamarind, but that’s only half the story. To balance it out, you need heat. The majority of conventional recipes combine:
Red chillies, dried (for depth)
Green chillies (for a burst of heat)
Black pepper (to add warmth to the back of the throat)
When the nutty semolina combines with the sour and spicy components, magic happens. Puli upma is addictive because of this balancing act between heat and tang.
Some grandmothers also add a pinch of jaggery to their swearing. Not too sweet, just enough to balance the flavours. Well done, grandmother.
Traditional preparation methods
Although making puli upma the old-fashioned way isn’t difficult, it does require consideration for the procedure.
The tempering comes first, with curry leaves crackling, mustard seeds popping in hot oil, and asafoetida contributing that enigmatic depth. This is laying the groundwork, not just adding flavour.
The tamarind water follows. Spices are added and simmered slowly until it intensifies and slightly reduces. The dry-roasted semolina is cooked in this concentrated liquid, soaking up all of the delicious tang.
The patience is what distinguishes traditional puli upma. The semolina can properly swell and absorb all those nuanced flavours thanks to the slow cooking. If you rush it, you will not get those ideal, distinct grains but rather a gummy mess.
Modern adaptations of puli upma
While traditional is admirable, let’s face it, we also love modern twists.
The puli upma of today has changed. Some astute chefs also add:
Vegetables for colour and nutrition, such as peas and carrots
Cashews or roasted peanuts for added crunch
For richness, add a little coconut milk.
Packets of preroasted semolina for hectic mornings
Fans of the instant pot version are also growing. You can make puli upma without the stirring marathon by using high pressure for seven minutes.
Some health-conscious people are replacing millet or quinoa with semolina. With more protein and fibre, it has the same tangy goodness but a different texture. It’s worth trying, even though it’s not your grandmother’s puli upma.
Pairing suggestions for complete meals
Puli upma works well with other dishes on your plate and is not just a solo act.
For breakfast, serve it with:
- A scoop of fresh coconut chutney (the tang is counterbalanced by the coolness)
- Coffee should be filtered because the bitterness perfectly balances the sour flavours.
Try serving it with the following for lunch or dinner:
- Cucumber and simple yoghurt raita
- On the side, crispy papadums
- A little dessert, such as jalebi, to finish the meal
The restaurant menus won’t tell you this, but puli upma is a fantastic accompaniment to grilled fish. There is nothing like the acidity to cut through the fish’s richness.
The finest aspect? The next day, leftover puli upma is even better. You will be blown away by the flavours that had time to meld over night, just add a little water while reheating.
My Zone
The unsung hero of every Indian kitchen is the upma. A homemaker’s magic can transform a packet of Bombay rava or poha into a meal that soothes the soul.
I grew up seeing my mum respond to food crises like a seasoned leader. I still get a kick out of one particular memory. After a long and exhausting journey to the South, we had just arrived back in Delhi. We were hungry, the train had been late, and it was past midnight. My mother vanished into the kitchen without pausing for a single second.
She had performed a silent miracle by the time my father and the four of us brothers had taken turns using our one bathroom, which was a luxury back then. She removed Bombay suji from her provision tin, pulses from jars, and onions and green chillies from the basket. The reassuring scent of rava upma filled our house in a matter of minutes.
Pastas and pizzas are considered fast food these days. However, decades ago, my mother prepared “fast food” for us, which was hot, flavourful, and full of love. Even though I’ve had a lot of upmas since, that late-night plate is still the best I’ve ever had. Some tastes never go away; they’re always there in your heart.
Frequently Asked Questions (FAQs)
Q1. Which type of upma is the healthiest?
Because of its complex carbohydrates and high fibre content, dhalia (broken wheat) upma is regarded as the healthiest. It promotes improved digestion and prolongs feelings of fullness.
Q2.Is it possible to make upma without garlic or onions?
Of course. Curry leaves, green chillies, and ginger are used more frequently in traditional South Indian homes to make a version without onions or garlic.
Q3. How can I prepare an upma in less than ten minutes?
The night before, chop the vegetables, use pre-roasted rava or poha, and have a ready tadka mix. This significantly reduces the amount of time needed to cook.
Q4. What causes my upma to become sticky?
When too much water is added or the rava is not properly roasted, stickiness results. When adding the rava, stir and keep the ratio between 1:2 and 1:2.5.
Q5. What can I serve with upma?
Upma pairs well with coconut chutney, sambar, pickles, yoghurt, bananas, or even crispy papad.
Final Thoughts
All varieties of South Indian upma, including rava, dhalia, rice, poha, and tangy puli, demonstrate that comfort food doesn’t have to be difficult. Every variation has a unique flavour, texture, and local charm, but they are all united by simplicity. Upma offers countless options for anyone interested in Indian breakfasts, whether they are a busy professional, a stay-at-home mom searching for quick fixes, or someone else.
Beyond just taste, it’s a nostalgic dish that transforms hunger into joy, reminiscent of the late-night rava upma my mother used to make. Upma’s power lies in its ability to satisfy your hunger, warm your heart, and leave you with treasured memories. “For more South Indian breakfast inspirations, explore NDTV Food’s South Indian Breakfast Collection