


Table of Contents
A SHORT AUDIO FOR THE POST
Introduction
Have you ever had a meal so rich in tradition that every bite takes you back to Punjab’s golden wheat fields? That is the allure of genuine Makki Ki Roti and Sarson Ka Saag, a renowned wintertime pairing that has warmed Punjabi hearts for many years.
With all the classic flavors and none of the guesswork, I’m going to show you how to make this famous Punjabi comfort food in your own kitchen.
In addition to their rustic flavors, Makki Ki Roti and Sarson Ka Saag are a celebration of seasonal abundance that firmly ties you to India’s agricultural heritage.
However, most recipes fail to explain how to make this dish truly authentic.
Understanding the Cultural Significance of Makki Ki Roti & Sarson Ka Saag
The Winter Delicacy of Punjab: History and Tradition
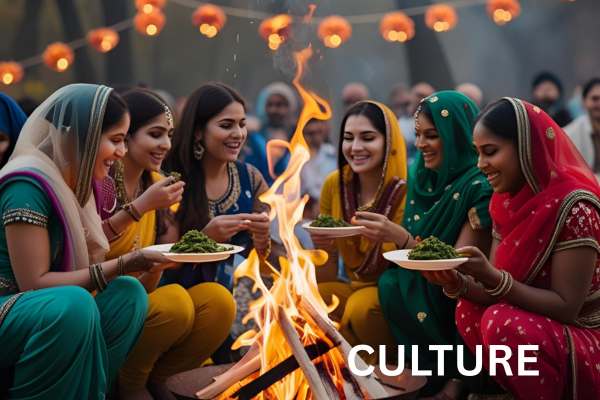
Imagine sweeping fields of yellow mustard, snow-capped mountains in the distance, and the smell of freshly prepared Makki Ki Roti filling the crisp winter air. For you, that’s Punjab in the winter.
The appearance of Sarson Ka Saag and Makki Ki Roti was not unexpected. The agricultural rhythm of Punjab, where corn and mustard greens thrived in the winter, gave rise to this famous combination. These easily accessible ingredients were ideal for providing farmers with the filling, warming food they needed to get through long days in the fields.
Grandmothers have been teaching the next generation how to pat the ideal corn flour rotis, and Punjabi families have been gathering around fires during the coldest months for centuries. Men assist in harvesting the mustard greens while women prepare the elaborate meal, making the dish a symbol of community.
This pairing is unique because it embodies Punjabi ingenuity. Nothing is wasted; even the stems of the mustard plant are used to add texture and nutrients to the saag.
Nutritional Benefits of This Classic Pairing
Beyond just being delicious, Makki Ki Roti and Sarson Ka Saag are a near-superfood combination:
Sarson (Mustard Greens): Rich in calcium, iron, and the vitamins A, C, and K. During the winter, when people are most susceptible to illness, the greens help strengthen immunity.
Makki (corn flour) has complex carbohydrates that give you long-lasting energy and fiber that helps with digestion—exactly what you’d need on chilly winter days.
The traditional additions—white butter, jaggery, and ghee—do more than just improve flavor; they also give the body the quick energy and necessary fats it needs during the colder months.
It’s wonderful how our ancestors naturally produced nutrient-dense meals without the aid of food pyramids or nutritional science. The rich mouthfeel of ghee and the sweet notes of jaggery perfectly balance the slightly bitter profile of saag.
Why This Dish Remains Popular Across Generations
Makki Ki Roti and Sarson Ka Saag obstinately refuse to become forgotten in an era of fast food and international cuisine. Why? This is because it evokes unique emotions.
For Punjabis around the world, the dish arouses strong feelings of nostalgia. Many people in the diaspora are immediately taken back to their grandparents’ houses by the smell of saag simmering on the stove. It’s the epitome of comfort food.
This meal transcends nostalgia and unites generations. Parents are sharing cultural heritage when they teach their kids how to press and flip Makki Ki Roti, in addition to a recipe.
The preparation of makki ki roti and sarson ka saag has also evolved over time. Modern chefs have produced modern presentations that maintain the traditional flavors while modernizing the aesthetics, and health-conscious people value its nutritional profile.
Regional Variations Across North India
The same dish will subtly change with regional influences if you travel throughout North India.
Haryana: Gives their saag a milder flavor profile by adding more garlic and occasionally bathua (chenopodium).
Himachal Pradesh: Adjust to what is available at higher elevations by combining mustard with native leafy greens.
Uttar Pradesh: Produces a less bitter, more complex saag by frequently adding spinach and occasionally radish leaves.
Rajasthan: To combat the desert winter, they typically make thinner makki rotis and use more red chili for heat.
Some places insist on serving it with buttermilk on the side, while others serve it with raw onions. The Punjab-Pakistan border areas frequently make a slightly more liquid saag and add more ghee.
The essence of the makki ki roti and sarson ka saag is a celebration of winter’s abundance and agricultural heritage that has fed and soothed people for generations, which is what unites these variations.
Essential Ingredients for Authentic Preparation
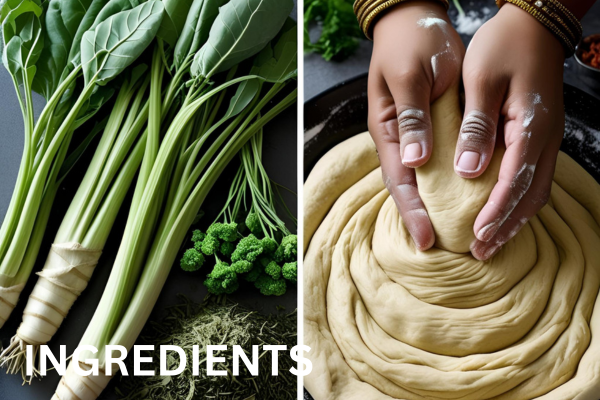
A. Selecting the Perfect Mustard Greens (Sarson) and Other Greens
Sarson Ka Saag’s greens are its essence. Look for fresh mustard greens with crisp stems and vivid, deep green leaves when you’re shopping. You won’t get that real flavor punch from anything that is yellowing or wilted.
A variety of greens are required for authentic Punjabi-style saag:
Mustard greens (sarson) should comprise roughly 70% of your greens mixture.
Spinach (palak): balances the mild bitterness and adds smoothness.
Bathua (chenopodium): Provides a distinct earthy taste that is difficult to replicate.
Unable to locate Bathua? Don’t worry. Collard greens are a good alternative in many diasporic Punjabi households.
B. Choosing Quality Cornmeal (Makki Ka Atta)
Cornmeal is not all the same! Don’t use fine corn flour or polenta for real Makki Ki Roti. Yellow cornmeal that is medium-ground and slightly coarse to the touch is what you need.
For this recipe, the best cornmeal is
has a vivid yellow hue.
includes the germ, which makes it more nutrient-dense.
Not too finely ground
Fresh with a hint of sweetness
Fresh cornmeal is crucial because it loses its inherent sweetness as it ages. This dish is ideal for a particular “Makki Ka Atta” that is sold in many Indian grocery stores.
C. Must-Have Spices and Seasonings for Traditional Flavor
Sarson Ka Saag’s spice profile is surprisingly straightforward but vitally important:
Green chilies provide just the right amount of heat.
Ginger: Here, fresh is a must.
Garlic: Thick quantities add complexity
A pinch of asafoetida (hing) can create a magical effect.
Garam masala: Use sparingly in the final step.
Ghee: Although not strictly a spice, ghee’s tempering is crucial.
This dish’s distinctive aroma comes from the tadka (tempering) of cumin seeds and garlic in ghee. You won’t get the full Punjabi experience if you skip this step. The tadka (tempering) of cumin seeds and garlic in ghee is what gives this dish its signature aroma. Skip this step, and you’ll miss the authentic Punjabi experience.
D. Optional Ingredients for Enhanced Taste
Do you want to elevate your dish to the level of “my Punjabi grandmother would approve”? Think about these improvements:
White makki dana (corn kernels): To add texture and sweetness to the saag, add white makki dana, or maize kernels.
Jaggery (gur): A tiny bit of jaggery (gur) perfectly counteracts the bitterness.
Butter: It’s customary to spread liberal amounts on hot rotis.
White radish (mooli): This is added in some areas for additional depth.
Kasuri methi (dried fenugreek leaves): re-added at the end for fragrance.
In addition, sliced onions, green chilies, and a glass of lassi are often served alongside this in Punjabi households; these are not ingredients per se, but rather essential accompaniments.
E. Substitutions for Hard-to-Find Ingredients
Not in India? No issue. The following wise substitutions won’t undermine genuineness:
For bathua, collard greens or kale are good options.
For makki ka atta: Use medium-ground cornmeal (not cornflour) for makki ka atta.
For kasuri methi: A small amount of ground fenugreek seed (use sparingly!) is used for kasuri methi.
For asafoetida: Minced garlic with a touch of leek
For desi ghee: Homemade clarified butter
The greens are the most difficult to replace. For that peppery kick that characterizes sarson, try a combination of kale, spinach, and a little rocket if you can’t find mustard greens.
Keep in mind that the best recipes are created by comprehending the “why” behind each ingredient; this allows you to adjust without losing your soul.
.
Step-by-Step Sarson Ka Saag Preparation

A. Cleaning and Preparing the Greens Properly
Cleaning properly is the first step in creating a fantastic Sarson Ka Saag. Don’t rush this step, I assure you!
The mustard leaves should first be separated from their thick stems. We’re only using the tender parts of those stems because they can be tough and bitter. To counterbalance the astringent taste of mustard, pick up some spinach and bathua (goosefoot) leaves as well.
Soak all the greens in cold water in your washbasin. Watch the dirt sink to the bottom as you swish them around. Until the water runs clear, repeat this three or four times. I’ve discovered that killing any remaining bacteria with a tablespoon of salt in the last rinse helps.
Roughly chop everything; don’t get too fine just yet! Later, we’ll discuss that.
B. The Secret to Perfect Blanching Technique
This is where the majority of recipes fail. Don’t simply boil your greens until they’re completely mushy!
Add a generous pinch of salt to a large pot of water and bring it to a rolling boil. Drop your greens in batches, starting with the mustard (approximately 5 minutes), followed by the spinach and bathua (2–3 minutes).
The secret? Blanch them and then immediately submerge them in ice-cold water. This “shocking” retains the nutrients, stops the cooking process, and maintains the vivid green color.
After completely draining, carefully squeeze out any extra water. Greens should be soft but not mushy.
C. Grinding and Texture Tips for Authentic Results
Authentic Sarson Ka Saag is made or broken by texture. Too silky? It’s food for babies. Too big? It’s a salad.
If you have a traditional sil-batta (grinding stone), use it. If not, pulse in a food processor, but do not run it constantly! Instead of a smooth paste, you want tiny, distinguishable pieces of greens.
While grinding, add a thumb-sized piece of ginger and a tiny green chili. Their oils are better released into the mixture by the heat than by adding them afterwards.
After grinding, stir in 2 tablespoons of cornmeal (makki ka atta) for that traditional Punjabi consistency. This perfectly thickens the saag and enhances Makki Ki Roti, its partner.
D. Tempering (Tadka) Methods That Elevate Flavor
The magic happens in the tadka! Heat pure ghee in a heavy-bottomed pan (don’t use oil, please).
Wait for the cumin seeds to splutter after adding a pinch of asafoetida (hing). Add the finely chopped garlic and cook until golden but not brown.
At this stage, some families—my grandmother’s secret touch—add a pinch of dried fenugreek (kasuri methi).
Over your saag, drizzle this aromatic tadka and stir gently. When it hits the greens, does it sizzle? Perfection sounds like that.
Just before serving, top with a dollop of white butter or fresh cream for an extra-special touch. It adds amazing richness and cuts through the bitterness.
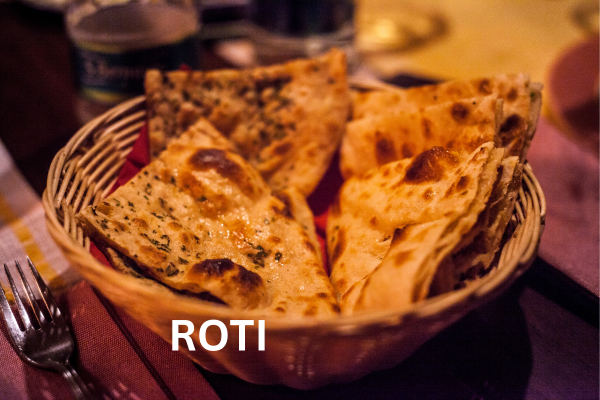
Mastering Makki Ki Roti from Scratch
Achieving the Perfect Dough Consistency
Getting the dough just right is the first step in making makki ki roti. This can make or ruin your roti experience, I promise!
The temperature of the water holds the key. Always use hot water—not boiling, not lukewarm, but just hot enough to touch for a few seconds. Since there is no gluten to do the job, this aids in binding the cornmeal particles together.
To begin, use this infallible ratio:
Two cups of makki ka atta, or yellow cornmeal
One cup of roughly hot water
Half a teaspoon of salt
Using a spoon to mix at first, add water gradually (the mixture will be too hot for hands). Knead with your palms once it’s cool enough to handle. The dough should have a slightly sticky but not wet texture. Add a tablespoon of water at a time if you can’t get it to come together in a ball.
Avoid overkneading! Excessive kneading does not improve makki dough like it does wheat dough. To create a cohesive mass that holds together, simply work it enough.
Hand-Rolling Techniques for Beginners
Even seasoned chefs are occasionally intimidated by rolling makki ki roti! Here’s how to do it flawlessly:
Your rolling surface will be a plastic sheet or Ziploc bag that you cut open.
Put a piece of dough the size of a golf ball on the plastic.
Put another plastic sheet over it.
To flatten, gently press with your palm.
Spread it out to a diameter of roughly 6-7 inches using a rolling pin.
For novices, the plastic sheets’ ability to keep things from sticking is revolutionary! Continue using dry cornmeal to dust the dough and your hands if you’re going the old-fashioned way (without plastic).
Keep in mind that these rotis are typically ¼ inch thicker than ordinary chapatis. The goal of perfection is even thickness, not a perfect circle.
Traditional Cooking Methods of Makki ki roti on Tawa (Griddle)
The ideal temperature for the tawa (griddle) is medium-hot, so that water droplets sizzle but do not immediately evaporate.
It takes practice to use the flipping technique.
Place one side of the plastic sheet on the hot tawa after carefully removing the other side.
Peel off the second sheet of plastic after 30 seconds.
Cook for one to two minutes, or until tiny bubbles appear.
Using a flat spatula, gently flip.
To guarantee even cooking, use the spatula to press the edges.
Drizzle both sides with ghee.
The roti shouldn’t burn, but it should get brown spots. A properly cooked makki ki roti has a unique scent and a soft interior with a slightly crisp exterior.
For that genuine smoky taste, traditionalists frequently finish the makki ki roti directly over an open flame, but your hob will also work just fine.
Troubleshooting Common Roti Problems
Are you having problems with Makki Ki Roti? Even Punjabi grandmothers had to start somewhere, so don’t worry!
Problem: When rolling, the roti breaks.
Solution: The answer is that your dough is too dry. To improve binding, try adding two tablespoons of mashed potatoes or a tablespoon of hot water.
Problem: Makki ki Roti sticking to the tawa
Solution: Before adding makki ki roti, your tawa wasn’t hot enough. Always properly preheat.
Problem: Edges cracking while cooking
Solution: Use a spatula to press the edges, then dab the area around them with a little ghee.
Problem: Roti too hard after cooking
Solution: Either your dough was too dry or you overcooked it. To keep freshly made makki ki roti soft, cover them with a cloth.
Problem: Makki ki Roti too thick in the middle
Solution: Makki ki Roll with more even pressure and pay a little more attention to the center.
Keep in mind that practice makes perfect. If your initial attempts aren’t Instagram-worthy, don’t give up. The flavor will remain fantastic, particularly when combined with sarson ka saag!
Serving and Pairing Suggestions
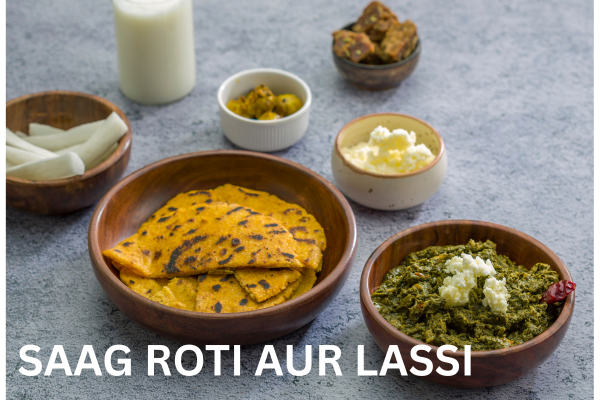
Traditional Accompaniments
Without their distinctive accompaniments, Makki Ki Roti and Sarson Ka Saag’s magic is incomplete. It’s practically a must to top your hot roti with a dollop of slowly melting white butter (makhan)! Adding butter is a custom that every Punjabi home follows religiously; it’s not just about taste.
The slightly bitter flavors of the saag are perfectly balanced by the sweet taste of jaggery (gur). For a true Punjabi experience, break off a small piece and bite into each spoonful of saag-roti. The contrast is astounding!
And without lassi, what would a Punjabi meal be? The real experience of relishing a typical makki ki roti and sarson ka saag is incomplete if not accompanied with a tall glass of this creamy yogurt beverage, which can be served sweet or salted with a hint of roasted cumin. The coolness of the lassi counterbalances the rustic flavors of the main dish.
Modern Plating Ideas for Impressive Presentation
The days of serving this rustic dish only in a traditional manner are long gone. These modern concepts can help you improve your presentation:
- Make a stack of tiny Makki Ki Rotis and sandwich each layer with a little saag.
- Serve each portion in a small earthen bowl or copper kadai.
- Place white butter in a small copper container and set it on the slate plates.
- For a splash of color, garnish with edible flowers or microgreens.
- Apply a pattern of white butter all over the plate.
Without sacrificing authenticity, these small adjustments turn a homemade dish into a presentation fit for a restaurant.
Complementary Side Dishes to Complete Your Meal
These sides can complete your Punjabi feast, even though the star duo is filling on its own:
- Diced cucumbers, tomatoes, and onions combined with chaat masala make up kachumber salad.
- Aloo methi: Another traditional winter dish of potatoes cooked with fenugreek leaves
- Punjabi kadhi is a curry made with yogurt and pakoras that go surprisingly well together.
- Until ki chutney: The nutty richness of sesame seeds is added.
- Pickled onions: Red onions pickled quickly shave off the richness
To make it a full celebration meal on special occasions, serve paneer tikka or tandoori chicken along with saag for makki ki roti. Keep in mind that in Punjab, food is about more than just eating; it’s about feeling happy and blessed!
Tips for Meal Planning and Storage
Make-Ahead Strategies for Busy Weeknights
Planning ahead can make a significant difference when you have a craving for Makki Ki Roti and Sarson Ka Saag but lack the time to spend in the kitchen after work.
You can fully prepare the Sarson Ka Saag a day or two in advance. In fact, the flavors intensify throughout the night! Simply wash, chop, and pressure-cook all of the greens before tempering them. You’re already halfway through dinner if you keep it in an airtight container.
Mix the dough for Makki Ki Roti up to 4 hours in advance and keep it covered with a moist cloth. If time is critical, shape the rotis and store them in the refrigerator between sheets of parchment paper. When you’re ready to eat, all you’ll have to do is cook them fresh.
Are you feeling adventurous? For the week, measure out spice blends in small containers. Just that saves valuable cooking time.
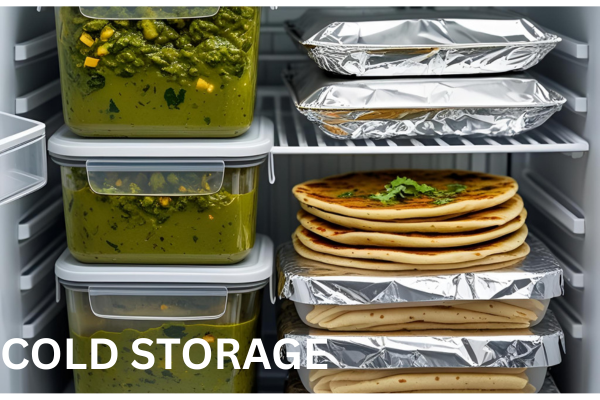
Proper Storage Methods to Maintain Freshness
Have any leftovers? No issue! When properly stored, Sarson Ka Saag can last up to four days in the refrigerator.
Before putting your saag in the refrigerator, let it cool completely. Instead of using plastic containers, use glass ones because they won’t get stained or absorb the strong mustard smell. Seal tightly, leaving a small opening at the top.
Makki Ki Roti is more difficult to prepare because the dough tends to solidify. What’s your best option? Before putting them in an airtight container, wrap the stack in aluminum foil and sandwich each roti with a paper towel. This prevents them from drying out.
For saag, freezing works perfectly if you’ve made a large batch. Use it within two months after portioning it into freezer-safe containers. The texture remains surprisingly smooth!
Reheating Techniques That Preserve Authentic Taste
Maintaining the fresh-made flavor when reheating these dishes requires a little skill.
Regarding Sarson Ka Saag:
- Stovetop: To thin it out a bit, add 1-2 tablespoons of water. On medium-low heat, stir occasionally.
- Place a damp paper towel over the microwave and heat it for 30 seconds at a time, stirring occasionally.
- What’s the secret trick? When reheating, add a tiny pinch of cumin seeds, garlic, and ghee (tempering). This instantly brings back the flavors and gives it a freshly prepared taste!
Regarding Makki Ki Roti:
- The best technique is to use a skillet or tawa. Heat a tawa and add a small amount of ghee, then warm each roti for 30 seconds on each side.
- Direct flame: For a faintly smoky taste, hold with tongs over a low flame for 10 to 15 seconds on each side.
- The roti becomes tough if you microwave it.
To restore moisture, sprinkle the makkiki roti with a few drops of water before reheating, and while still hot, lightly brush them with ghee. They’ll taste nearly as delicious as when they’re fresh!
MY Zone
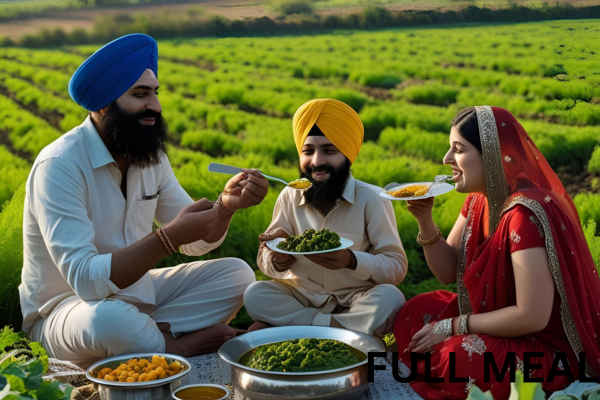
My love affair with Makki ki Roti and Sarson ka Saag began on a chilly December evening in Ludhiana, when my wife was about to deliver our first child. Her family served me a traditional winter meal — steaming hot Makki ki rotis with thick, bubbling saag topped generously with white butter. That evening, I didn’t just eat — I surrendered to the warmth, flavor, and hospitality of Punjab.
Since that day, this dish has earned a permanent spot in our winter kitchen. No December goes by without a ritual serving of Makki ki Roti. It’s more than a meal — it’s a season’s tradition, a fragrant memory, and a heartfelt reminder of family, nourishment, and belonging.
For me, winter doesn’t officially begin until that first plate of saag and roti is served — warming both the body and soul.
Frequently Asked Questions (FAQs)
1. Can I use frozen mustard greens for Sarson Ka Saag?
If fresh mustard greens aren’t available, you can use frozen ones. The flavor and texture, however, might vary somewhat. To prevent too much water in your saag, thoroughly drain and thaw them before cooking.
2. Why does my Makki Ki Roti keep breaking while rolling?
Because makki ki roti doesn’t contain gluten, it is more likely to crack. To avoid this:
- When kneading, use hot water.
- For improved binding, add a spoonful of mashed potato or wheat flour.
- Roll gently between plastic sheets for support.
3. Can I make Sarson Ka Saag without a sil-batta (grinding stone)?
Of course! You can use a food processor or blender, but make sure to pulse just enough to preserve texture and avoid over-blending into a paste.
4. Why is my saag too watery?
Squeeze out excess water after blanching greens.
Add cornmeal (makki ka atta) while cooking to thicken.
Simmer uncovered to reduce liquid.
5. Is this dish gluten-free?
Indeed! Unless wheat flour is added as a thickener, makki ki roti and saag are naturally gluten-free.
Final Thoughts
More than just food, Makki Ki Roti and Sarson Ka Saag are a celebration of Punjabi culture, seasonal bounty, and culinary knowledge. This dish carries centuries of tradition, warmth, and nourishment from Punjab’s golden fields to kitchens around the world.
Why Makki ki Roti and Sarson ka Saag Stand the Test of Time:
✅ Nutrient-packed – Rich in vitamins, iron, and fibre, this food is nutrient-dense.
✅ Cultural connection – It gives Punjabis all over the world a sense of home. .
✅ Versatile & adaptable – It’s kept interesting by regional twists.
✅ Comfort in every bite – The ultimate wintertime soul food—comfort in every bite.
A Final Tip for Authenticity:
Patience and love are the keys to the best Makki Ki Roti and Sarson Ka Saag. The ghee-laden tadka is what makes this dish so memorable, so take your time with the greens, work on the texture of the roti, and don’t rush it.
Regardless of your level of cooking experience, this legendary Punjabi team promises a flavourful adventure you won’t soon forget. So get your supplies together, embrace your inner Punjabi grandmother, and enjoy preparing Makki ki Roti and Sarson Ka Saag . Let the magic happen in your kitchen!
Happy Cooking! 🍽️