


Table of Contents
Make Restaurant-Style Veg Biryani Right in Your Own Kitchen
If you’ve ever ordered vegetable biryani at a restaurant and wondered why yours never quite tastes the same at home, you’re not alone. Getting that smoky, layered, aromatic flavor feels like a mystery — but it’s really just about knowing the right steps.
This authentic veg biryani recipe is for home cooks who want real results without culinary school training. You don’t need fancy equipment or hours of free time. You just need the right guidance.
Here’s what we’ll walk through together:
- The exact vegetarian biryani ingredients and biryani spices you need to nail that deep, restaurant-quality flavor
- A homemade biryani step-by-step cooking method that takes the guesswork out of layering and dum cooking
- Practical biryani cooking tips that make the difference between soggy rice and perfectly separated, flavor-packed grains
By the end, you’ll know exactly how to make biryani at home that tastes like it came straight from your favorite restaurant kitchen — no shortcuts, no compromises.
Let’s get into it.
Essential Ingredients for an Authentic Veg Biryani
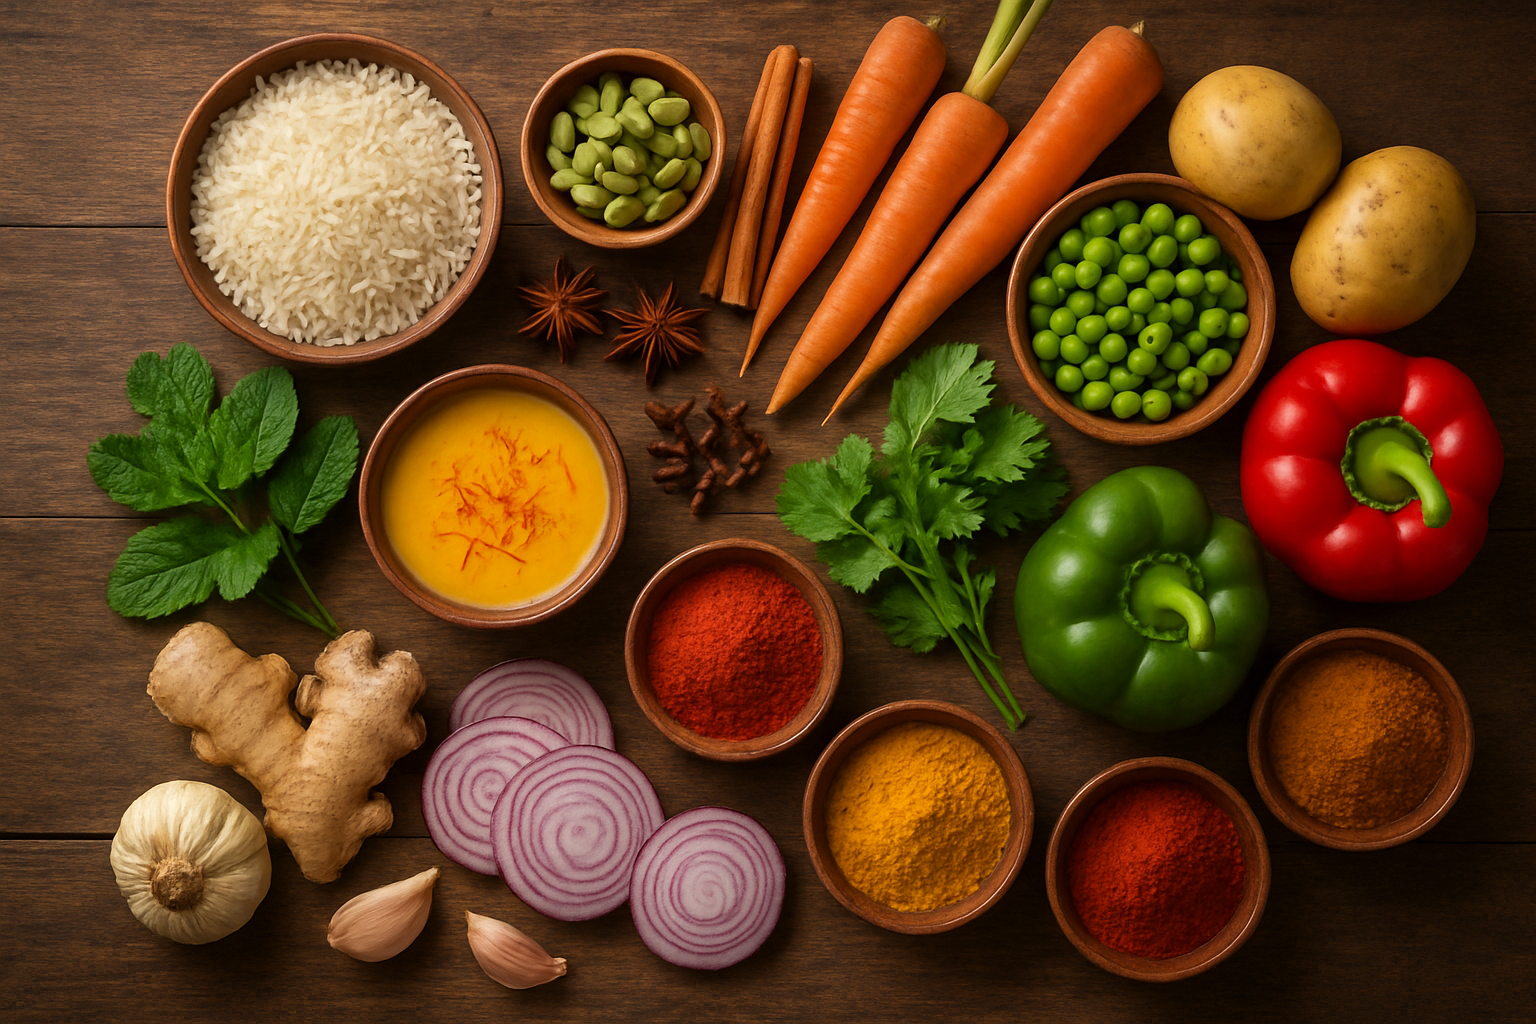
Fresh Vegetables That Add the Best Flavor and Texture
The vegetables you pick can make or break your veg biryani recipe. You want veggies that hold their shape during cooking, absorb the spices beautifully, and bring a natural sweetness or earthiness to every bite.
Here are the best vegetables to use:
- Potatoes – Absorb spices deeply and add a hearty, filling quality. Cut them into medium chunks so they cook evenly without turning mushy.
- Cauliflower (Gobi) – Soaks up masala like a sponge and adds a slightly nutty flavor. Break into medium florets.
- Carrots – Bring natural sweetness and a pop of color. Slice them diagonally for a nicer presentation.
- Green peas (Matar) – Fresh or frozen, they add a burst of sweetness and color. Toss them in toward the end so they stay bright and tender.
- French beans – Add a mild crunch and a fresh green flavor that balances the richness of the spices.
- Bell peppers – Optional but excellent. They add a slightly sweet, slightly smoky note.
- Paneer (Indian cottage cheese) – Not technically a vegetable, but adding cubed paneer takes the biryani to a whole new level of richness and protein.
Pro tip: Always cut your vegetables into similar-sized pieces so everything cooks at the same rate. And skip vegetables with high water content like zucchini or cucumber — they release too much moisture and make your rice soggy.
The Right Rice Variety for Perfect Biryani
Rice is the soul of any authentic biryani recipe, and choosing the wrong variety will ruin the whole dish no matter how good your spices are.
Always use aged Basmati rice. This is non-negotiable.
Here’s why aged Basmati works best:
| Feature | Aged Basmati Rice | Regular Long-Grain Rice | Short-Grain Rice |
|---|---|---|---|
| Grain length after cooking | Extra long, fluffy | Moderate | Short and sticky |
| Aroma | Distinctly fragrant | Mild | Minimal |
| Texture | Light, separate grains | Can clump | Sticky and clumped |
| Absorbs spices | Beautifully | Decently | Poorly |
| Best for Biryani | ✅ Yes | ❌ Not ideal | ❌ No |
Aged Basmati rice (aged for at least 1–2 years) has a lower moisture content, which means the grains stay firm, separate, and fluffy after cooking. Fresh Basmati tends to become sticky and clumped — a disaster for biryani.
How to prep your rice:
- Rinse the rice under cold water at least 4–5 times until the water runs clear. This removes excess starch that causes stickiness.
- Soak the rice in cold water for 30 minutes. This shortens cooking time and helps the grains elongate beautifully.
- Cook the rice only 70–80% through before layering. It will finish cooking during the dum (slow steam) process.
Popular brands that work great: Daawat, India Gate Classic, Kohinoor, or Lal Qilla.
Key Spices and Aromatics You Cannot Skip
This is where restaurant-style biryani separates itself from a regular rice dish. The layering and combination of whole spices and ground spices is what creates that deep, complex aroma that fills the entire kitchen.
Whole Spices (Added to the Oil First)
These are the backbone of the biryani’s aroma. Always bloom them in hot oil or ghee before adding anything else.
- Bay leaves (Tej patta) – 2–3 leaves
- Green cardamom (Elaichi) – 4–5 pods, lightly crushed
- Black cardamom (Badi elaichi) – 1–2 pods
- Cinnamon stick (Dalchini) – 1–2 inches
- Cloves (Laung) – 4–5
- Star anise (Chakri phool) – 1–2
- Mace (Javitri) – a small piece
- Shah jeera (Caraway seeds) – 1 teaspoon
Ground Spices (Added to the Vegetable Masala)
- Red chili powder – for heat and color
- Coriander powder – for earthiness
- Turmeric – a small amount, just for a slight golden hue
- Garam masala – added at the end for freshness
- Biryani masala powder – optional but recommended for authentic depth
Aromatics You Must Use
- Fresh ginger-garlic paste – Made fresh at home, not from a jar. This makes a huge difference in flavor.
- Fried onions (Birista) – Thinly sliced onions fried until deep golden and crispy. These are sprinkled between the layers and are absolutely essential for that restaurant-style biryani flavor.
- Fresh mint leaves (Pudina) – Added between the rice layers. They release their fragrance during the dum process and give the biryani that signature freshness.
- Fresh coriander leaves (Dhaniya) – Adds brightness and color.
- Saffron soaked in warm milk – This gives the biryani its beautiful golden streaks and a subtle floral aroma. Even a tiny pinch goes a long way.
- Rose water or kewra water – A few drops drizzled over the top layer before sealing adds a subtle floral note that screams restaurant-quality.
Quick Spice Reference Table
| Spice | Form | Purpose |
|---|---|---|
| Green cardamom | Whole | Floral, sweet aroma |
| Cinnamon | Whole | Warm, woody depth |
| Star anise | Whole | Mild licorice note |
| Saffron | Soaked in milk | Color and floral aroma |
| Garam masala | Ground | Warmth and complexity |
| Mint leaves | Fresh | Freshness between layers |
| Fried onions | Crispy | Sweetness and richness |
| Kewra water | Liquid | Signature biryani fragrance |
Using fresh, whole spices instead of pre-ground ones wherever possible makes a noticeable difference. Ground spices lose their potency over time, while whole spices release their oils fresh when they hit the hot fat.
Choosing the Best Cooking Oil or Ghee
The fat you cook in carries the flavor of all your spices throughout the entire dish. This is not the place to cut corners.
Ghee (Clarified Butter) is the gold standard for authentic biryani. It has a rich, nutty, slightly sweet flavor that elevates every single ingredient it touches. Ghee also has a high smoke point, which means you can fry your onions and bloom your spices without the fat burning and turning bitter.
Neutral cooking oil like sunflower oil or vegetable oil works well too, especially if you want a lighter dish or are cooking for someone who avoids dairy. Many professional cooks actually use a combination — oil for frying the onions (since you need a larger quantity) and ghee for finishing the layers.
Here’s a quick comparison:
| Fat | Flavor | Best Used For | Notes |
|---|---|---|---|
| Pure Ghee | Rich, nutty, buttery | Layering and finishing | Authentic, restaurant-style taste |
| Refined Oil | Neutral | Frying onions in bulk | Use when making large batches |
| Combination | Balanced | Full recipe | Best of both worlds |
| Butter | Mild, creamy | Not recommended | Low smoke point, can burn |
For a truly vegetarian biryani at home that tastes like it came from a restaurant, drizzle at least 2–3 tablespoons of good-quality ghee over the final layer of rice before sealing the pot for dum. That richness and aroma is something oil alone simply cannot replicate.
If you are using store-bought ghee, go for brands like Amul, Mother Dairy, or Gowardhan — they have consistent quality and a genuine dairy flavor that works beautifully in biryani.
Must-Have Kitchen Tools to Make the Process Easier

The Ideal Pot or Pan for Layered Biryani
The vessel you cook your biryani in makes a bigger difference than most people realize. A heavy-bottomed pot is your best friend here — it distributes heat evenly and prevents the bottom layer of rice from scorching while the steam does its magic on the upper layers.
Here’s what works best for a homemade biryani step by step:
- A Heavy Dutch Oven or Enamel Pot: This is the gold standard for home cooks. The thick base holds heat steadily, and the tight-fitting lid traps steam perfectly during the dum (slow-cooking) process. A 5 to 6-quart size is ideal for a family-sized biryani.
- A Traditional Handi (Clay Pot): If you want to go truly authentic, a clay handi is what restaurant-style biryani is often cooked in. The porous material allows a tiny bit of moisture exchange, giving the rice a subtly earthy, smoky flavor that a stainless steel pot simply cannot replicate.
- A Wide, Thick-Based Stainless Steel Pot: A solid everyday option for most kitchens. Go for a pot that’s wider rather than tall and narrow — a wider base means more surface area for even layering, which is key to getting that beautiful separation between the vegetable masala and the fragrant rice layers.
- A Non-Stick Deep Pan with Lid: Works well in a pinch, especially for beginners who are worried about the rice sticking at the bottom. Just make sure it’s deep enough to hold multiple layers comfortably.
What to Avoid:
| Vessel Type | Why It’s Not Ideal |
|---|---|
| Thin aluminum pots | Uneven heat distribution, leads to burnt bottom |
| Pots without a lid | Steam escapes, rice turns dry and undercooked |
| Very deep, narrow pots | Poor layering, uneven cooking throughout |
| Small saucepans | Not enough space for proper layering |
One pro trick used by experienced cooks: place a flat iron tawa (griddle) underneath your pot when doing the dum. This creates an extra buffer between the direct flame and the pot, reducing the risk of burning the bottom layer — a game-changer when you’re making restaurant-style biryani at home.
Tools That Help You Achieve Consistent Results
Beyond the main cooking pot, a handful of smaller tools can seriously upgrade your biryani game. These aren’t fancy gadgets — they’re practical essentials that take a lot of guesswork out of the process.
Measuring Tools
Getting the rice-to-water ratio right is one of the trickiest parts of any veg biryani recipe. Use these:
- A measuring cup: For consistent rice portions every single time. Most recipes work on a 1:1.5 or 1:1.75 rice-to-water ratio, depending on the basmati variety.
- A kitchen scale: If you want to get precise with your vegetables, spices, and rice, a basic digital scale removes all the guesswork. Especially useful when scaling the recipe up or down.
Prep Tools
- A sharp chef’s knife: Uniform vegetable cuts matter more than you’d think. When your carrots, potatoes, and beans are cut to a similar size, they cook evenly without some pieces turning mushy while others stay undercooked.
- A mandoline slicer: If your recipe calls for thinly sliced onions for the fried onion (birista) topping — and it absolutely should — a mandoline gets you paper-thin, perfectly even slices in a fraction of the time.
- A large mixing bowl: Handy for soaking rice, marinating vegetables, and mixing spices.
- A colander or fine mesh strainer: For draining soaked rice properly before parboiling. Excess water at this stage can ruin the texture of the final dish.
Cooking and Finishing Tools
- A flat spatula or rice paddle: For gently folding layers without breaking the rice grains — biryani should never be stirred aggressively.
- A ladle: For spreading the vegetable masala evenly as a base layer.
- A mortar and pestle: For freshly grinding whole spices like cardamom, cloves, and peppercorns. Pre-ground spices are convenient, but freshly crushed ones bring out a depth of flavor that genuinely makes the biryani taste more authentic and restaurant-quality.
- Aluminum foil or parchment paper: Used to seal the pot before placing the lid on top, creating a tighter seal during dum cooking. This is how restaurants lock in that intense aroma and flavor.
- A flat tawa (griddle): As mentioned earlier, this goes under the pot to diffuse the heat during the slow-cooking phase.
Quick Tool Checklist
| Tool | Purpose |
|---|---|
| Heavy-bottomed pot | Even heat, proper layering |
| Flat tawa | Heat diffuser for dum cooking |
| Sharp chef’s knife | Uniform vegetable cuts |
| Mandoline slicer | Perfect thin onion slices |
| Fine mesh strainer | Drain soaked rice evenly |
| Kitchen scale | Precise ingredient measurements |
| Mortar and pestle | Fresh-ground spices for better flavor |
| Aluminum foil | Tight seal for dum process |
| Rice paddle | Gentle handling of cooked rice |
Having these tools ready before you start cooking turns the whole process from stressful to enjoyable. When everything is within reach and your prep is organized, you spend less time scrambling and more time actually cooking — and that focus shows in the final dish.
Preparing Your Ingredients Like a Professional Chef
How to Wash and Soak Rice for Fluffy Grains
The rice is the backbone of any good veg biryani recipe, and getting this step right makes a massive difference in the final dish. Most home cooks rush through this part, and that’s exactly where things go wrong.
Washing the Rice:
- Place your basmati rice in a large bowl and fill it with cold water
- Gently swirl the rice with your fingers — never aggressively rub the grains together, as this breaks them
- Drain and repeat this process 4 to 5 times until the water runs completely clear
- The cloudy water you see initially is excess surface starch — removing it prevents the rice from clumping and turning mushy during cooking
Soaking the Rice:
Soaking is non-negotiable if you want those long, separate, fluffy grains that make restaurant-style biryani so visually appealing.
- After washing, cover the rice in fresh cold water and let it soak for a minimum of 30 minutes — 45 minutes is even better
- During soaking, the individual grains absorb water and expand slightly, which means they need less time in boiling water and are far less likely to break or overcook
- Drain the rice completely just before you’re ready to parboil it
| Soaking Time | Result |
|---|---|
| Less than 15 minutes | Grains may break during cooking |
| 30 minutes | Good texture, grains hold shape |
| 45 minutes | Ideal — long, fluffy, fully separate grains |
| More than 60 minutes | Grains become too soft and fragile |
Always use aged long-grain basmati rice for the best results. Aged basmati has lower moisture content and cooks up much more evenly than fresh basmati.
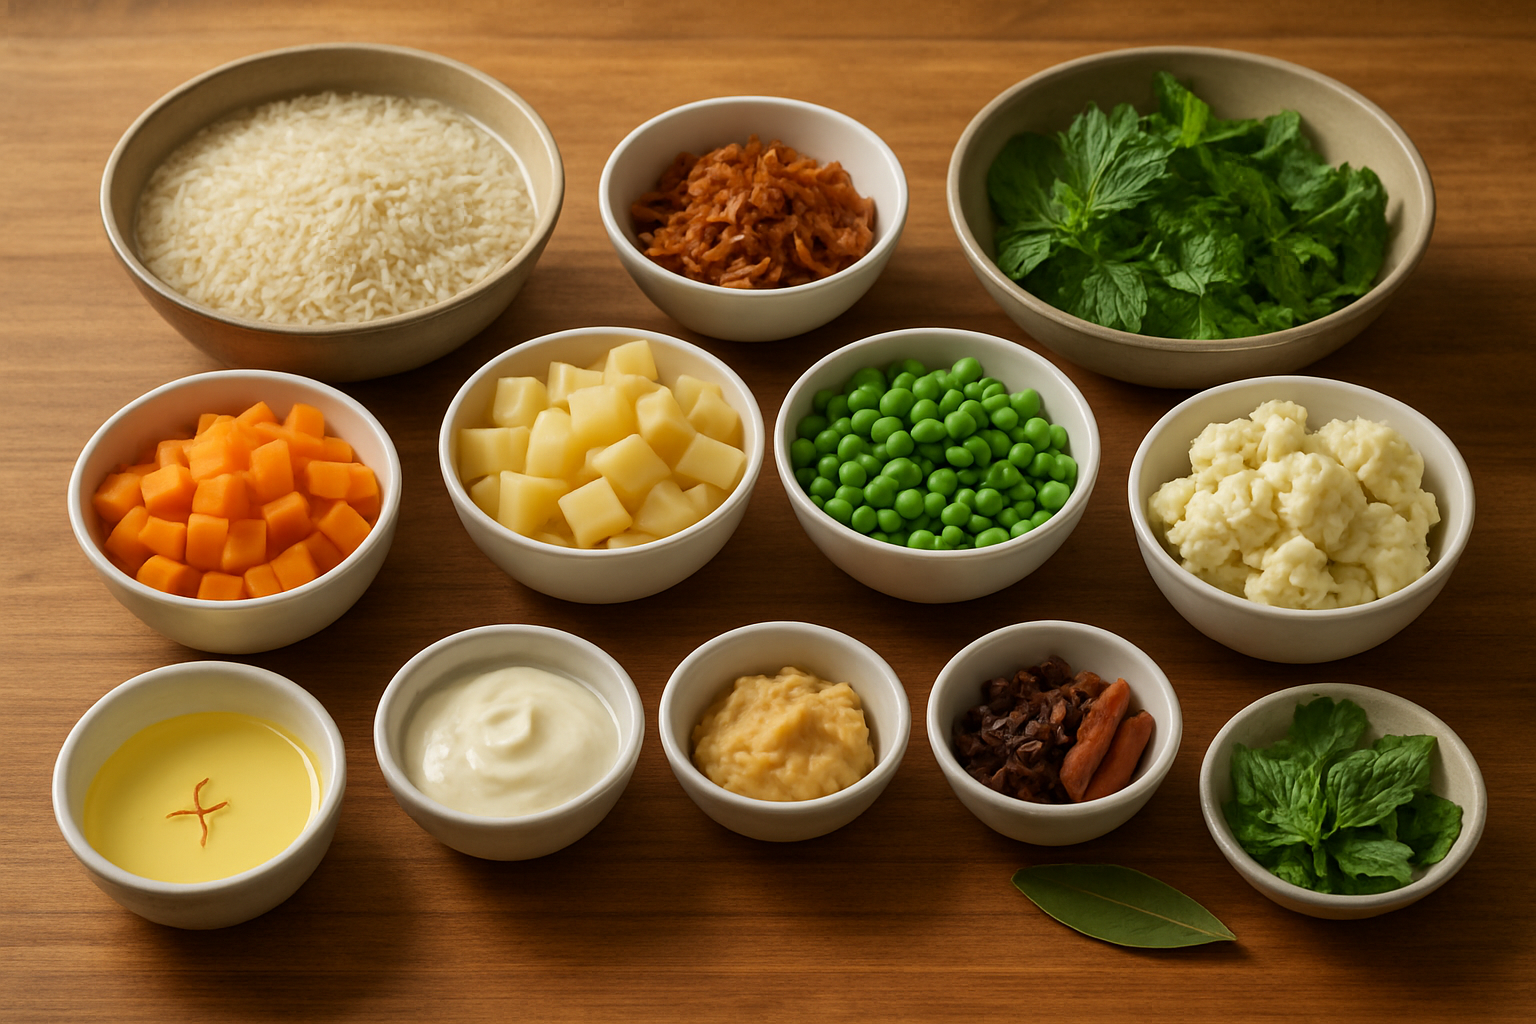
Marinating Vegetables for Maximum Flavor
This is the step that separates a good vegetable biryani at home from a truly great one. Marinating your vegetables before cooking gives the biryani that deep, layered flavor you taste in a restaurant but can never quite recreate without knowing this trick.
Best Vegetables to Use:
- Cauliflower (gobi) — holds up beautifully under heat and absorbs the marinade well
- Carrots — add a natural sweetness and a firm bite
- Green beans — give a nice snap and texture contrast
- Potatoes — essential for heartiness; cut into medium chunks so they cook through
- Green peas — can go in fresh or frozen
- Bell peppers — add color and a mild sweetness
- Mushrooms — optional but they bring a meaty, umami depth
The Marinade Mixture:
Combine all of the following in a large bowl and mix well:
- ½ cup thick yogurt (dahi) — acts as the base and tenderizer
- 1 tsp turmeric powder
- 1 tsp red chili powder
- 1 tsp coriander powder
- ½ tsp cumin powder
- 1 tsp garam masala
- 1 tbsp ginger-garlic paste — freshly made is always better
- 1 tsp lemon juice — brightens everything up
- Salt to taste
- 2 tbsp oil — helps the spices coat evenly
How to Marinate:
- Cut all your vegetables into medium-sized, uniform pieces so they cook at the same rate
- Add them into the yogurt marinade and coat thoroughly
- Cover the bowl and let it sit for at least 30 to 60 minutes at room temperature, or refrigerate overnight for even deeper flavor
- The yogurt tenderizes the vegetables slightly while the spices penetrate into each piece
Quick tip: If you’re using paneer, cut it into cubes and add it to the same marinade. Just be careful not to overcook it later — paneer only needs a few minutes.
Making Fresh Fried Onions for an Authentic Taste
Fried onions — known as birista — are one of the most critical components of any authentic biryani recipe. They add a sweet, caramelized crunch and deep savory flavor that simply cannot be replaced with store-bought alternatives (though those work in a pinch).
What You Need:
- 3 large onions, sliced paper-thin (use a mandoline if you have one)
- Oil or ghee for deep frying — enough to submerge the onions
- A pinch of salt
Step-by-Step Process:
- Slice your onions into very thin, even rings — uneven slices mean some will burn while others remain soft
- Spread them out on a kitchen towel and pat them dry — moisture is the enemy of crispy fried onions
- Heat oil in a deep pan over medium heat — not high heat, which causes burning before they turn golden
- Add the onions in batches rather than dumping them all in at once; crowding the pan steams them instead of frying them
- Stir occasionally and keep a close eye — the onions go from golden to burnt very quickly
- Once they turn a deep golden brown, scoop them out immediately with a slotted spoon
- Spread them on a paper towel-lined plate — they crisp up further as they cool
- Lightly salt them while still warm
Common Mistakes to Avoid:
- ❌ Frying on high heat — leads to bitter, unevenly cooked onions
- ❌ Not drying the onions beforehand — results in soggy, greasy birista
- ❌ Taking them out too early — they should be deep golden, not pale yellow
- ❌ Leaving them in the oil too long — even 30 extra seconds can ruin a whole batch
Once cooled, these can be stored in an airtight container for up to a week. Make a big batch and thank yourself later.
Preparing the Whole Spice Blend for Depth of Flavor
Whole spices are what give biryani its unmistakable aroma — that warm, complex fragrance that hits you before you even take the first bite. These spices are not meant to be eaten directly but they slowly release their oils into the ghee and rice, building incredible depth.
The Essential Whole Spices for Biryani:
| Spice | Quantity | What It Adds |
|---|---|---|
| Bay leaves (tej patta) | 2–3 leaves | Mild herbal, slightly floral note |
| Green cardamom (elaichi) | 4–5 pods, lightly crushed | Sweet, perfumed aroma |
| Black cardamom (badi elaichi) | 1–2 pods | Smoky, earthy depth |
| Cloves (laung) | 4–5 | Warm, pungent, slightly sweet |
| Cinnamon stick (dalchini) | 1 inch piece | Warm, woody sweetness |
| Star anise (chakri phool) | 1 whole | Subtle licorice-like flavor |
| Mace (javitri) | 1 small blade | Delicate, nutmeg-like warmth |
| Black peppercorns | 6–8 | Gentle heat and sharpness |
| Cumin seeds (jeera) | 1 tsp | Earthy, nutty aroma |
How to Prep the Whole Spices:
- Lightly crush cardamom pods with the flat side of your knife — this opens them up and releases more flavor
- You don’t need to grind them; simply having them whole and cracked is enough
- Keep them ready in a small bowl before you start cooking so you’re not scrambling mid-process
These spices get added in two stages in most restaurant-style biryani recipes — once to the cooking oil when you start the base, and again to the water when parboiling the rice. This double-layering is what gives homemade biryani that unmistakably deep, complex aroma.
Creating a Rich Biryani Masala from Scratch
While using store-bought biryani masala is perfectly fine for a quick weeknight version, making your own from scratch takes the flavor to a completely different level. A freshly ground biryani masala has a vibrancy and depth that pre-packaged blends simply can’t match.
Whole Spices You’ll Need to Grind:
- 2 tbsp coriander seeds
- 1 tbsp cumin seeds
- 1 tsp black peppercorns
- 6 green cardamom pods (seeds only)
- 2 black cardamom pods (seeds only)
- 4 cloves
- 1 small piece of cinnamon (about 1 inch)
- 1 blade of mace
- ½ tsp fennel seeds (saunf)
- 2–3 dried red chilies (adjust to your heat preference)
- 1 small piece of nutmeg (just a few scrapes on a grater)
- 1 tsp shah jeera (caraway seeds)
The Process:
- Dry roast all the spices together in a heavy-bottomed pan over low-medium heat for 2 to 3 minutes, stirring constantly, until they turn aromatic — you’ll smell them toasting
- Don’t over-roast — as soon as you smell that warm, nutty fragrance, take them off the heat immediately and spread them on a plate to cool completely
- Once fully cooled, grind them into a fine, smooth powder using a spice grinder or a dry mixer jar
- Sieve the ground masala if you want a really fine texture — the larger pieces that stay back can go into the next batch
Storage Tips:
- Store in an airtight glass jar away from direct sunlight and heat
- Freshly made biryani masala stays potent for up to 3 to 4 weeks
- Always use a dry spoon to scoop it out — any moisture will ruin the shelf life
How Much to Use:
For a biryani serving 4 to 5 people, you’ll typically need 1.5 to 2 teaspoons of this homemade masala in your vegetable marinade and another ½ teaspoon layered with the rice. Because this is freshly ground, it’s more powerful than store-bought versions, so start conservatively and adjust to your taste.
Pro tip: Toast the spices one batch at a time if you’re making a larger quantity. Each spice has a slightly different burn point, but for small home quantities, toasting them together works beautifully as long as you keep the heat low and stay attentive.
This masala is also fantastic in other dishes — dal makhani, curries, and even roasted vegetables — so making a slightly larger batch is always a smart move.
Step-by-Step Cooking Method for Restaurant-Style Results
Parboiling Rice to the Perfect Doneness
Getting the rice right is honestly the most important step in this whole veg biryani recipe. Most home cooks either undercook or overcook the rice at this stage, and it shows in the final dish. The goal here is to parboil the rice to exactly 70–75% doneness — firm in the center with a slight bite — because it will finish cooking during the dum process.
Here’s how to do it right:
- Wash your basmati rice thoroughly under cold water at least 4–5 times until the water runs clear. This removes excess starch that makes rice sticky and clumpy.
- Soak the rice for a minimum of 30 minutes, ideally 45 minutes. Soaked rice absorbs water more evenly and elongates beautifully during cooking.
- Bring a large pot of water to a rolling boil. Use at least 4–5 cups of water for every cup of rice — you want the rice to swim freely.
- Add whole spices directly to the boiling water: 2 bay leaves, 4–5 cloves, 2 green cardamoms, one small cinnamon stick, and a star anise. These infuse the rice with a subtle fragrance.
- Add 1.5 tablespoons of salt. The water should taste noticeably salty — this seasons the rice from the inside out.
- Add the soaked and drained rice and stir gently.
- Start checking the rice at the 5-minute mark. Take a grain and press it between your fingers. If the center still has a hard, chalky white dot, it needs more time. If it crushes completely and feels soft, you’ve gone too far.
- Drain immediately when it hits that 70–75% mark. Spread the rice on a large plate or tray to stop the cooking process quickly.
| Rice Doneness | What It Feels Like | Right for Biryani? |
|---|---|---|
| 50% cooked | Hard and chalky throughout | No — too raw |
| 70–75% cooked | Firm with a tiny hard center | ✅ Yes — perfect |
| 90% cooked | Mostly soft, slight firmness | Borderline — risky |
| 100% cooked | Fully soft, no resistance | No — will turn mushy |
Adding a teaspoon of ghee or oil to the boiling water also helps the grains stay separate and adds a gentle richness.
Cooking the Vegetable Masala Base the Right Way
The vegetable masala base is what gives this homemade biryani its restaurant-style depth. Rushing through this step is the number one reason home-cooked biryani ends up tasting flat. You need layers of flavor built slowly, one on top of another.
Start with the aromatics:
- Heat 3–4 tablespoons of oil or ghee in a heavy-bottomed pan or kadai over medium heat.
- Add whole spices first — bay leaf, cloves, cardamom, cinnamon, and a pinch of shahi jeera. Let them sizzle for 30–40 seconds until aromatic.
- Add thinly sliced onions (2 large) and cook on medium heat for 12–15 minutes, stirring occasionally. Don’t rush this. You want them to turn deep golden brown, almost caramelized. This is the flavor foundation.
- Add ginger-garlic paste (1.5 tablespoons) and cook until the raw smell completely disappears, about 2–3 minutes.
Building the masala layer:
- Add finely chopped or pureed tomatoes (2 medium). Cook them down until the oil separates and the mixture looks thick and jammy — not watery.
- Now add your dry spices:
- 1 teaspoon turmeric
- 1.5 teaspoons red chili powder
- 2 teaspoons coriander powder
- 1 teaspoon cumin powder
- 1.5 teaspoons biryani masala
- Stir the spices into the tomato-onion mixture and cook for another 2 minutes on low heat so they bloom properly.
Adding the vegetables:
- Add your chopped vegetables — potatoes, carrots, green beans, cauliflower, peas, and capsicum work beautifully. Cut them into medium chunks so they hold their shape.
- Stir everything together and add ½ cup of whisked yogurt in two additions, stirring between each addition so it doesn’t split.
- Add ½ cup water, cover, and cook the vegetables on medium-low heat until they’re about 80% cooked. They should be tender but not falling apart.
- Finish with a handful of fresh mint and coriander leaves, and a squeeze of lemon juice. Adjust salt at this point.
The masala should look thick, well-coated, and aromatic — not soupy. If there’s too much water, cook it uncovered on high heat for a couple of minutes to reduce it before moving to the layering step.
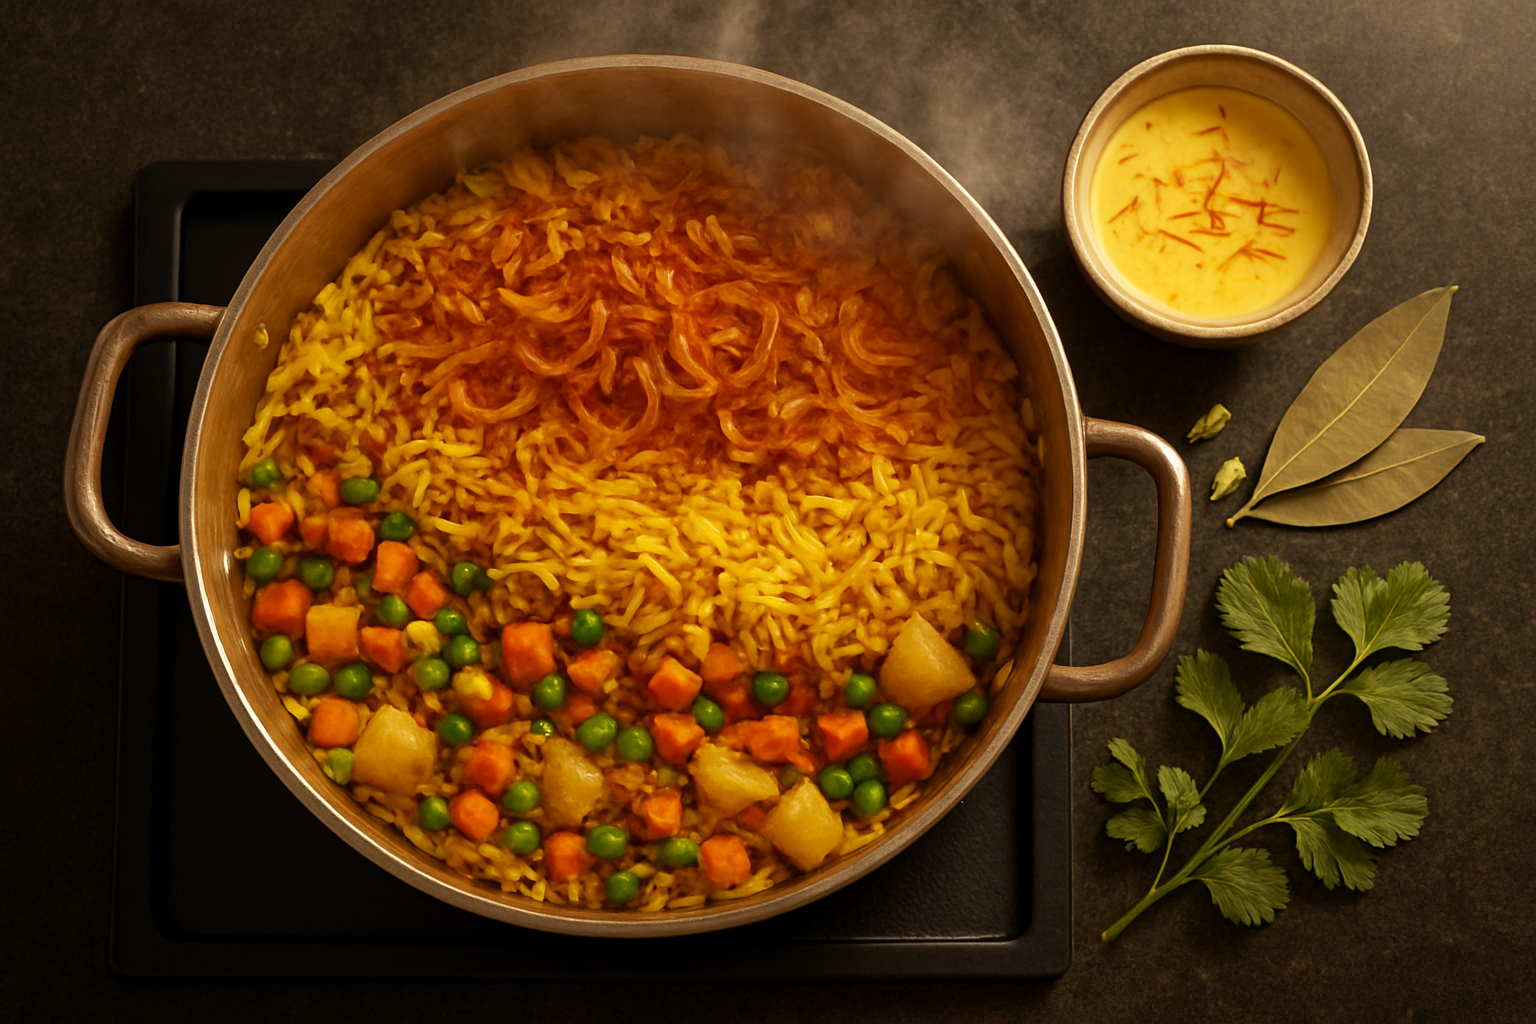
Layering Rice and Vegetables for Even Cooking
The layering stage is where your vegetable biryani at home starts looking and feeling like the real deal. This isn’t just about aesthetics — the way you layer directly affects how flavors travel through the biryani during the dum cooking process.
Prep your garnishes before you start layering:
- Fried onions (birista): Thinly slice 2 onions and deep fry or pan-fry them until crispy and golden brown. Drain on paper towels. These add a sweet crunch and incredible depth.
- Saffron milk: Dissolve a generous pinch of saffron strands in 3–4 tablespoons of warm milk. This creates the signature golden streaks you see in restaurant-style biryani.
- Fresh mint and coriander leaves: Roughly torn or chopped.
- Ghee: Have 2–3 tablespoons ready to drizzle between layers.
The layering process:
Use a heavy-bottomed pot or Dutch oven with a tight-fitting lid. A wide, shallow pot works better than a tall narrow one for even heat distribution.
- First layer: Spread a very thin layer of rice (about ¼ of the total quantity) on the bottom of the pot. This prevents the vegetable masala from sticking or burning.
- Second layer: Spread all of the vegetable masala evenly over the rice base. Smooth it out with the back of a spoon.
- Third layer: Add half of the remaining rice over the masala. Spread gently without pressing down.
- Add garnishes on this layer: Scatter half the fried onions, half the mint and coriander, a drizzle of ghee, and half the saffron milk.
- Fourth layer: Top with the remaining rice. Smooth gently.
- Final garnishes on top: The rest of the fried onions, remaining mint and coriander, saffron milk, and one last drizzle of ghee.
A few things to keep in mind:
- Don’t press the rice down at any point — you want the layers to stay distinct and the grains to remain fluffy.
- Make sure the vegetable masala isn’t too wet when you layer it. Excess moisture will make the rice soggy during dum cooking.
- The pot should be roughly ¾ full at most after layering. Too full and the steam won’t circulate properly.
Sealing and Dum Cooking for Deep Infused Flavors
The dum technique is what separates an authentic biryani recipe from everything else. “Dum” literally means “breath” in Persian — the idea is that the biryani cooks slowly in its own steam, with all the flavors locked inside. No shortcuts here.
Two ways to seal the pot:
- Dough seal (traditional): Mix flour and water into a stiff dough. Roll it into a long rope and press it firmly around the rim of the pot. Place the lid on top and press down hard so the dough creates an airtight seal. This is the most effective method.
- Foil seal (easier): Cover the pot tightly with heavy-duty aluminum foil, pressing it around the edges. Then place the lid on top. Not as airtight as dough, but works very well at home.
The dum cooking process:
- Place the sealed pot on a tawa (flat griddle) or cast iron pan over your stove. The tawa acts as a heat diffuser and prevents the bottom layer from burning.
- Cook on high heat for 5 minutes first. This builds up the steam pressure inside the pot.
- Reduce to the lowest possible heat and cook for another 20–25 minutes.
Biryani Dum Cooking at a Glance:
| Stage | Heat Level | Duration | Purpose |
|---|---|---|---|
| Initial blast | High | 5 minutes | Build steam pressure |
| Main dum | Very low | 20–25 minutes | Slow-cook, infuse flavors |
| Resting | Off/residual | 10 minutes | Let everything settle |
- After 20–25 minutes on low heat, turn off the flame and let the pot sit, sealed, for another 10 minutes. Don’t open it early — the steam is still doing important work.
- When you open the pot, lift the lid away from you to avoid the rush of hot steam.
How to open and serve without ruining the layers:
- Use a wide, flat spatula or a large spoon with a long handle.
- Gently fold the biryani from the sides and bottom upward — don’t stir aggressively. The goal is to mix the layers just enough so each serving gets rice and vegetables together, while still showing those beautiful golden saffron streaks.
- If you spot any dry spots or uncooked rice at the top, place a damp cloth under the lid, reseal, and put back on low heat for another 5 minutes.
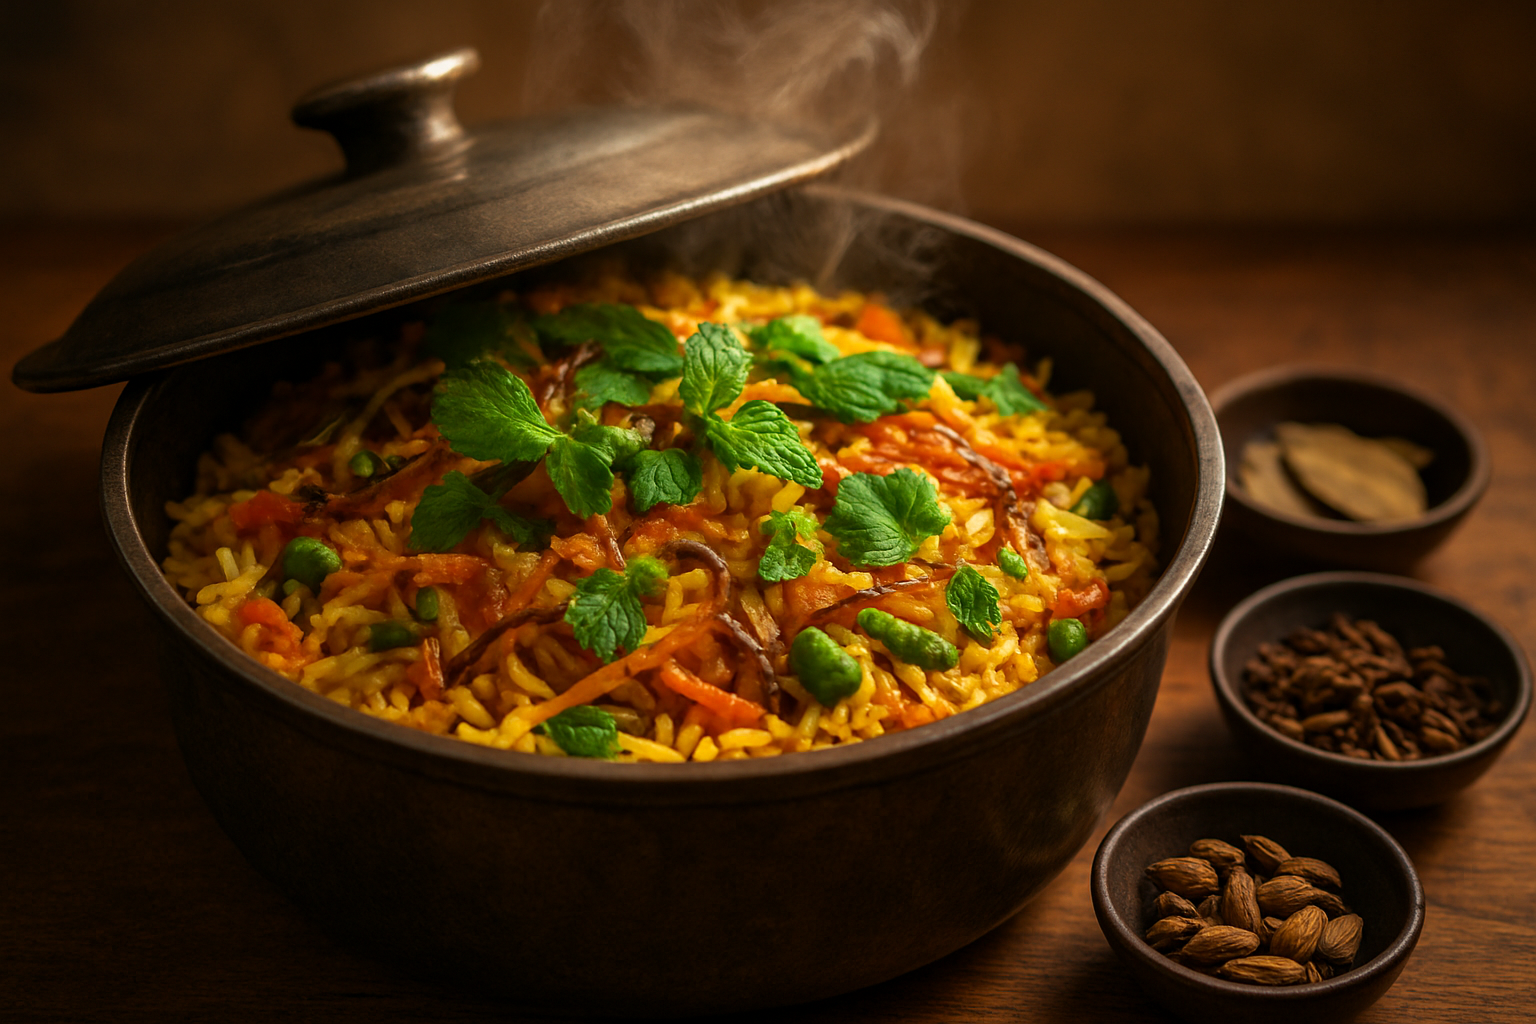
The result should be perfectly cooked, long-grain basmati rice with every grain separate, deeply fragrant from the biryani spices, and vegetables that are tender but still hold their shape. That’s the marker of a truly restaurant-style biryani made right at home.
Pro Tips to Achieve That Perfect Restaurant-Style Biryani
Getting the Right Rice to Vegetable Ratio
One of the biggest secrets behind a great veg biryani recipe is nailing the balance between rice and vegetables. Get it wrong, and you either end up with a bowl of mushy veggies drowning in rice or a veggie-heavy dish that feels more like a stew than a biryani.
The golden ratio most restaurant kitchens swear by is 2:1 — two parts rice to one part vegetables by volume. So if you’re using 2 cups of basmati rice, aim for about 1 cup of mixed vegetables. This gives every spoonful that satisfying combination of fluffy, long-grain rice with just enough vegetables to keep things interesting.
Here’s a quick breakdown to keep handy:
| Basmati Rice | Mixed Vegetables | Serves |
|---|---|---|
| 1 cup | ½ cup | 2 people |
| 2 cups | 1 cup | 4 people |
| 3 cups | 1.5 cups | 6 people |
A few things to keep in mind when prepping your veggies:
- Cut vegetables into uniform, medium-sized chunks. Too small and they’ll disappear into the rice during dum cooking. Too large and they won’t cook through properly.
- Don’t overcrowd the pot with too many varieties. Stick to 4–5 types — classics like carrots, peas, beans, potatoes, and cauliflower work beautifully together.
- Par-cook dense vegetables first. Potatoes and carrots take longer to soften than peas or corn. Either sauté them a little longer in the masala stage or give them a quick blanch before adding them in.
- Account for shrinkage. Vegetables reduce in size as they cook, especially spinach or mushrooms, so add slightly more of these if you’re including them.
Controlling Heat to Avoid Burning or Undercooking
Heat management is honestly where most homemade biryanis go wrong. The dum cooking stage — where the biryani slow-cooks with a sealed lid — is incredibly sensitive to temperature. Too high, and the bottom layer scorches. Too low, and the rice stays chalky and the whole thing tastes steamed rather than layered.
Here’s how to keep things perfectly under control:
The Two-Stage Heat Method
This is the same approach used in restaurant-style biryani kitchens, and it works like a charm at home too.
- High heat for the first 2–3 minutes — After sealing the pot, place it over medium-high heat. This creates the initial burst of steam that gets trapped inside and begins cooking everything through.
- Low heat for 20–25 minutes — Reduce the flame to the lowest setting your stove allows. This gentle heat slowly finishes the cooking without burning the base.
Use a Heat Diffuser (Tawa Trick)
Place a flat griddle or tawa directly on your burner and set the biryani pot on top of it. The tawa absorbs and distributes the heat evenly, creating a buffer between the direct flame and the pot. This simple trick is used widely in Indian home kitchens and dramatically reduces the risk of a burnt bottom layer.
Signs of Trouble to Watch For
- Burning smell before the cook time is up — Lower the flame immediately and slide the tawa under the pot if you haven’t already.
- Excessive steam escaping from the edges — Your seal may have broken. Press the dough seal back or use a heavier lid.
- Hard, uncooked rice after opening — The heat was too low or the seal too loose. Place it back on low heat for another 5–10 minutes.
Quick Heat Guide for Dum Cooking
| Stage | Heat Level | Duration |
|---|---|---|
| Initial steam build-up | Medium-high | 2–3 minutes |
| Dum (slow cook) | Very low | 20–25 minutes |
| Resting (lid on, heat off) | No heat | 5–10 minutes |
Always let the biryani rest with the lid on after turning off the heat. The residual steam finishes the cooking gently and keeps the rice from becoming sticky.
Using Saffron Milk for Color and Aroma
Saffron milk is what separates a good biryani from a truly stunning one. That gorgeous golden-orange streak running through the white rice isn’t just for looks — it adds a floral, honey-like fragrance that no artificial food color can replicate. If you’re aiming for an authentic biryani recipe with that restaurant-quality finish, saffron milk is non-negotiable.
How to Make It Properly
- Warm about 3–4 tablespoons of whole milk — don’t boil it, just get it slightly warm to the touch.
- Add 8–10 saffron strands directly to the milk.
- Let it steep for at least 15–20 minutes. The longer it sits, the deeper and more vibrant the color gets. Overnight in the fridge is even better.
- The milk should turn a rich golden-yellow before you use it.
How and When to Add It
Drizzle the saffron milk over the top layer of rice just before you seal the pot for dum cooking. Don’t stir it in — the idea is to create that beautiful two-tone effect where some rice turns golden and the rest stays white.
You can boost the visual contrast by adding a few drops of natural food color (orange or yellow, derived from turmeric or carrot extract) alongside the saffron milk, but the saffron itself is the star.
Saffron Quality Matters
Not all saffron is created equal. Here’s a simple guide:
| Saffron Type | Color | Aroma | Best For |
|---|---|---|---|
| Kashmiri Saffron (Mongra) | Deep red strands | Very strong, floral | Premium biryani, special occasions |
| Spanish Saffron | Orange-red | Moderate | Everyday cooking |
| Fake/Adulterated Saffron | Bleeds color instantly | Little to no aroma | Avoid entirely |
To test if your saffron is real, drop a strand into warm water. Real saffron releases color slowly over several minutes and the strand itself stays red. Fake saffron bleeds color almost instantly and the strand turns pale or white.
Budget-Friendly Tip
If good saffron is hard to find or outside your budget, a pinch of turmeric dissolved in warm milk gives a similar golden color, though it won’t have the same floral aroma. Pair it with a drop of rose water to mimic that fragrant quality — it’s a trick many home cooks use for an easy veg biryani without compromising on the visual appeal.
Serving and Storing Your Veg Biryani the Right Way
Best Side Dishes to Serve Alongside Biryani
A great veg biryani recipe deserves equally great companions on the plate. The right side dishes don’t just fill up the table — they balance the bold spices and rich flavors of your homemade biryani beautifully.
Classic Pairings That Never Fail
- Raita — This is the non-negotiable partner for any restaurant-style biryani. A simple boondi raita or cucumber raita cools the palate between bites. Whisk together yogurt, grated cucumber, roasted cumin powder, salt, and a pinch of black pepper. Done.
- Mirchi ka Salan — This tangy, nutty chili curry is what most Hyderabadi restaurants serve alongside biryani, and for good reason. The tamarind and peanut base cuts right through the richness of the rice.
- Shorba — A thin, spiced broth-style gravy that works as both a drizzle over the biryani and a dipping side.
- Onion Salad — Thinly sliced raw onions with lemon juice, salt, and chaat masala. Simple, crunchy, refreshing.
- Papad — Roasted or fried papad adds a satisfying crunch that contrasts beautifully with the soft, layered rice.
Side Dish Pairing Guide
| Side Dish | Flavor Profile | Best For |
|---|---|---|
| Boondi Raita | Cooling, mild | Balancing heat and spice |
| Mirchi ka Salan | Tangy, nutty, spicy | Traditional Hyderabadi experience |
| Cucumber Raita | Fresh, creamy | Light, everyday meals |
| Onion Salad | Sharp, citrusy | Quick preparation, added crunch |
| Shorba | Savory, aromatic | Rich, restaurant-style presentation |
| Roasted Papad | Crunchy, salty | Textural contrast |
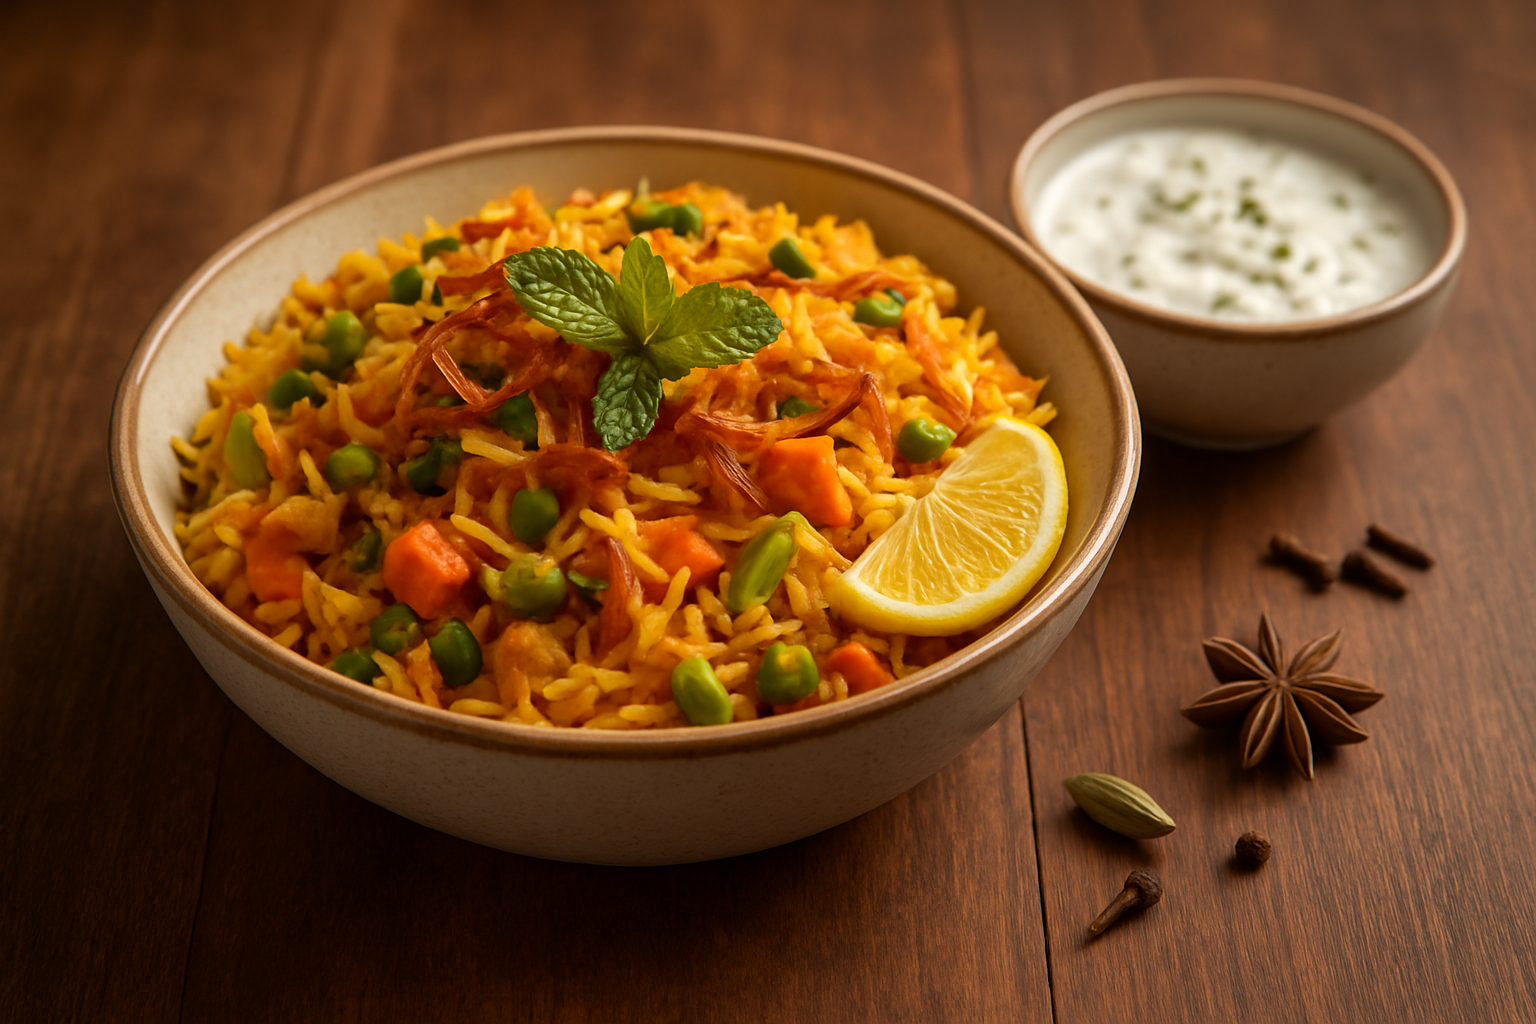
Garnishing Ideas That Impress Every Guest
Presentation matters just as much as taste when you want that authentic restaurant-style biryani look. A well-garnished biryani makes people reach for their phones before their spoons.
The Classic Restaurant Garnishes
- Fried Onions (Birista) — Golden, crispy caramelized onions scattered generously on top are both a garnish and a flavor bomb. Make a big batch and store them — you’ll want them every time.
- Fresh Mint and Coriander Leaves — A handful of fresh herbs sprinkled just before serving brightens up the color and adds a burst of freshness to every bite.
- Saffron Milk Drizzle — A few tablespoons of warm milk infused with saffron strands poured over the top gives the biryani that signature golden-orange tint and a faint floral aroma.
- Ghee Drizzle — A teaspoon of good-quality ghee drizzled right before serving adds an irresistible sheen and aroma that screams restaurant-quality.
- Fried Cashews and Raisins — Toss some cashews and raisins in a little ghee until golden. These add richness, sweetness, and a beautiful visual contrast.
- Rose Water Sprinkle — A light spritz of rose water just as you open the dum lid gives an elegant, aromatic touch without overpowering the spices.
Quick Garnishing Tips
- Always add fresh herb garnishes after the biryani comes off the heat so they stay vibrant and don’t wilt.
- Layer your garnishes — fried onions first, then herbs, then the saffron drizzle — for a visually stunning plate.
- Keep a portion of birista (fried onions) specifically for garnishing, separate from what you cooked into the biryani.
- Serve in a wide, shallow platter rather than a deep pot so every guest can see all the beautiful layers.
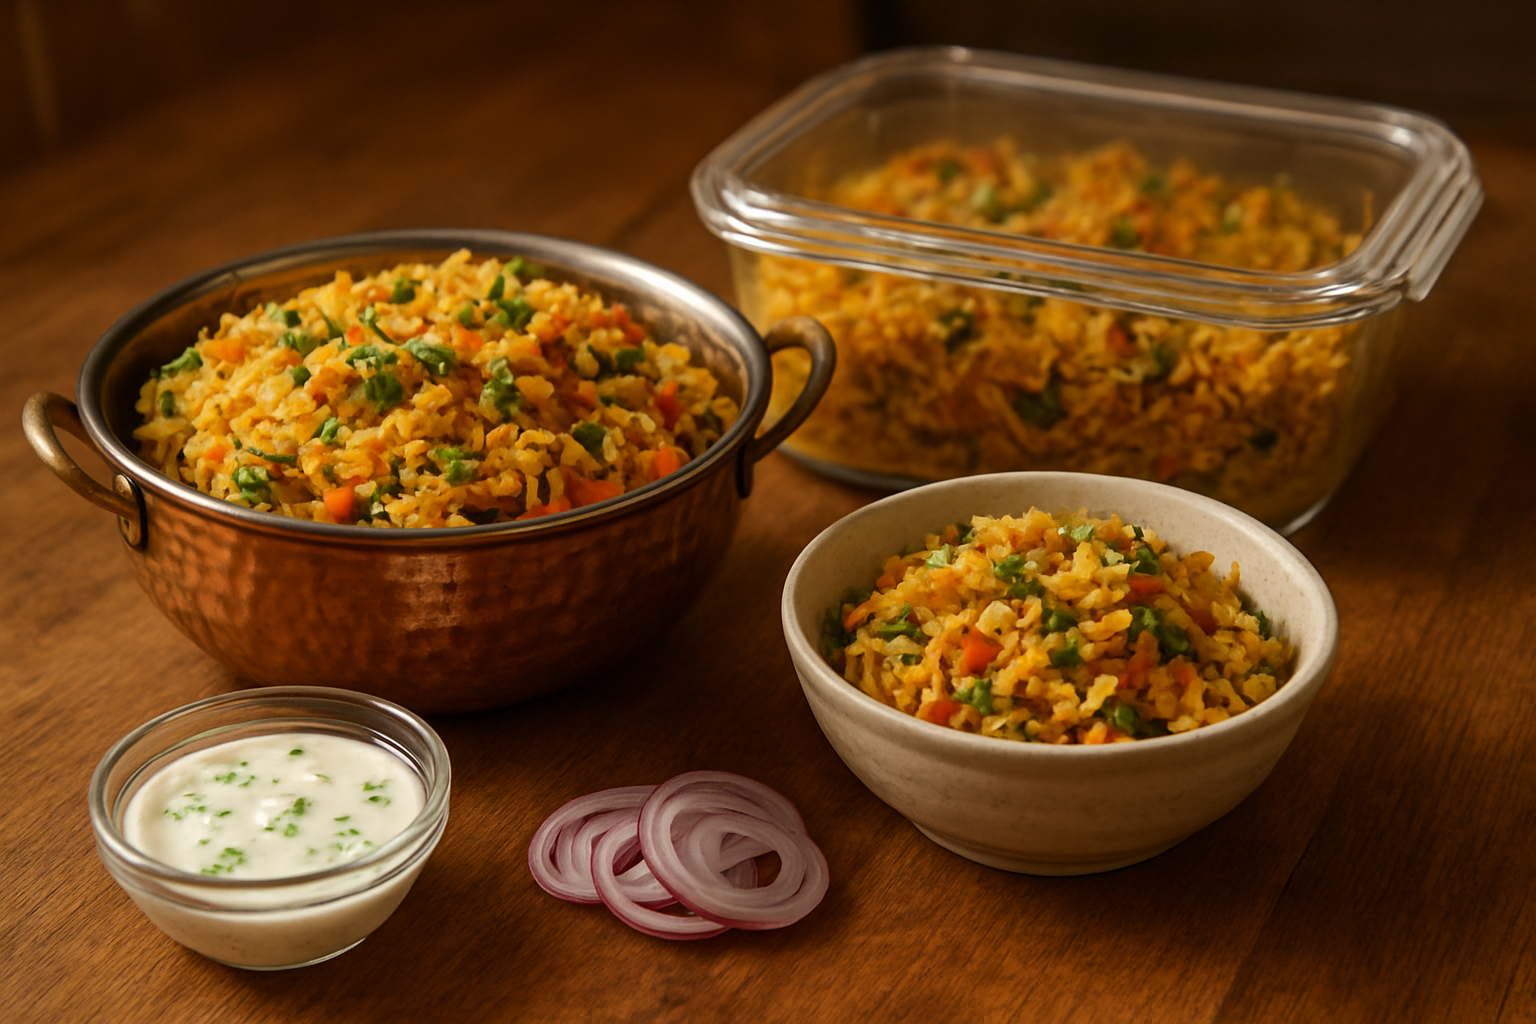
Storing Leftovers Without Losing Flavor and Texture
One of the best things about making vegetable biryani at home is that the leftovers are often even better the next day — once the spices settle deeper into the rice. But only if you store it correctly.
Refrigerating Your Biryani
- Let the biryani cool down completely before sealing it. Trapping steam inside the container makes the rice soggy.
- Use an airtight container to prevent the rice from drying out and absorbing fridge odors.
- Store in the refrigerator for up to 3 to 4 days. The flavors actually develop and deepen overnight.
- Separate leftovers into smaller portions so you only reheat what you need each time. Repeatedly heating and cooling biryani ruins the texture fast.
Freezing Biryani for Later
- Veg biryani freezes surprisingly well for up to 4 weeks.
- Spread it out on a tray to cool and freeze individually before transferring to freezer bags — this prevents it from clumping into one solid block.
- Label your bags with the date so you know exactly when to use them by.
- Avoid freezing biryani that already has raita or salad mixed into it. Only freeze the rice portion on its own.
Reheating Without Drying It Out
Getting the reheating right is where most people go wrong. Here’s how to bring your easy veg biryani back to life:
- Stovetop method — Add a splash of water (2–3 tablespoons) to the biryani in a heavy-bottomed pan. Cover tightly and steam on low heat for 5–8 minutes, stirring gently once or twice.
- Microwave method — Sprinkle a little water over the biryani before microwaving. Cover with a microwave-safe lid or damp paper towel. Heat in 1-minute intervals, stirring in between.
- Oven method — Spread in an oven-safe dish, sprinkle with water, cover tightly with foil, and reheat at 180°C (350°F) for about 15 minutes. Great for reheating large quantities.
- Always add a small drizzle of ghee when reheating to restore that restaurant-style richness and aroma.
Biryani Storage Quick Reference
| Storage Method | Duration | Key Tip |
|---|---|---|
| Room Temperature | 2–3 hours max | Never leave it out longer |
| Refrigerator | 3–4 days | Use airtight container |
| Freezer | Up to 4 weeks | Freeze in individual portions |
| Reheated Biryani | Consume immediately | Don’t re-freeze after reheating |
Making restaurant-style veg biryani at home is totally doable once you have the right ingredients, tools, and a little patience. From prepping your veggies and layering the rice just right, to nailing that perfect dum cooking technique, every step plays a role in getting that rich, aromatic flavor you love from your favorite restaurant.
Now it’s your turn to fire up that stove and give this recipe a shot! Don’t stress if it doesn’t turn out perfect the first time — biryani gets better every time you make it. Try it out this weekend, share it with family or friends, and watch it become your go-to dish for every special occasion.